KL25Z Freescale ⚠️ DISCONTINUED
Click any image to enlarge it.
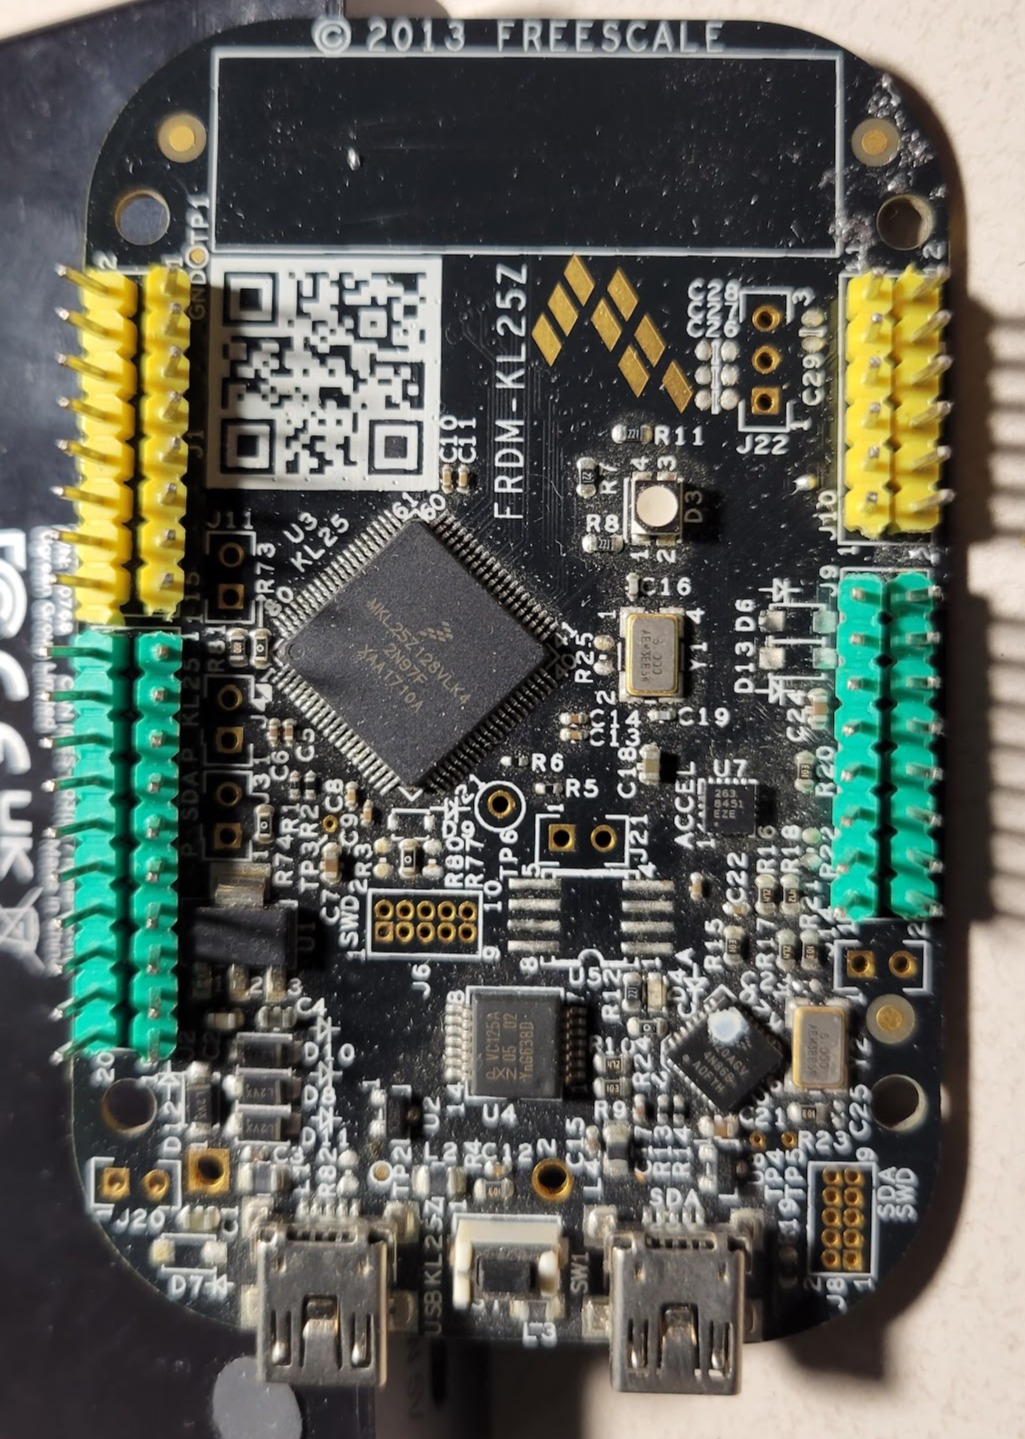
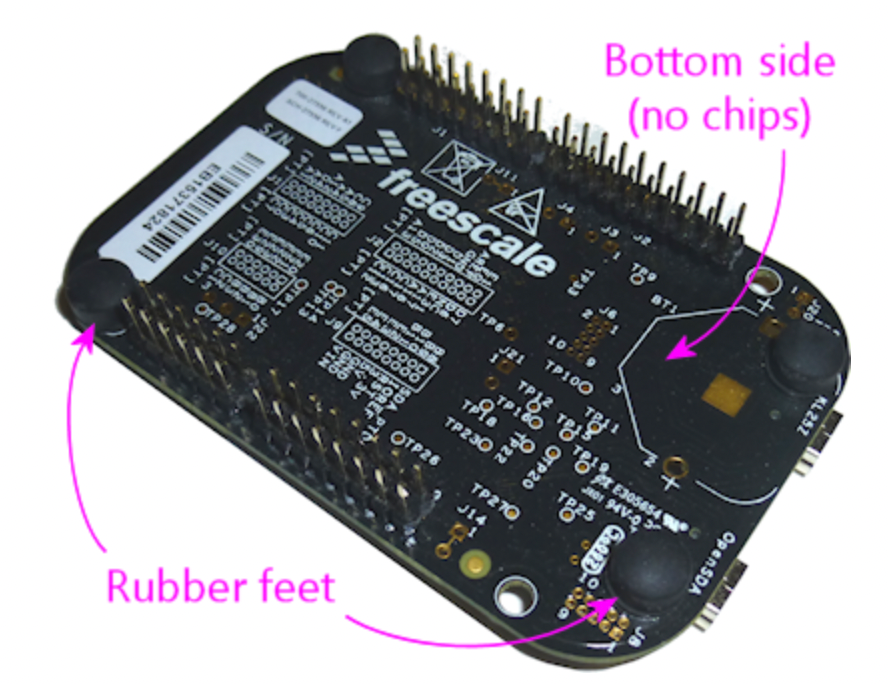
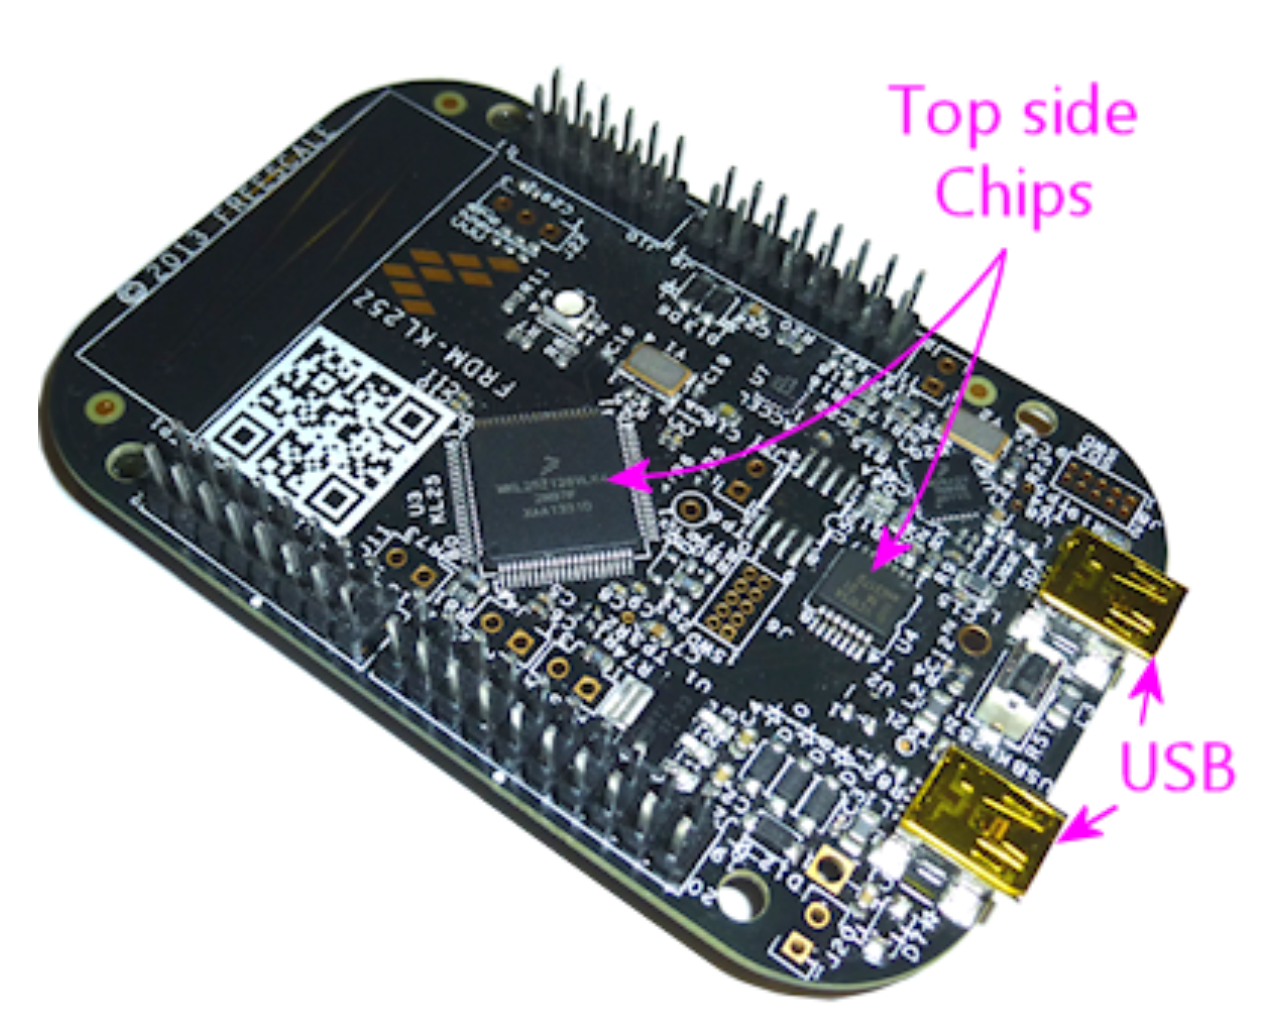
The FRDM-KL25Z is a hardware platform featuring the Freescale open standard embedded serial and debug adapter (OpenSDA). For virtual pinball, we use it in combination with the Pinscape software.
Order on AmazonWhy Use This Board?


🎮 Cabinet Buttons — Configure with Pinscape and Visual Pinball so pressing cabinet buttons triggers the correct in-game actions.
🔧 Toys — Connect solenoids, shaker motors, and other force feedback devices. When combined with Pinscape and DOF, toys activate during gameplay.
💡 RGB Flasher Lights — Connect RGB/flasher lights. With Pinscape and DOF, they react to gameplay events.
PRO
- Costs about $30
- Very common board
- Used by Pinscape, Arnoz, Cleveland Software
CON
- Availability can be limited
- Requires power booster for toys
- Limited number of ports
Getting Started
Before using this board, familiarise yourself with it. Below are the official KL25Z manuals and MJR guides. Michael J Roberts (MJR) is the creator of the Pinscape software.
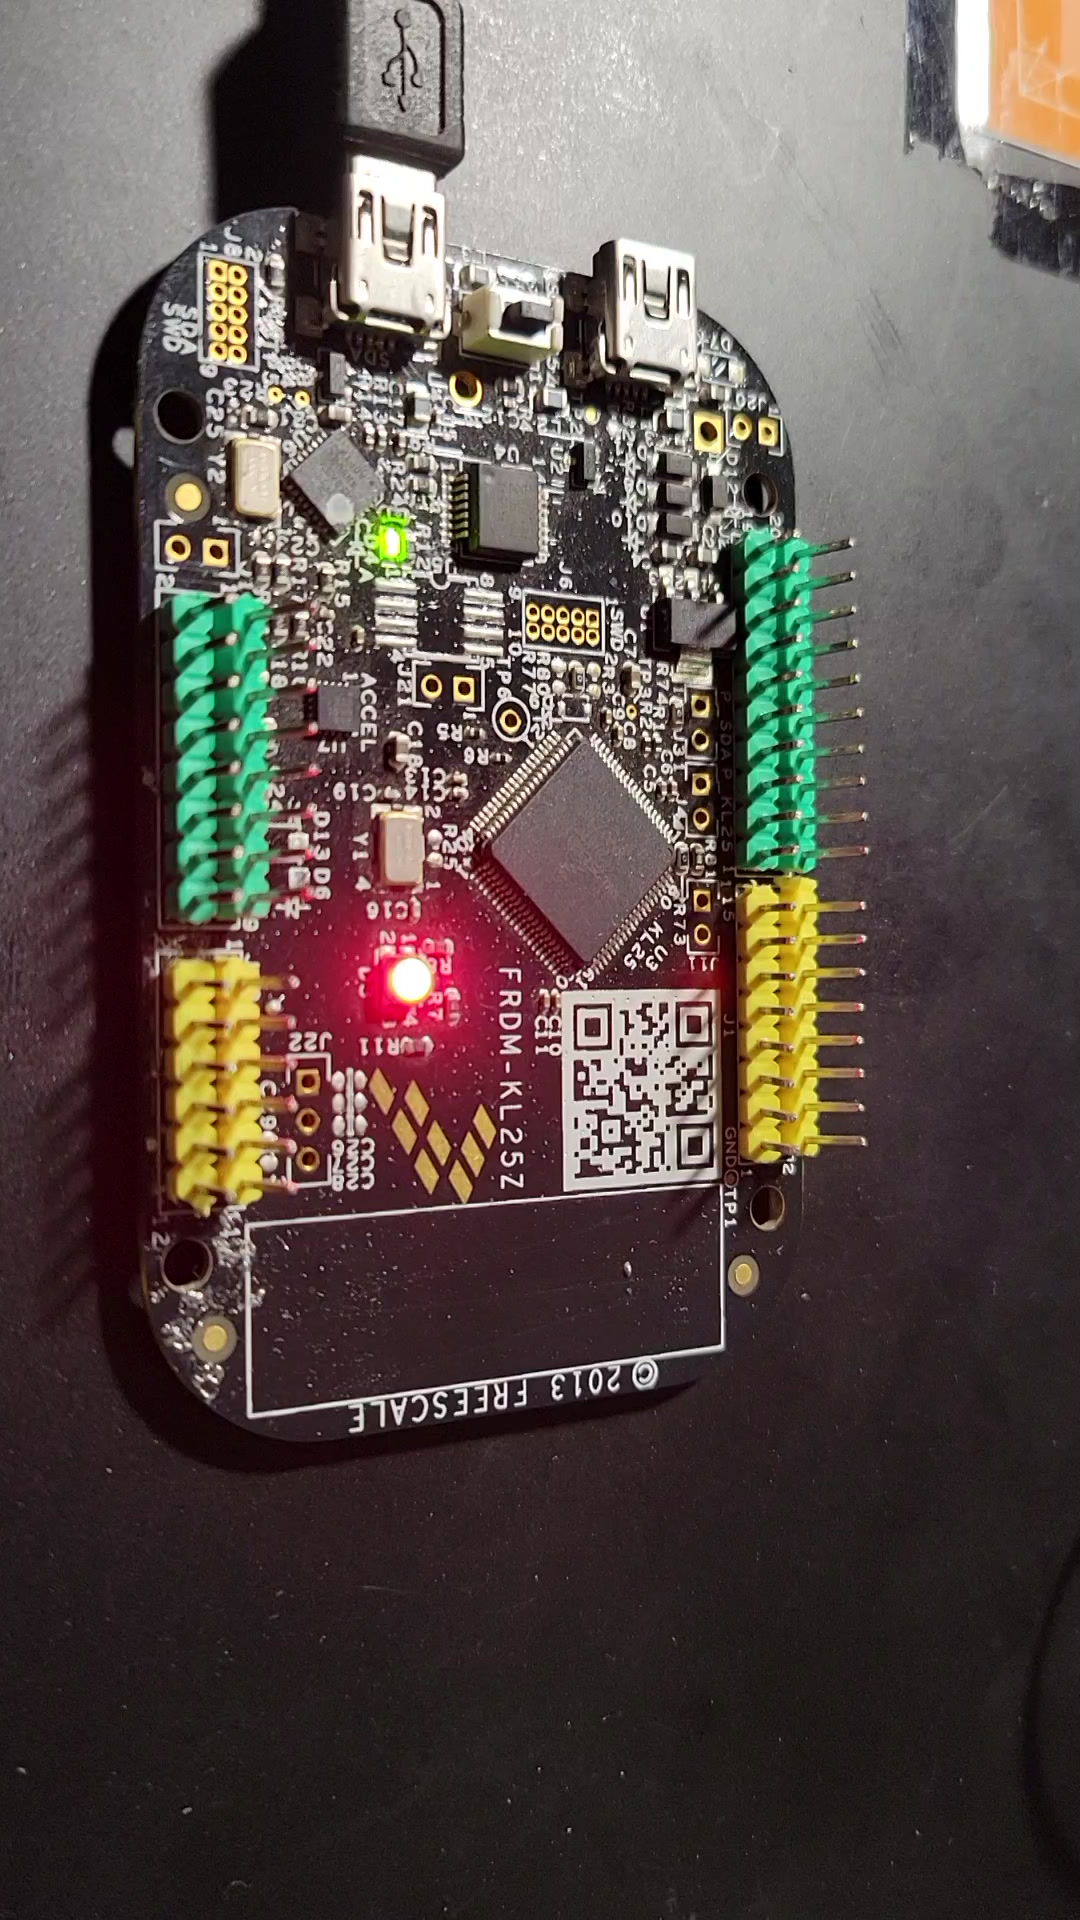
Preparing the KL25Z
Depending on where you purchased your KL25Z, it may or may not have pin headers soldered. Some suppliers will solder them for you on request. If ordering headers separately, look for 2.54mm pitch (0.1") headers.
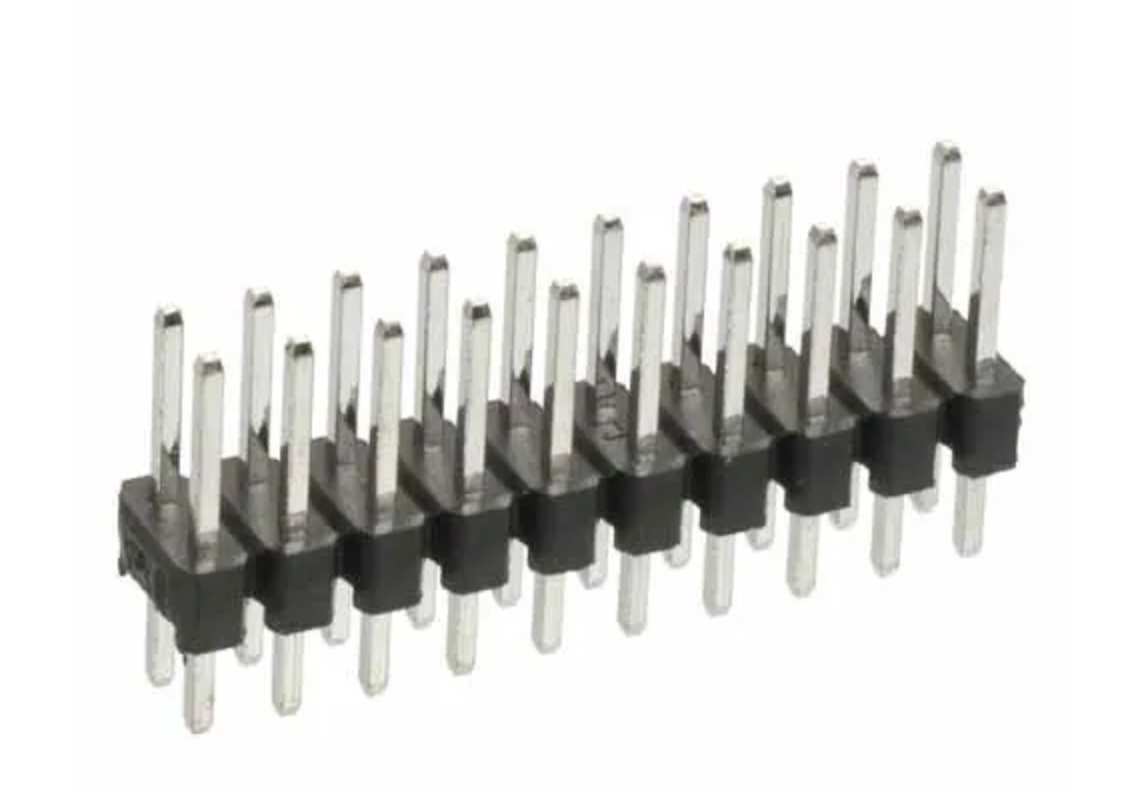
2.54mm pin headers — order from Mouser
Pin setup for expansion board use
Pin setup for standalone use
You will need to solder the pins — get yourself a magnifying glass and a soldering iron.
Flashing the KL25Z with Pinscape
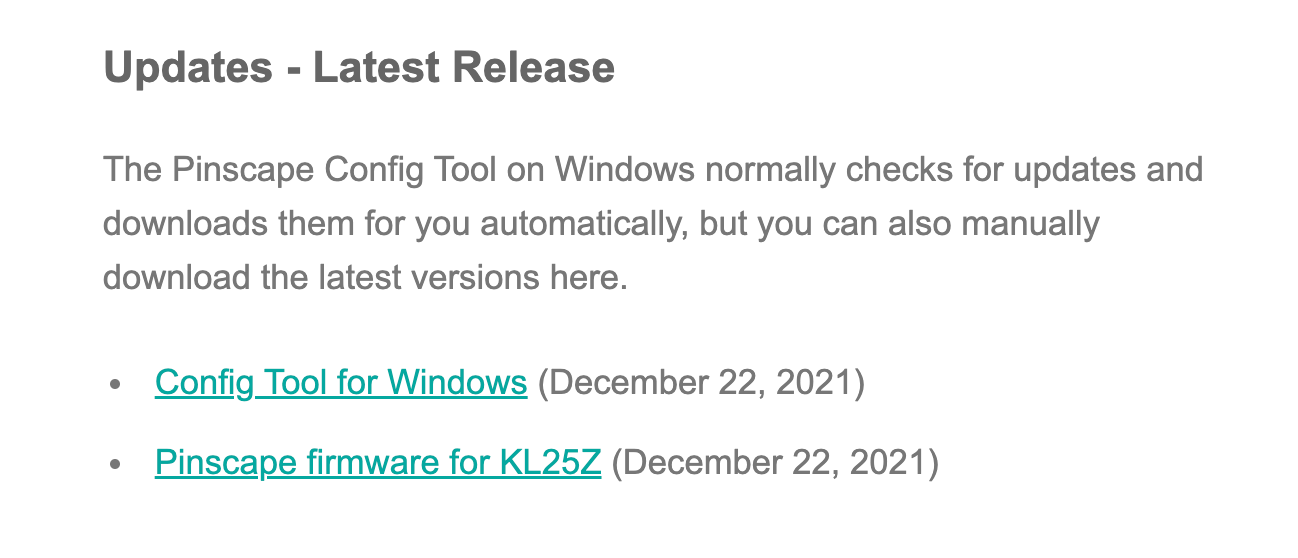
Head to the MJR site and download:
- The Pinscape Config Tool (Windows)
- The KL25Z firmware
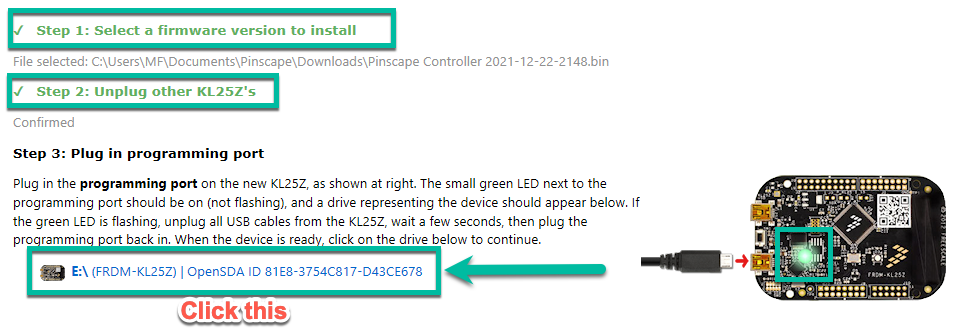
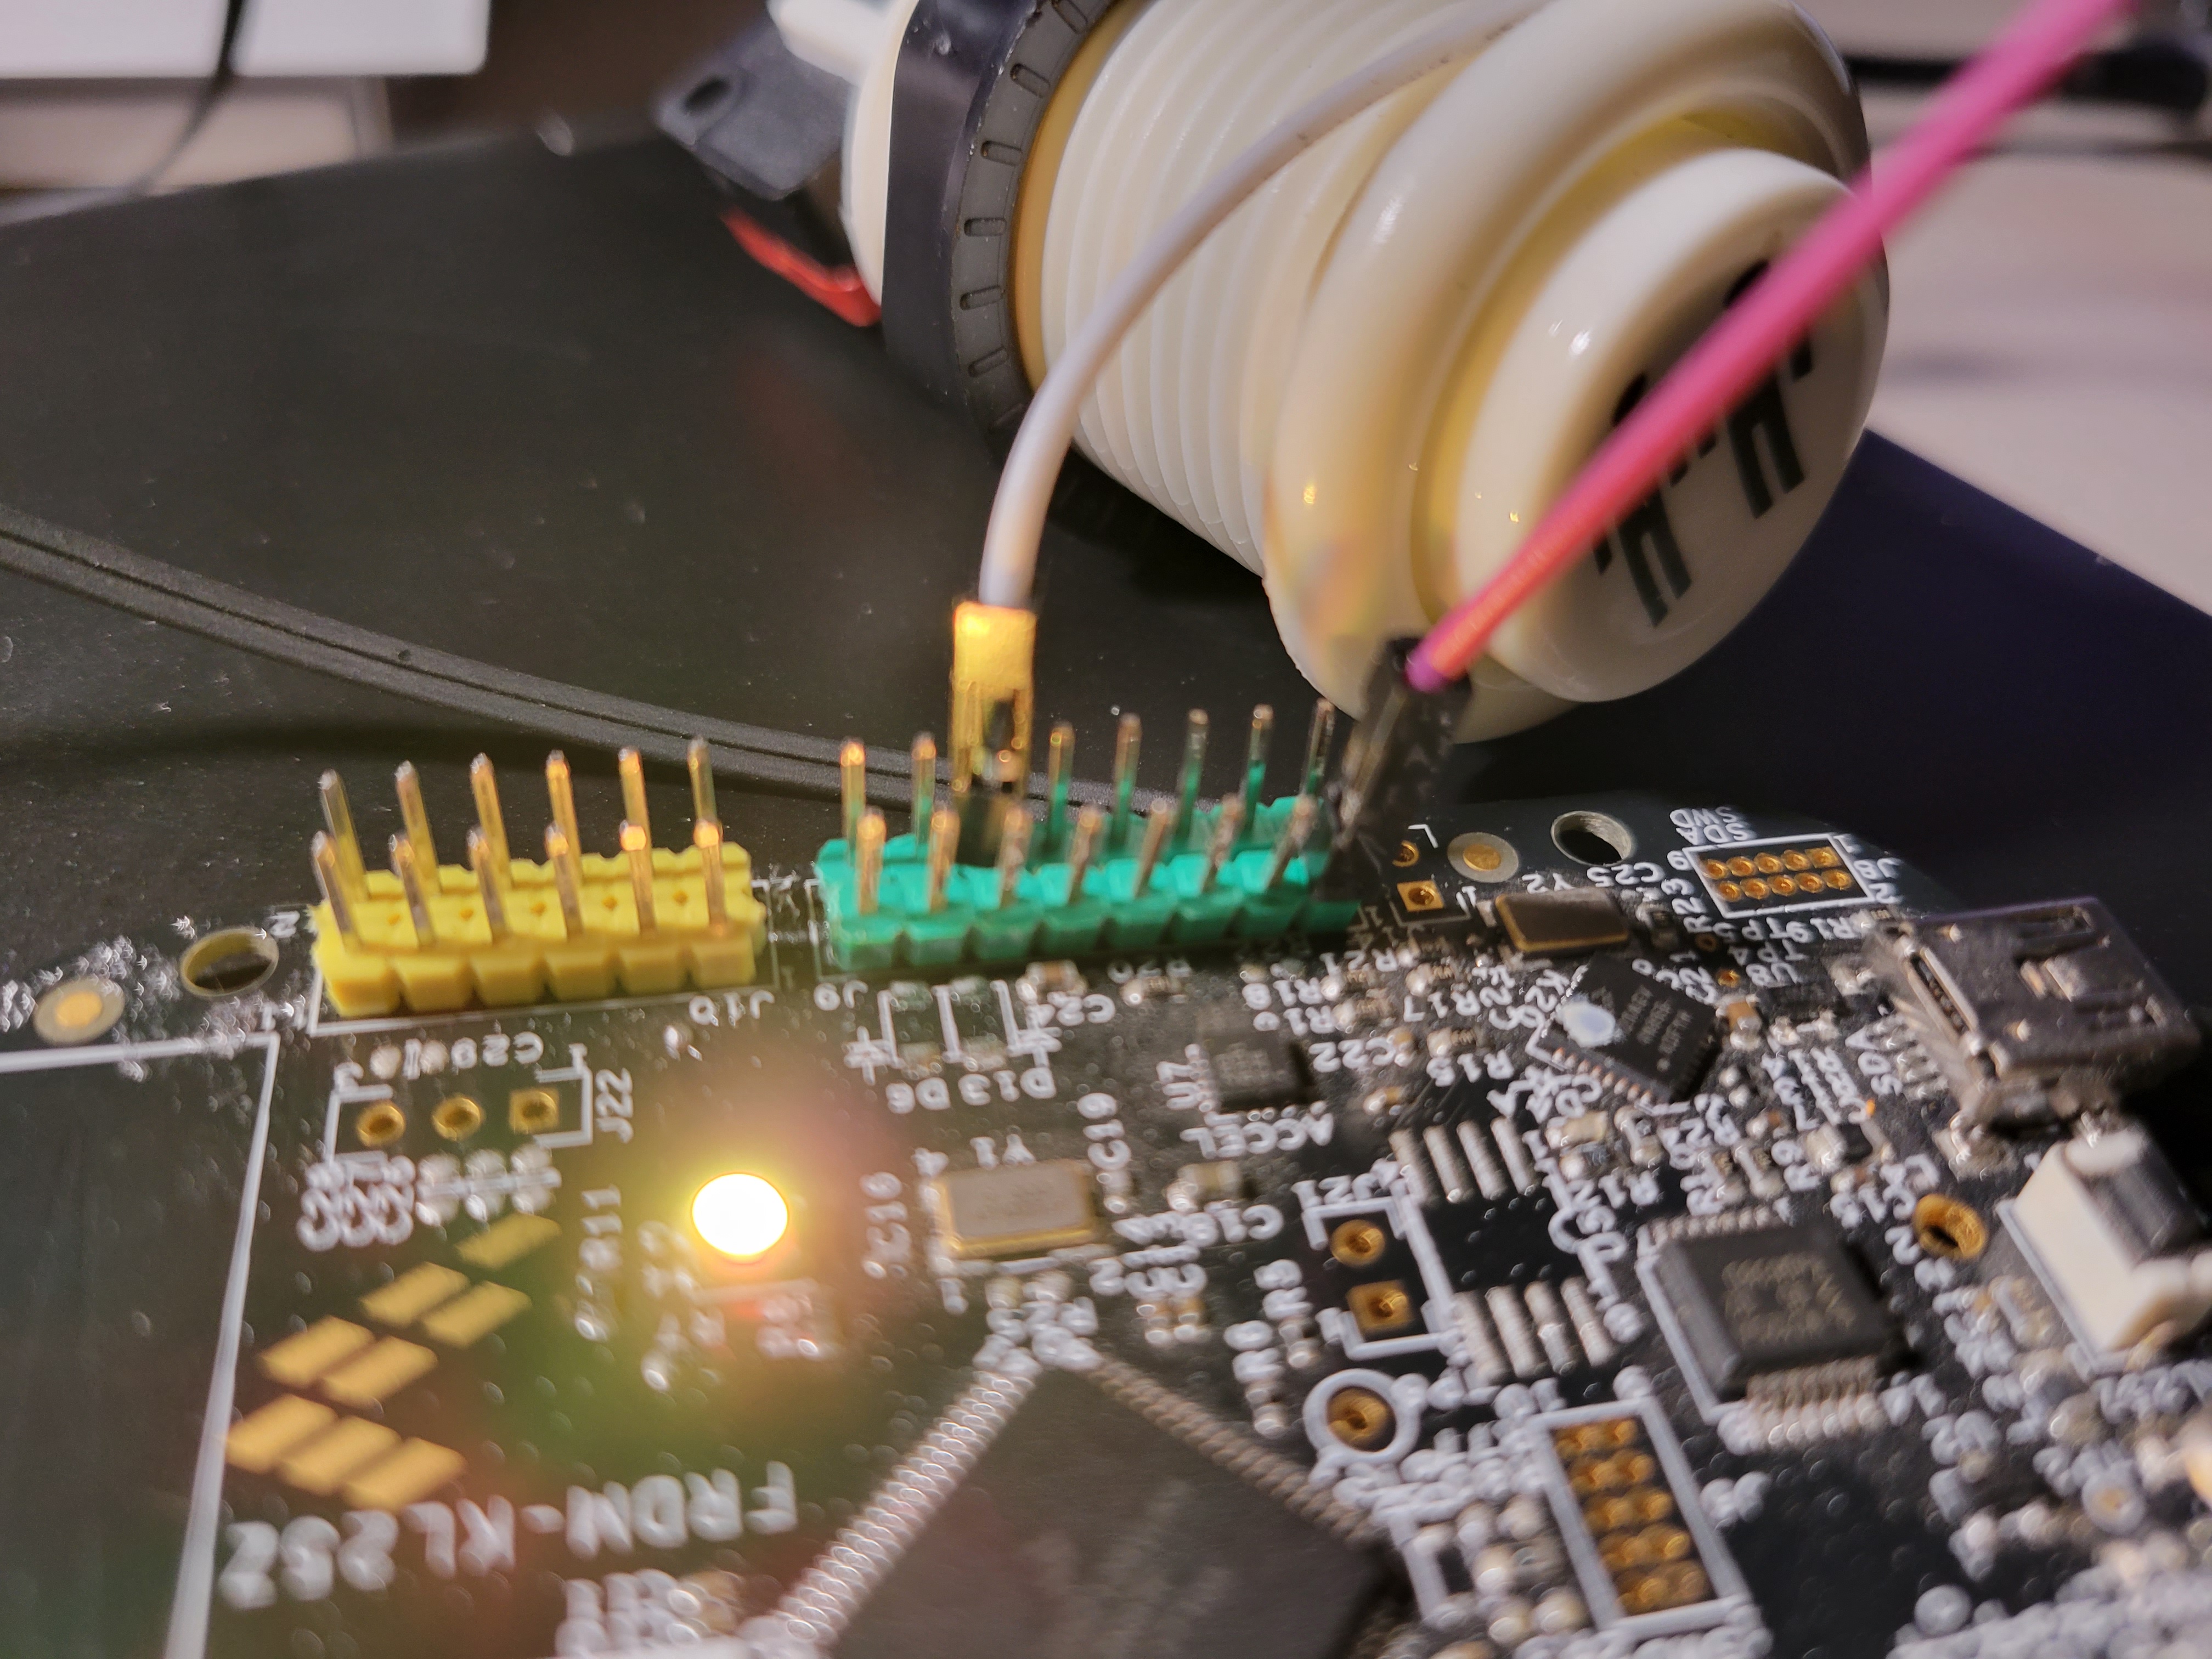
Connect a Mini-B USB cable to the SDA USB port on the KL25Z and plug it into your computer.
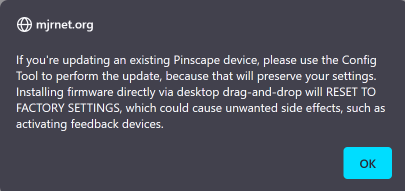
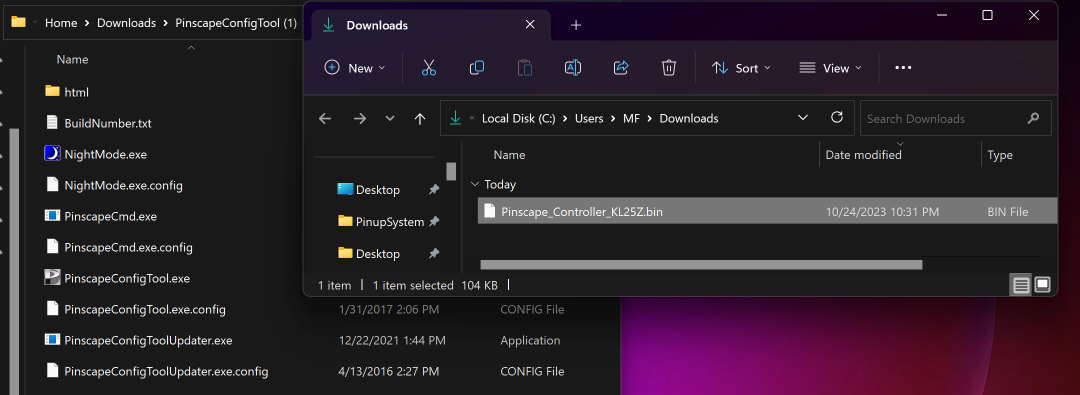
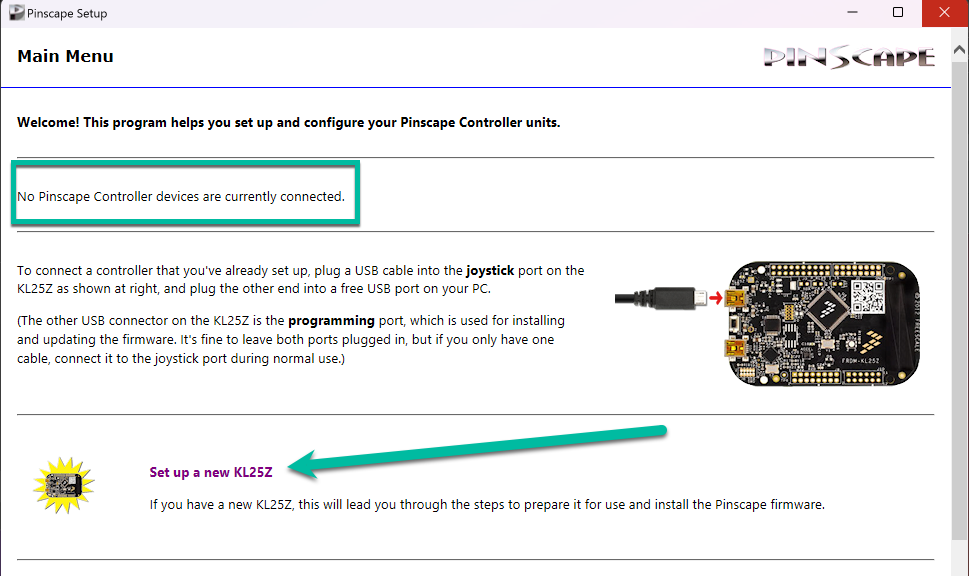
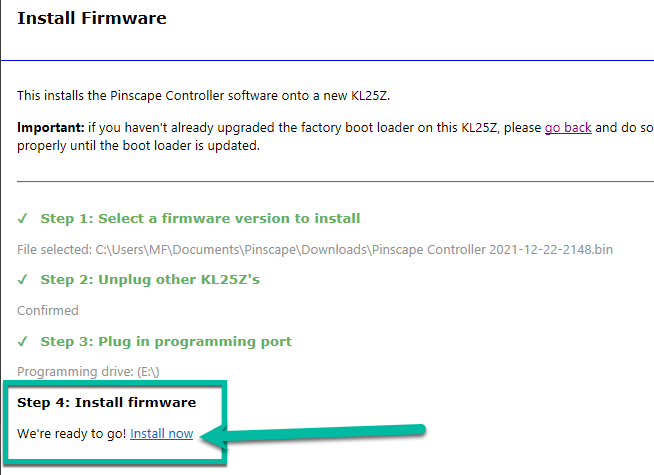
Launch PinscapeConfigTool.exe and choose Setup a New KL25Z.
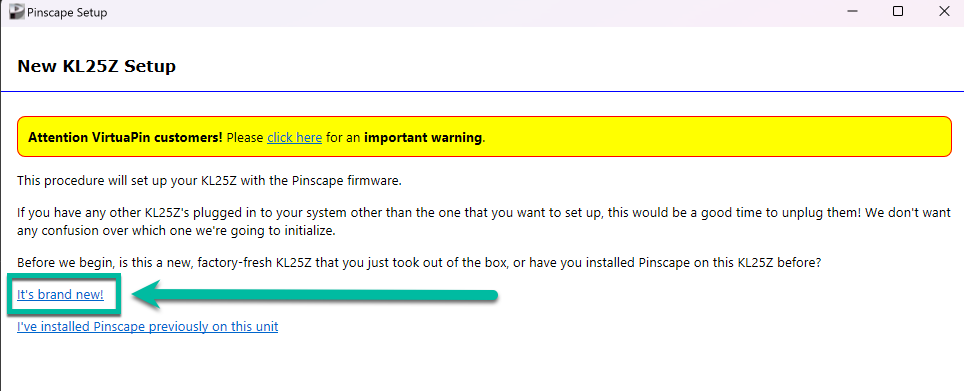

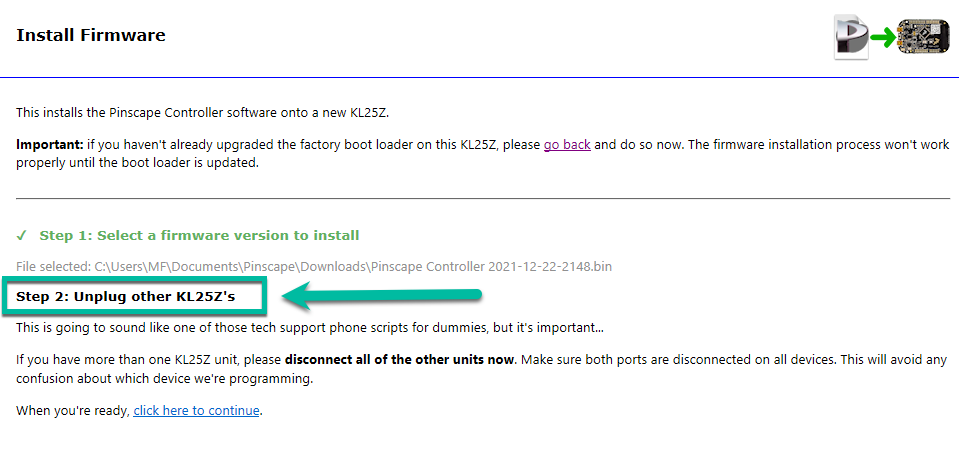
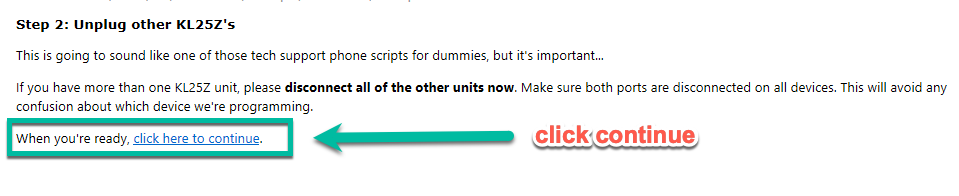
Click Continue. The software is well designed — it tells you exactly what to do and when.
Configuring Pinscape


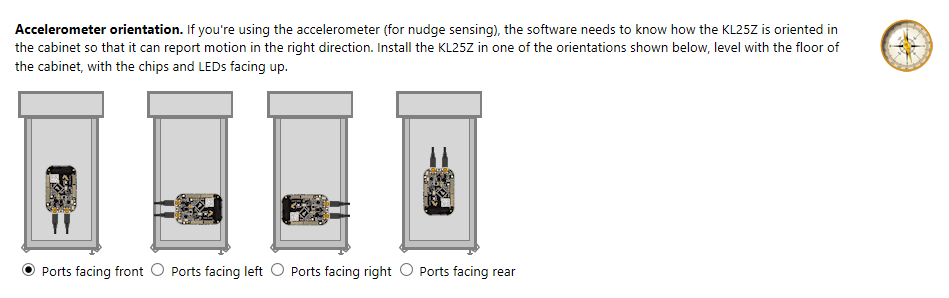
The KL25Z has a built-in accelerometer — this lets you physically push your cabinet to nudge the ball. Select the orientation of your KL25Z to match your setup. It can be mounted in any direction as long as it's level.
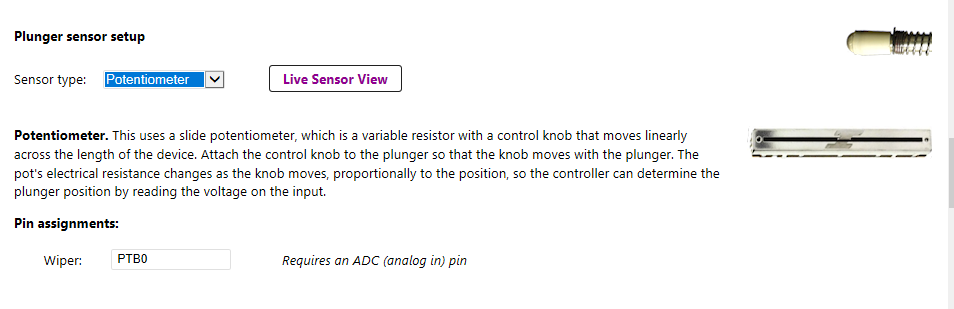

If you want to connect a plunger, select your sensor type from the dropdown. Most people use a potentiometer. Set to None for now if you don't have one — a full plunger tutorial will cover this.
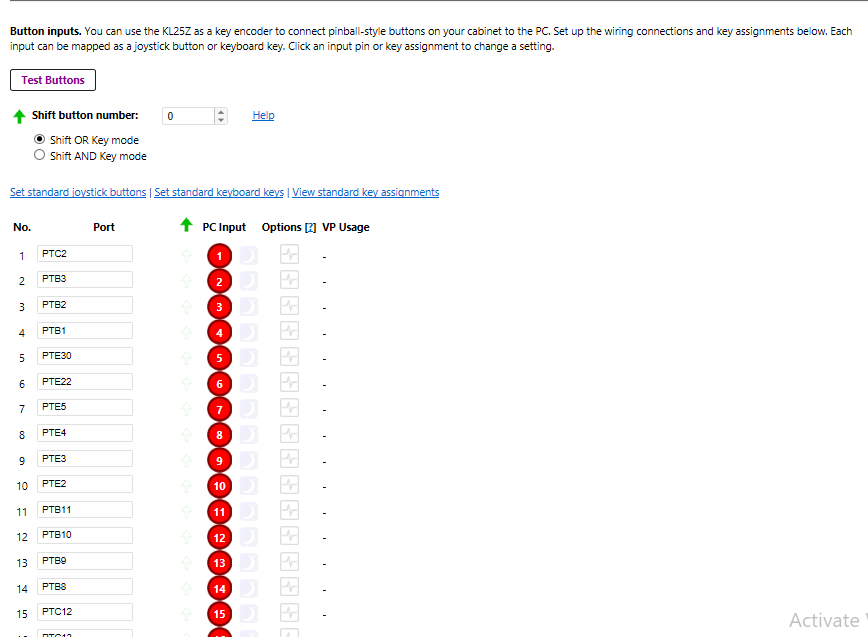
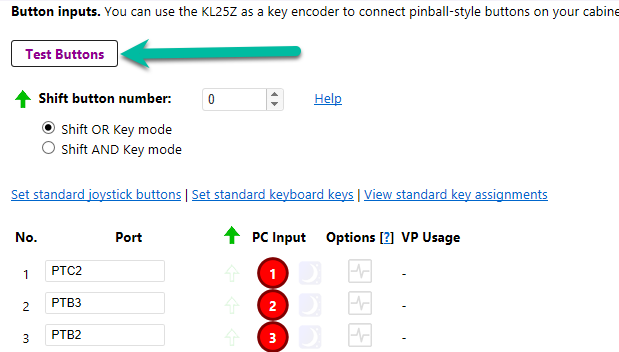
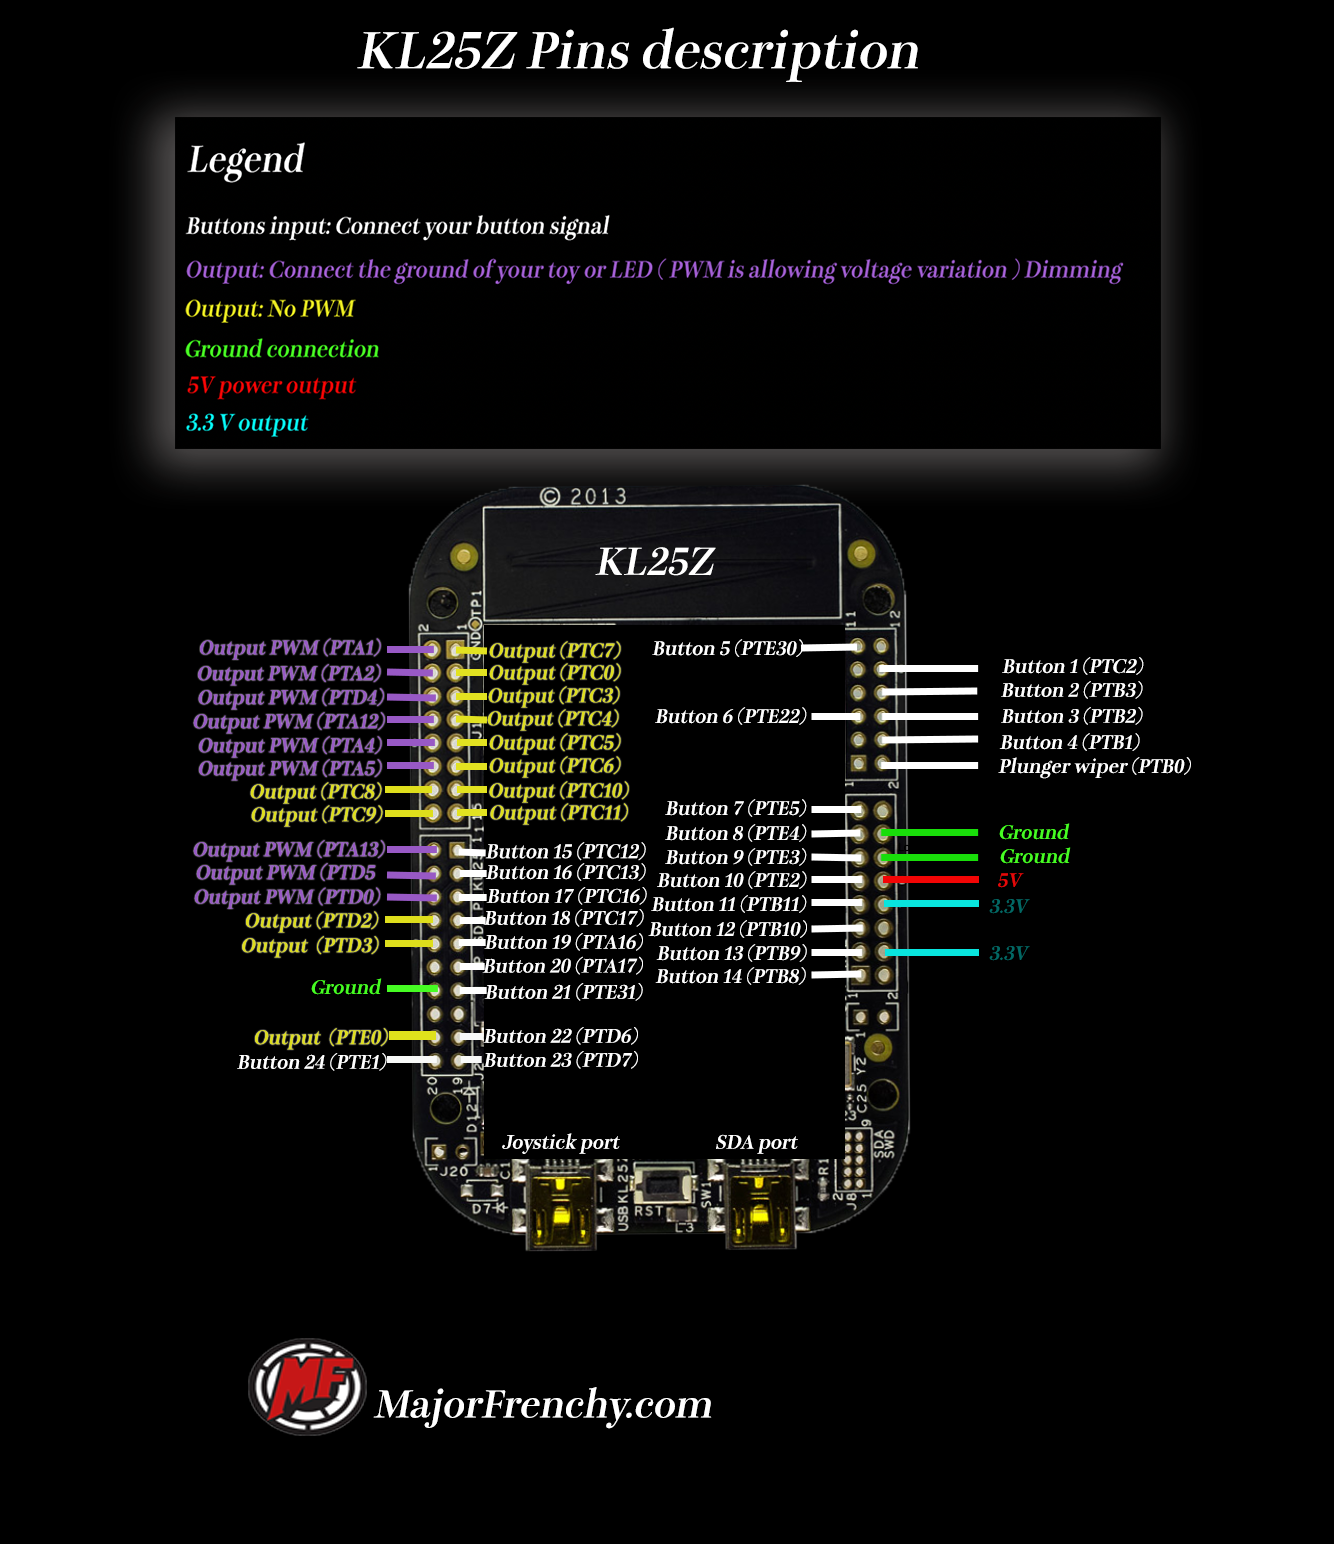
This section maps the button inputs (PTC2, PTC3, etc.) on the KL25Z. Click the Test button to see which physical port corresponds to each input as you scroll through buttons 1–24.

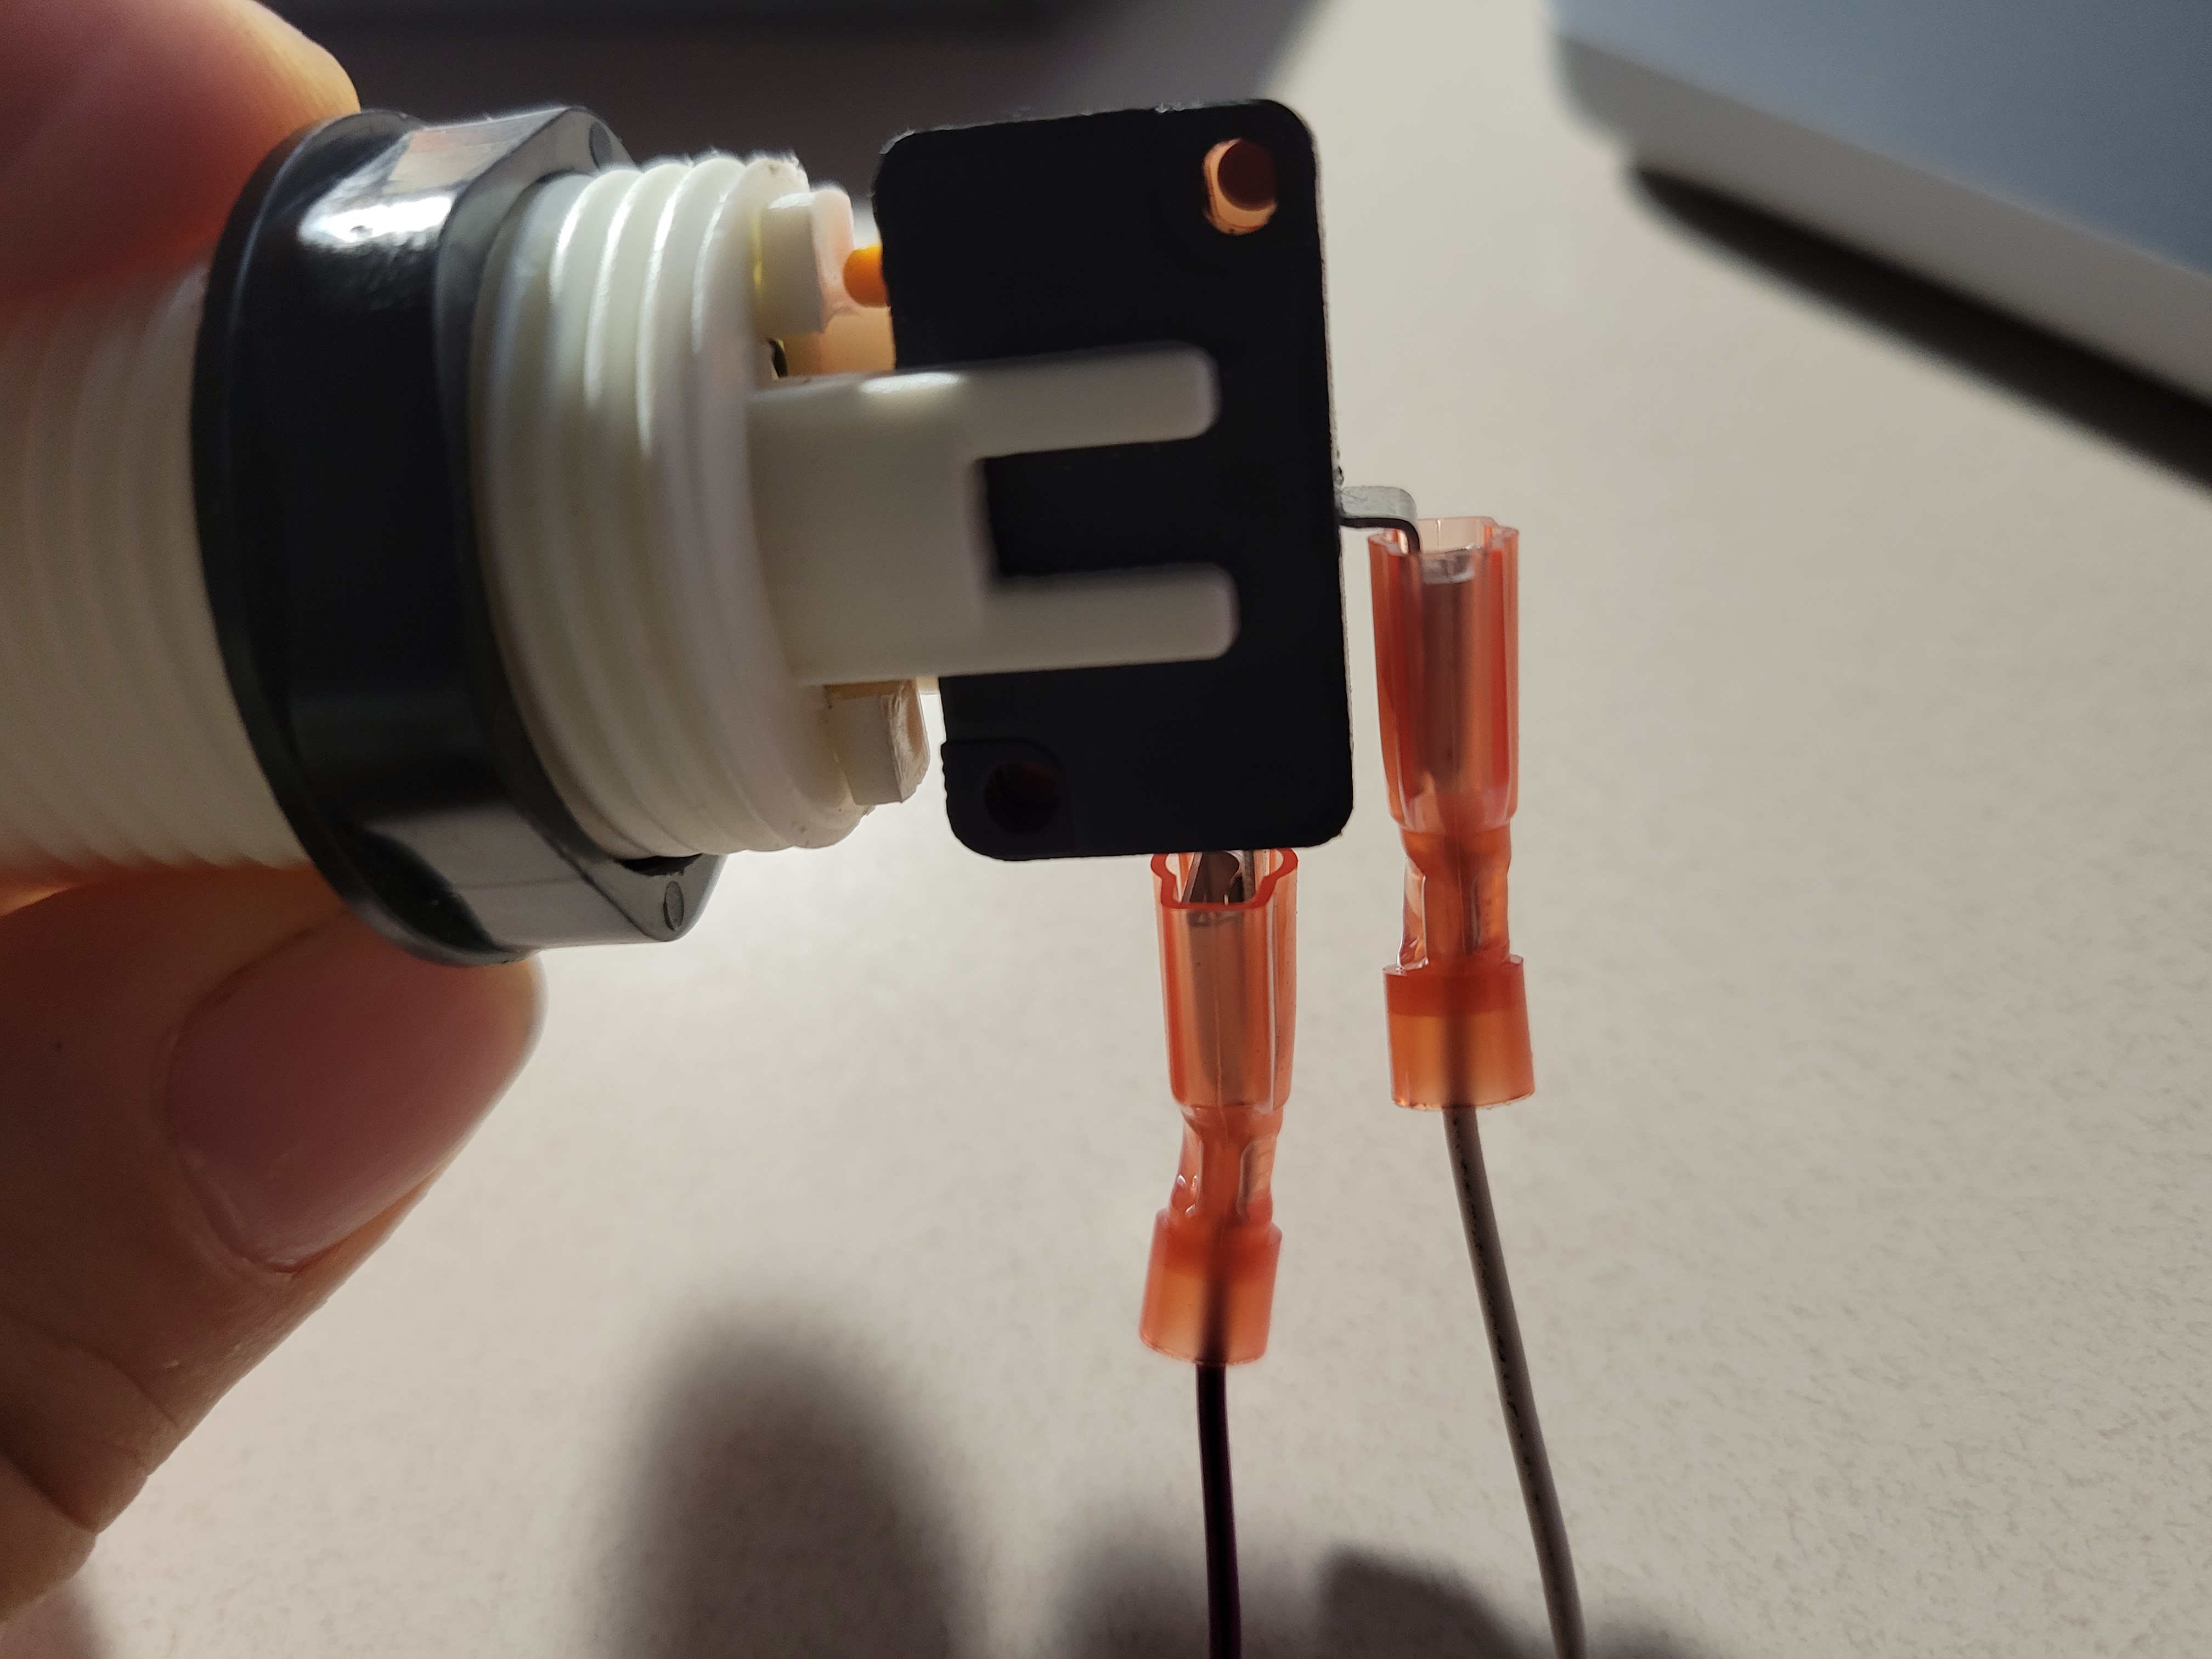
An arcade button has 2 pins — a signal and a ground. It doesn't matter which pin connects to ground as it simply completes the circuit:
- One wire → GROUND
- One wire → one of the white button ports on the diagram above

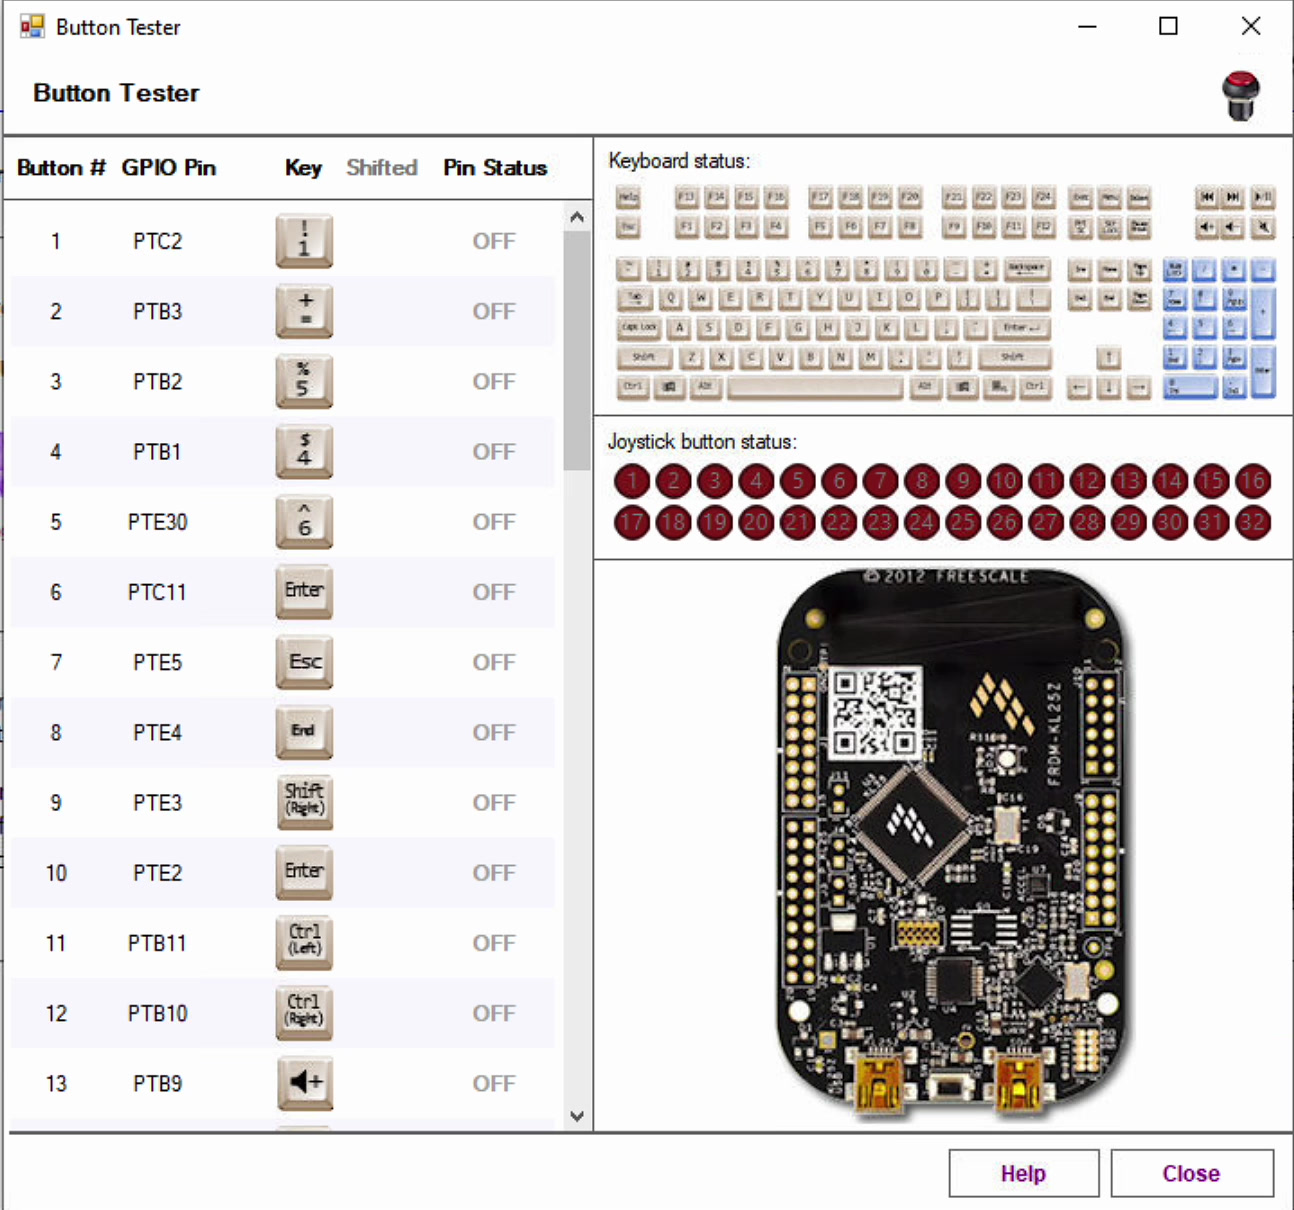
Scrolling through buttons 1–24 highlights the corresponding port on the KL25Z.
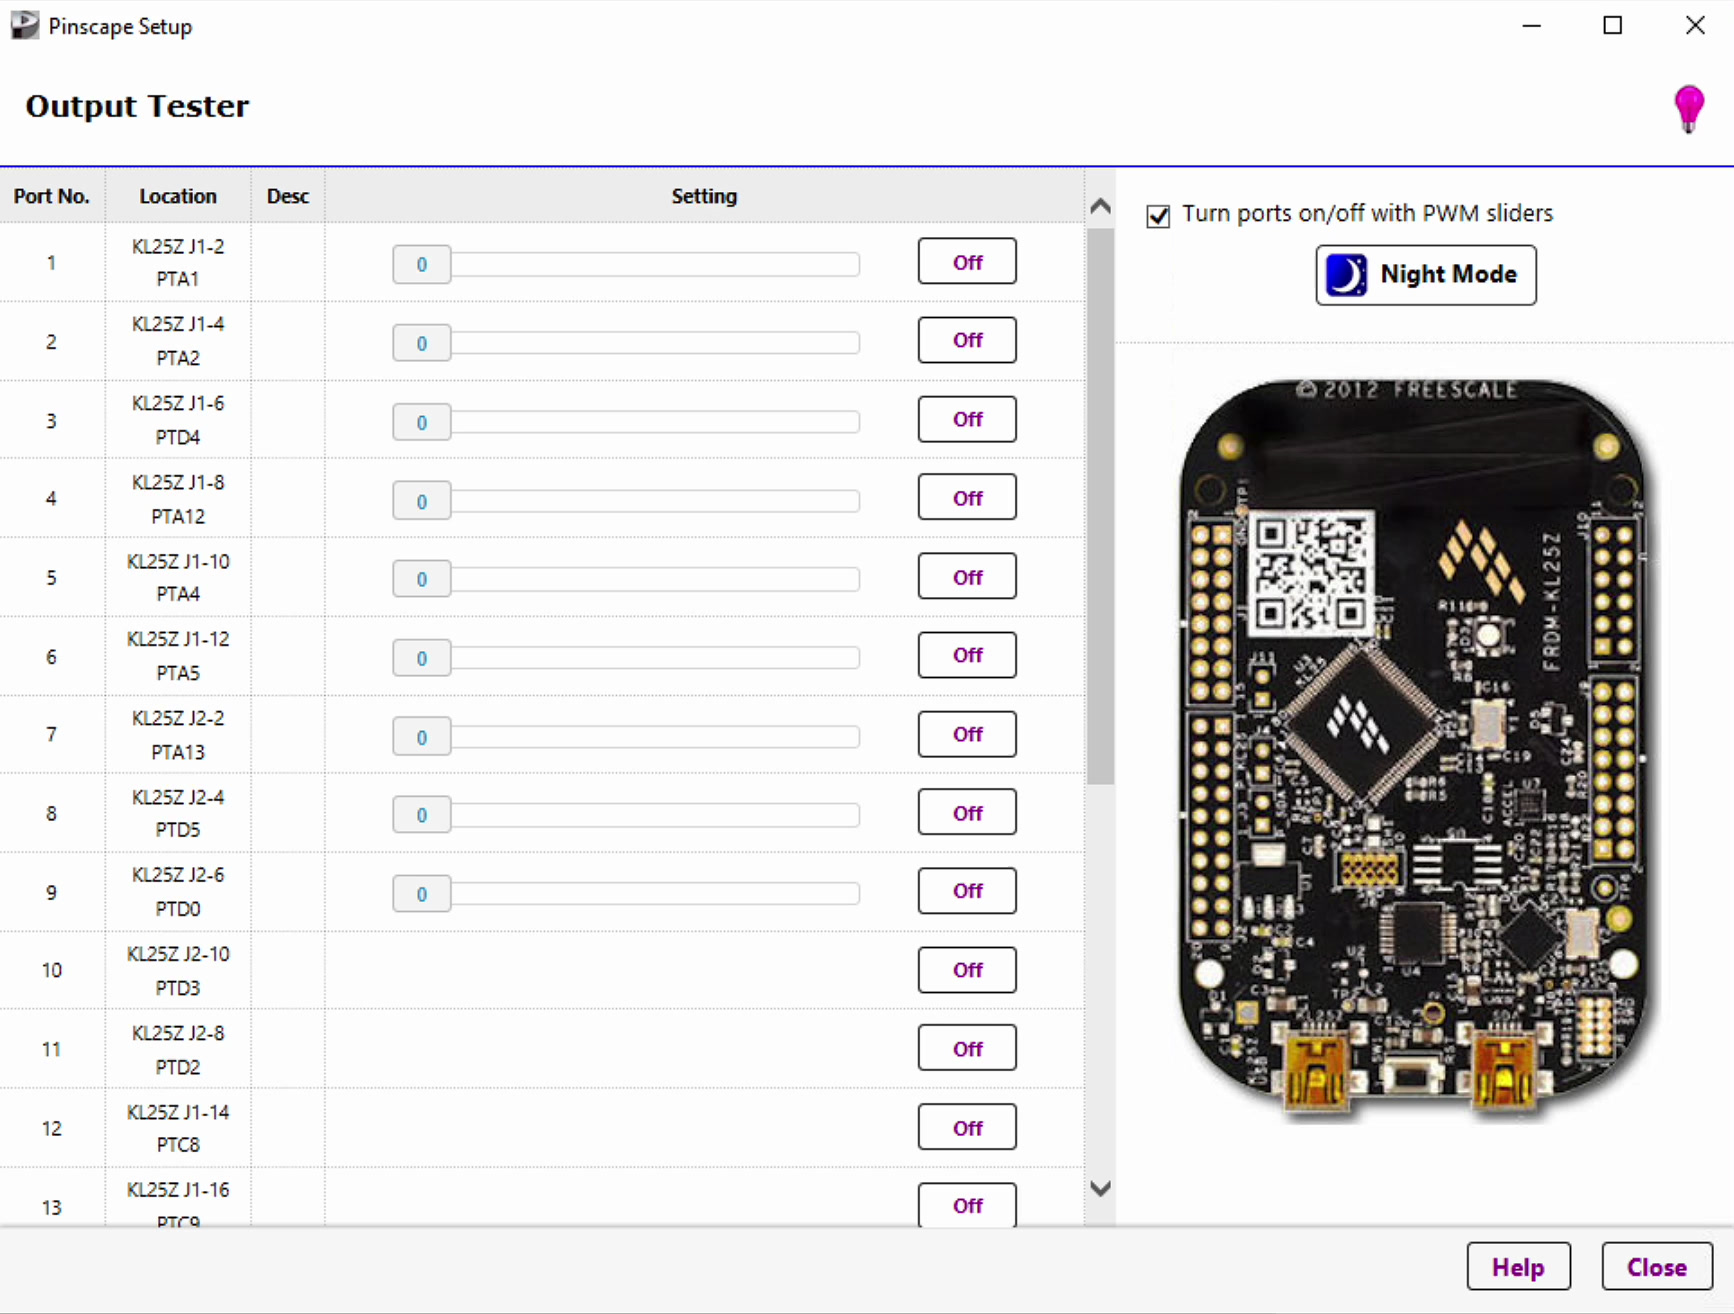
Scrolling through outputs 1–24 shows the corresponding port. Ports 1–9 have a slider bar — these support PWM (dimming).
Buttons, Inputs & Toy Outputs
There are 4 types of useful functions on this board for virtual pinball:
Connect cabinet buttons (flipper, start, exit, etc.)
Knocker, solenoids, gear motor, strobe, beacon
Pulse Width Modulation — supports dimming for lights and shaker speed
5V and 3.3V available for powering small devices
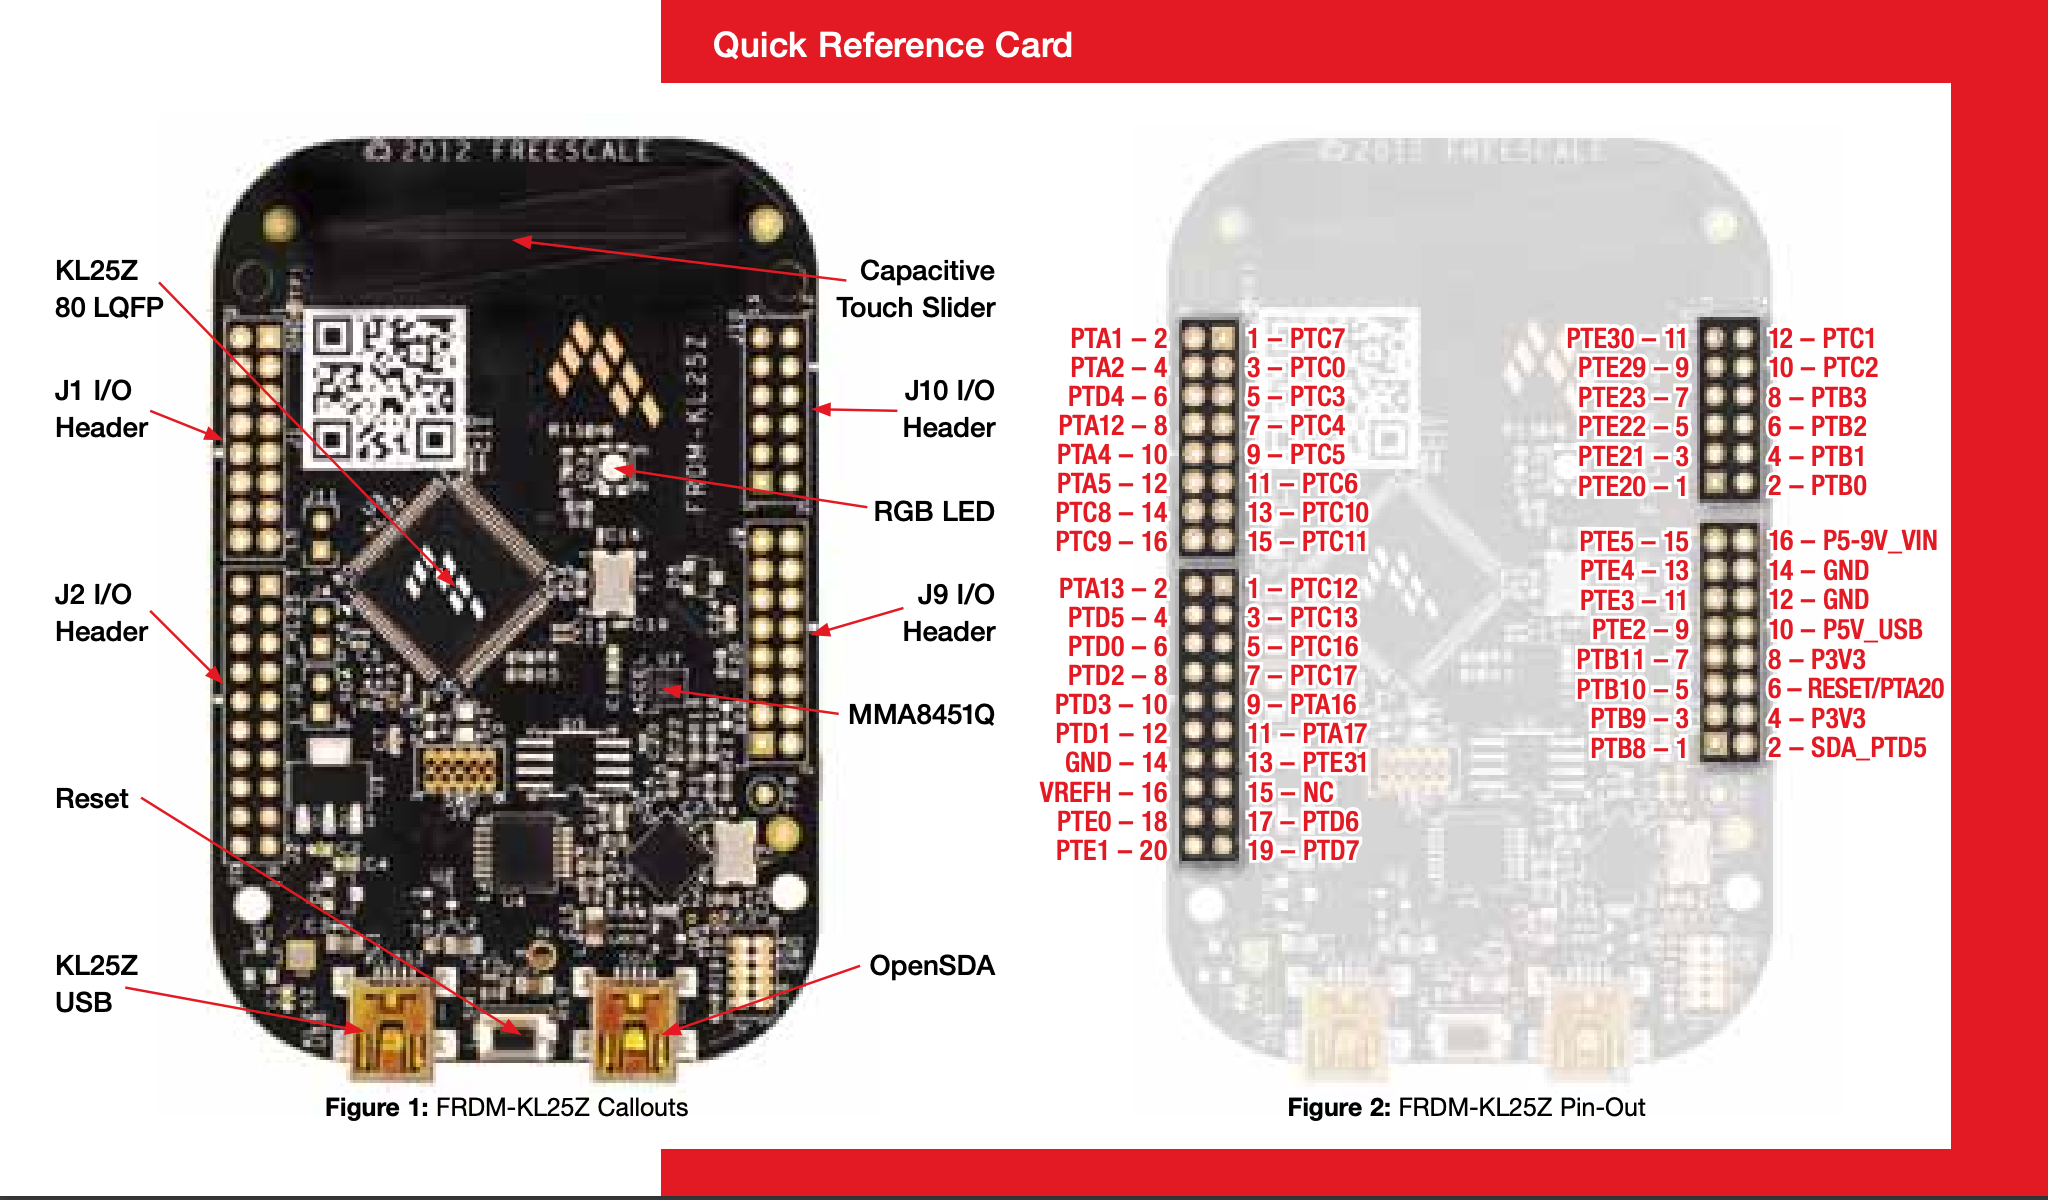
KL25Z Pinout Diagram
The diagram below labels all the ports. Download it and use it as a reference while wiring.
Connecting Toys
A separate power booster is required for toys — the KL25Z provides a maximum of 4mA per port. Use a MOSFET booster board or LED power booster. Buttons do NOT need a booster.
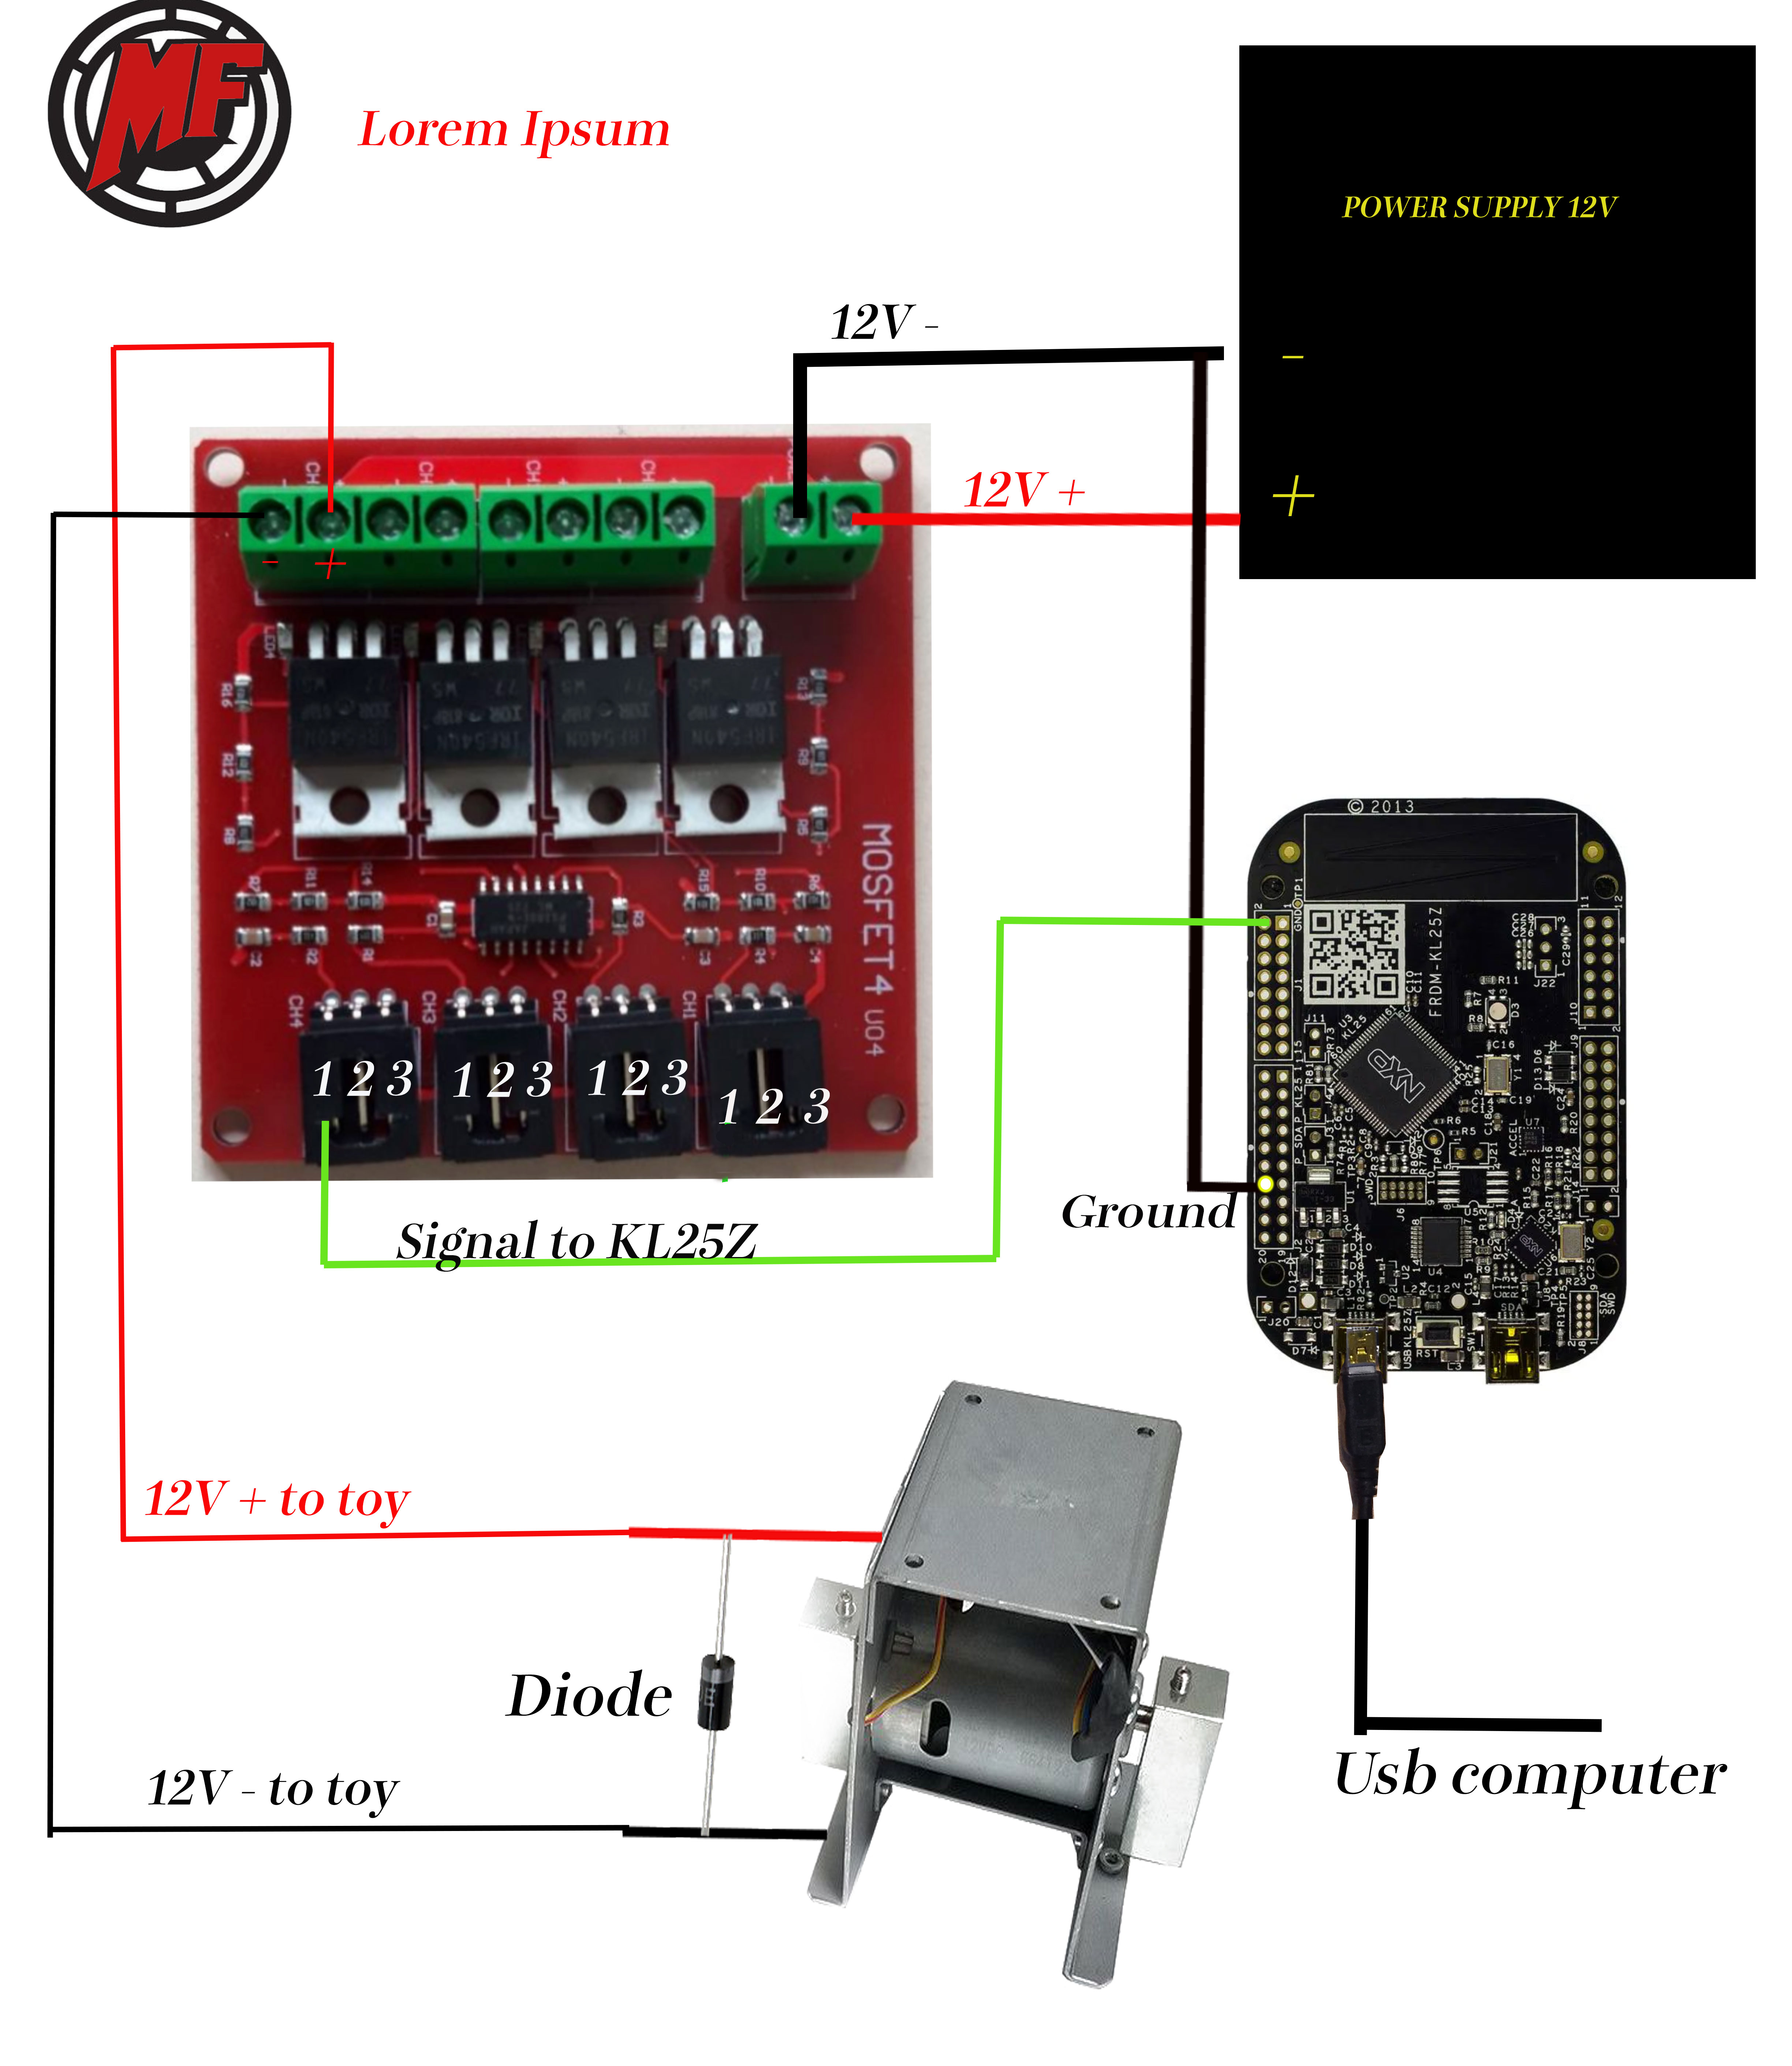
Example: 12V shaker motor connected using a KL25Z and a MOSFET board. Use signal Pin #1 of each MOSFET channel. There are 4 channels per board — add more boards for more devices. Use a separate board for each voltage (e.g. a dedicated board for 24V toys).
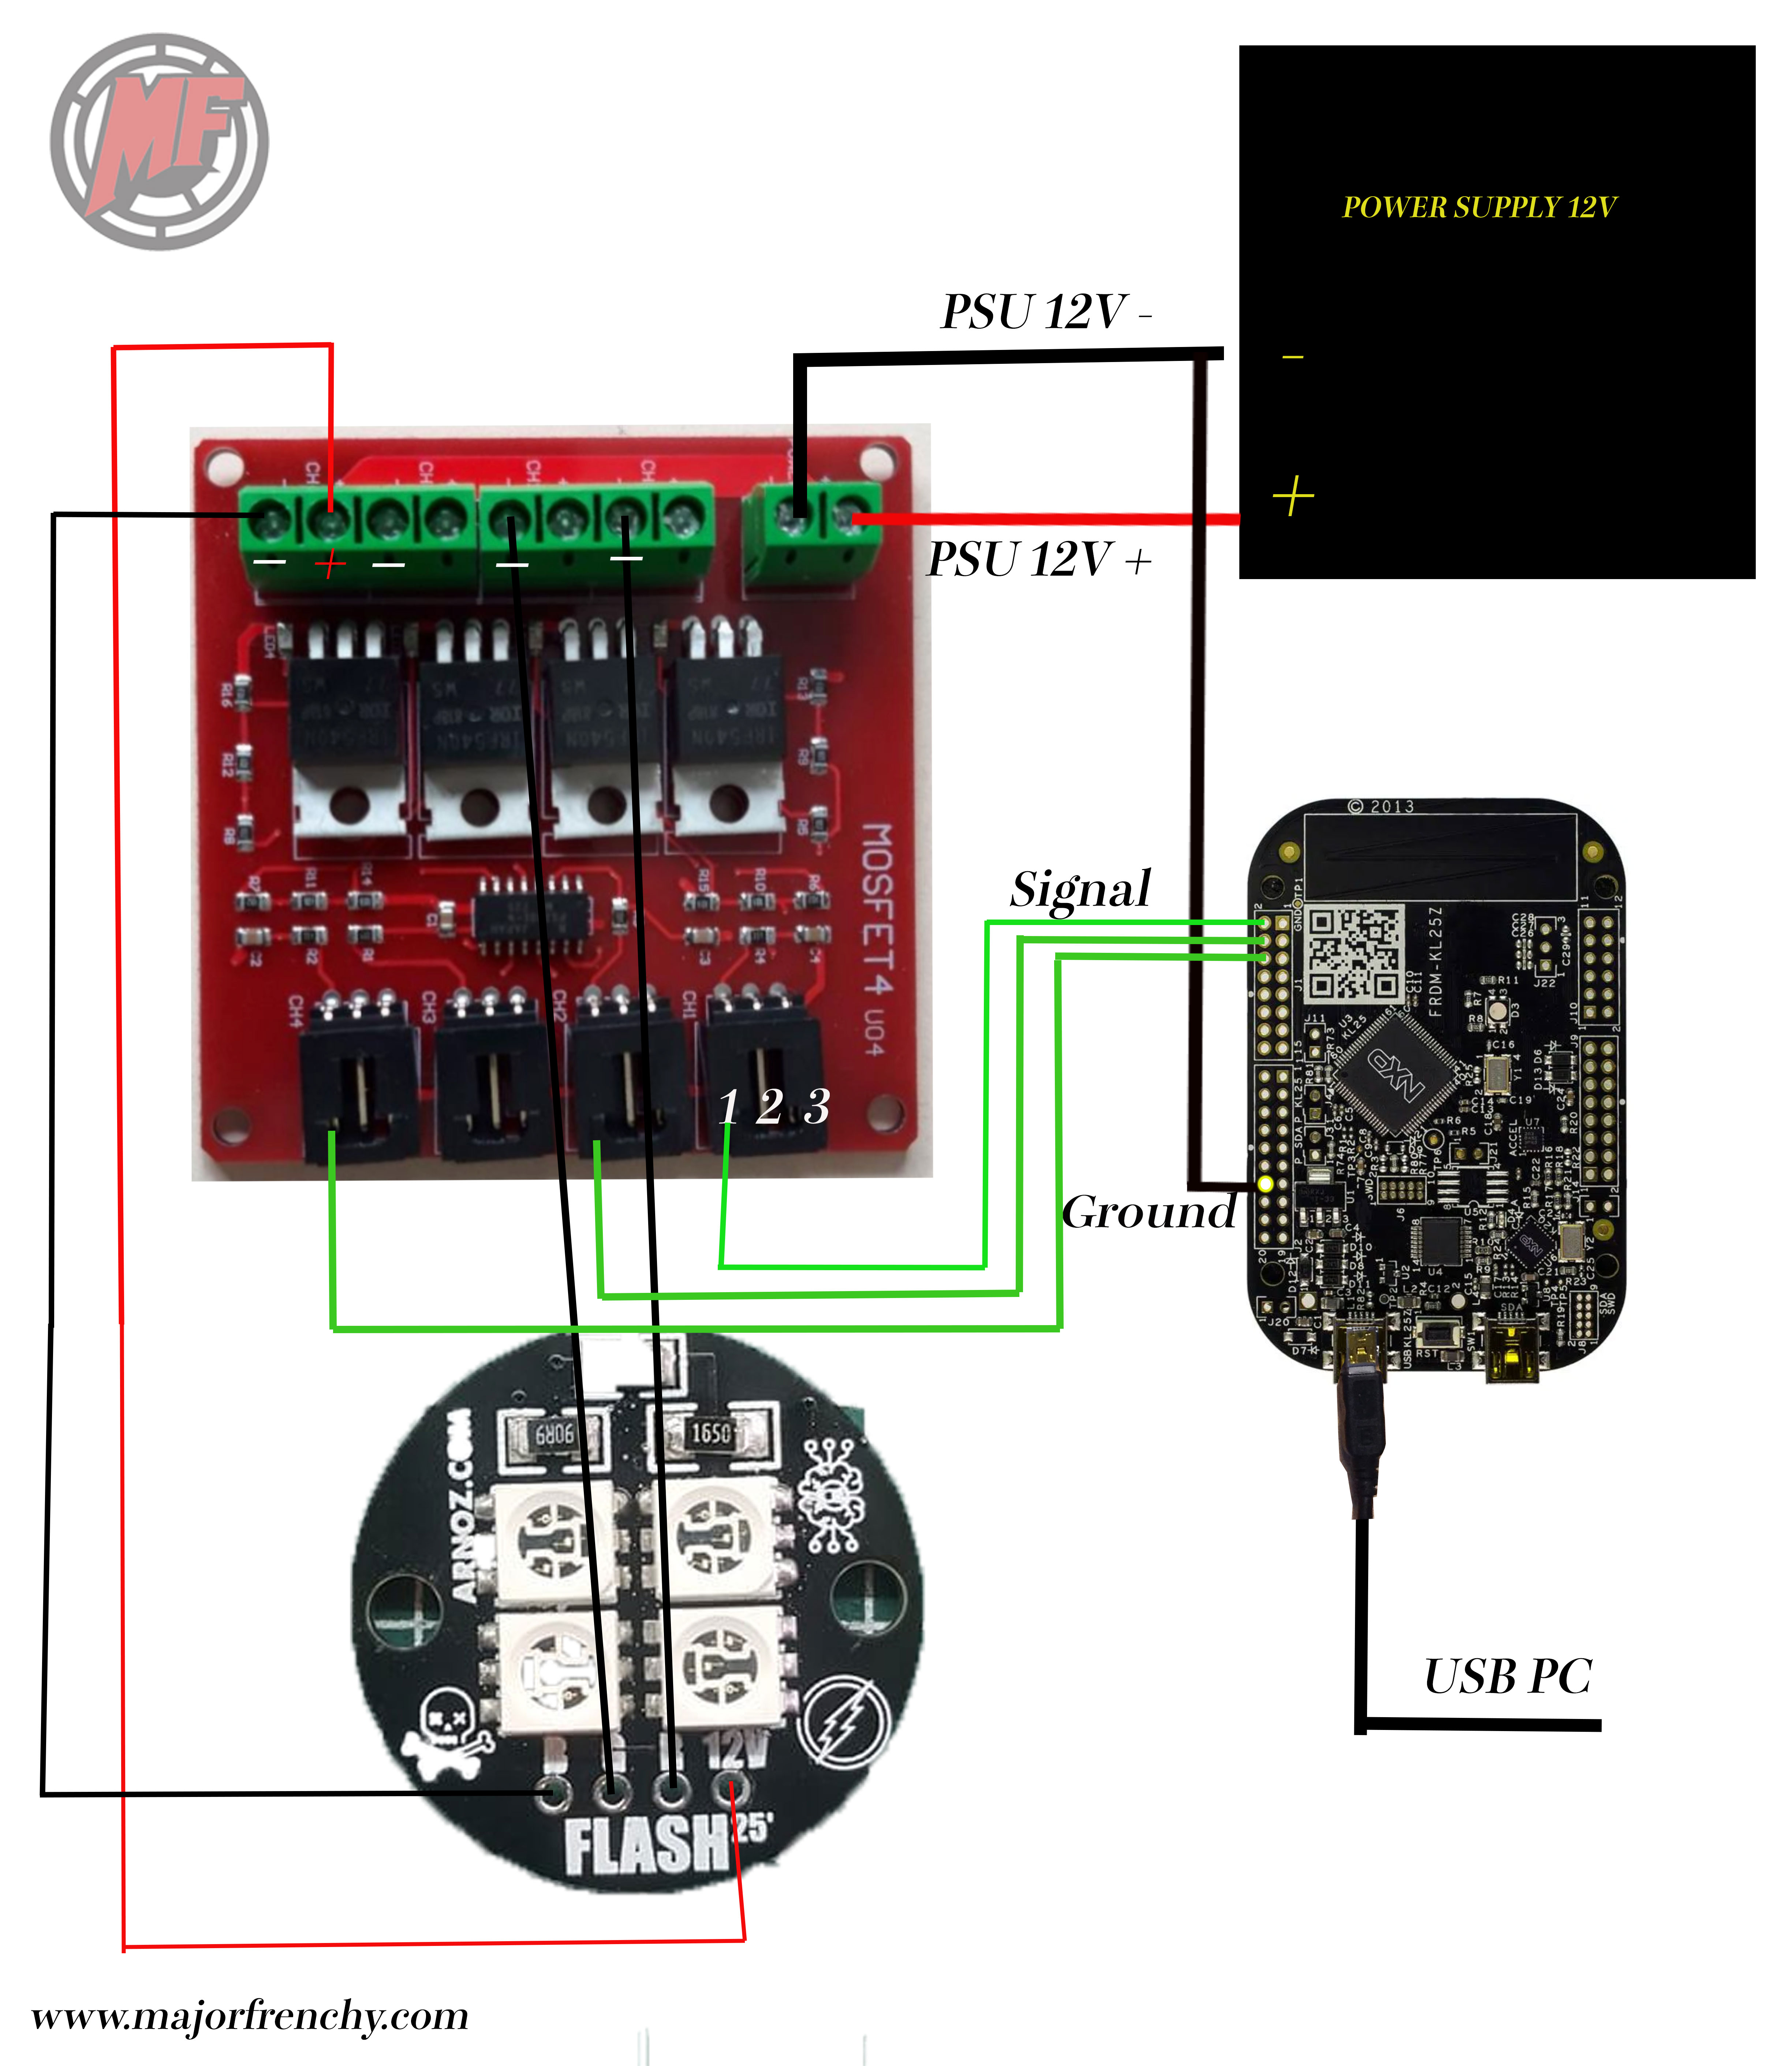
Example: 12V RGB light connected using Arnoz 12V RGB + MOSFET board. For a 5-LED flash bar you need 15 ports (1 per colour × 3 per RGB LED), which requires 4 MOSFET boards.
Testing Toy Connections
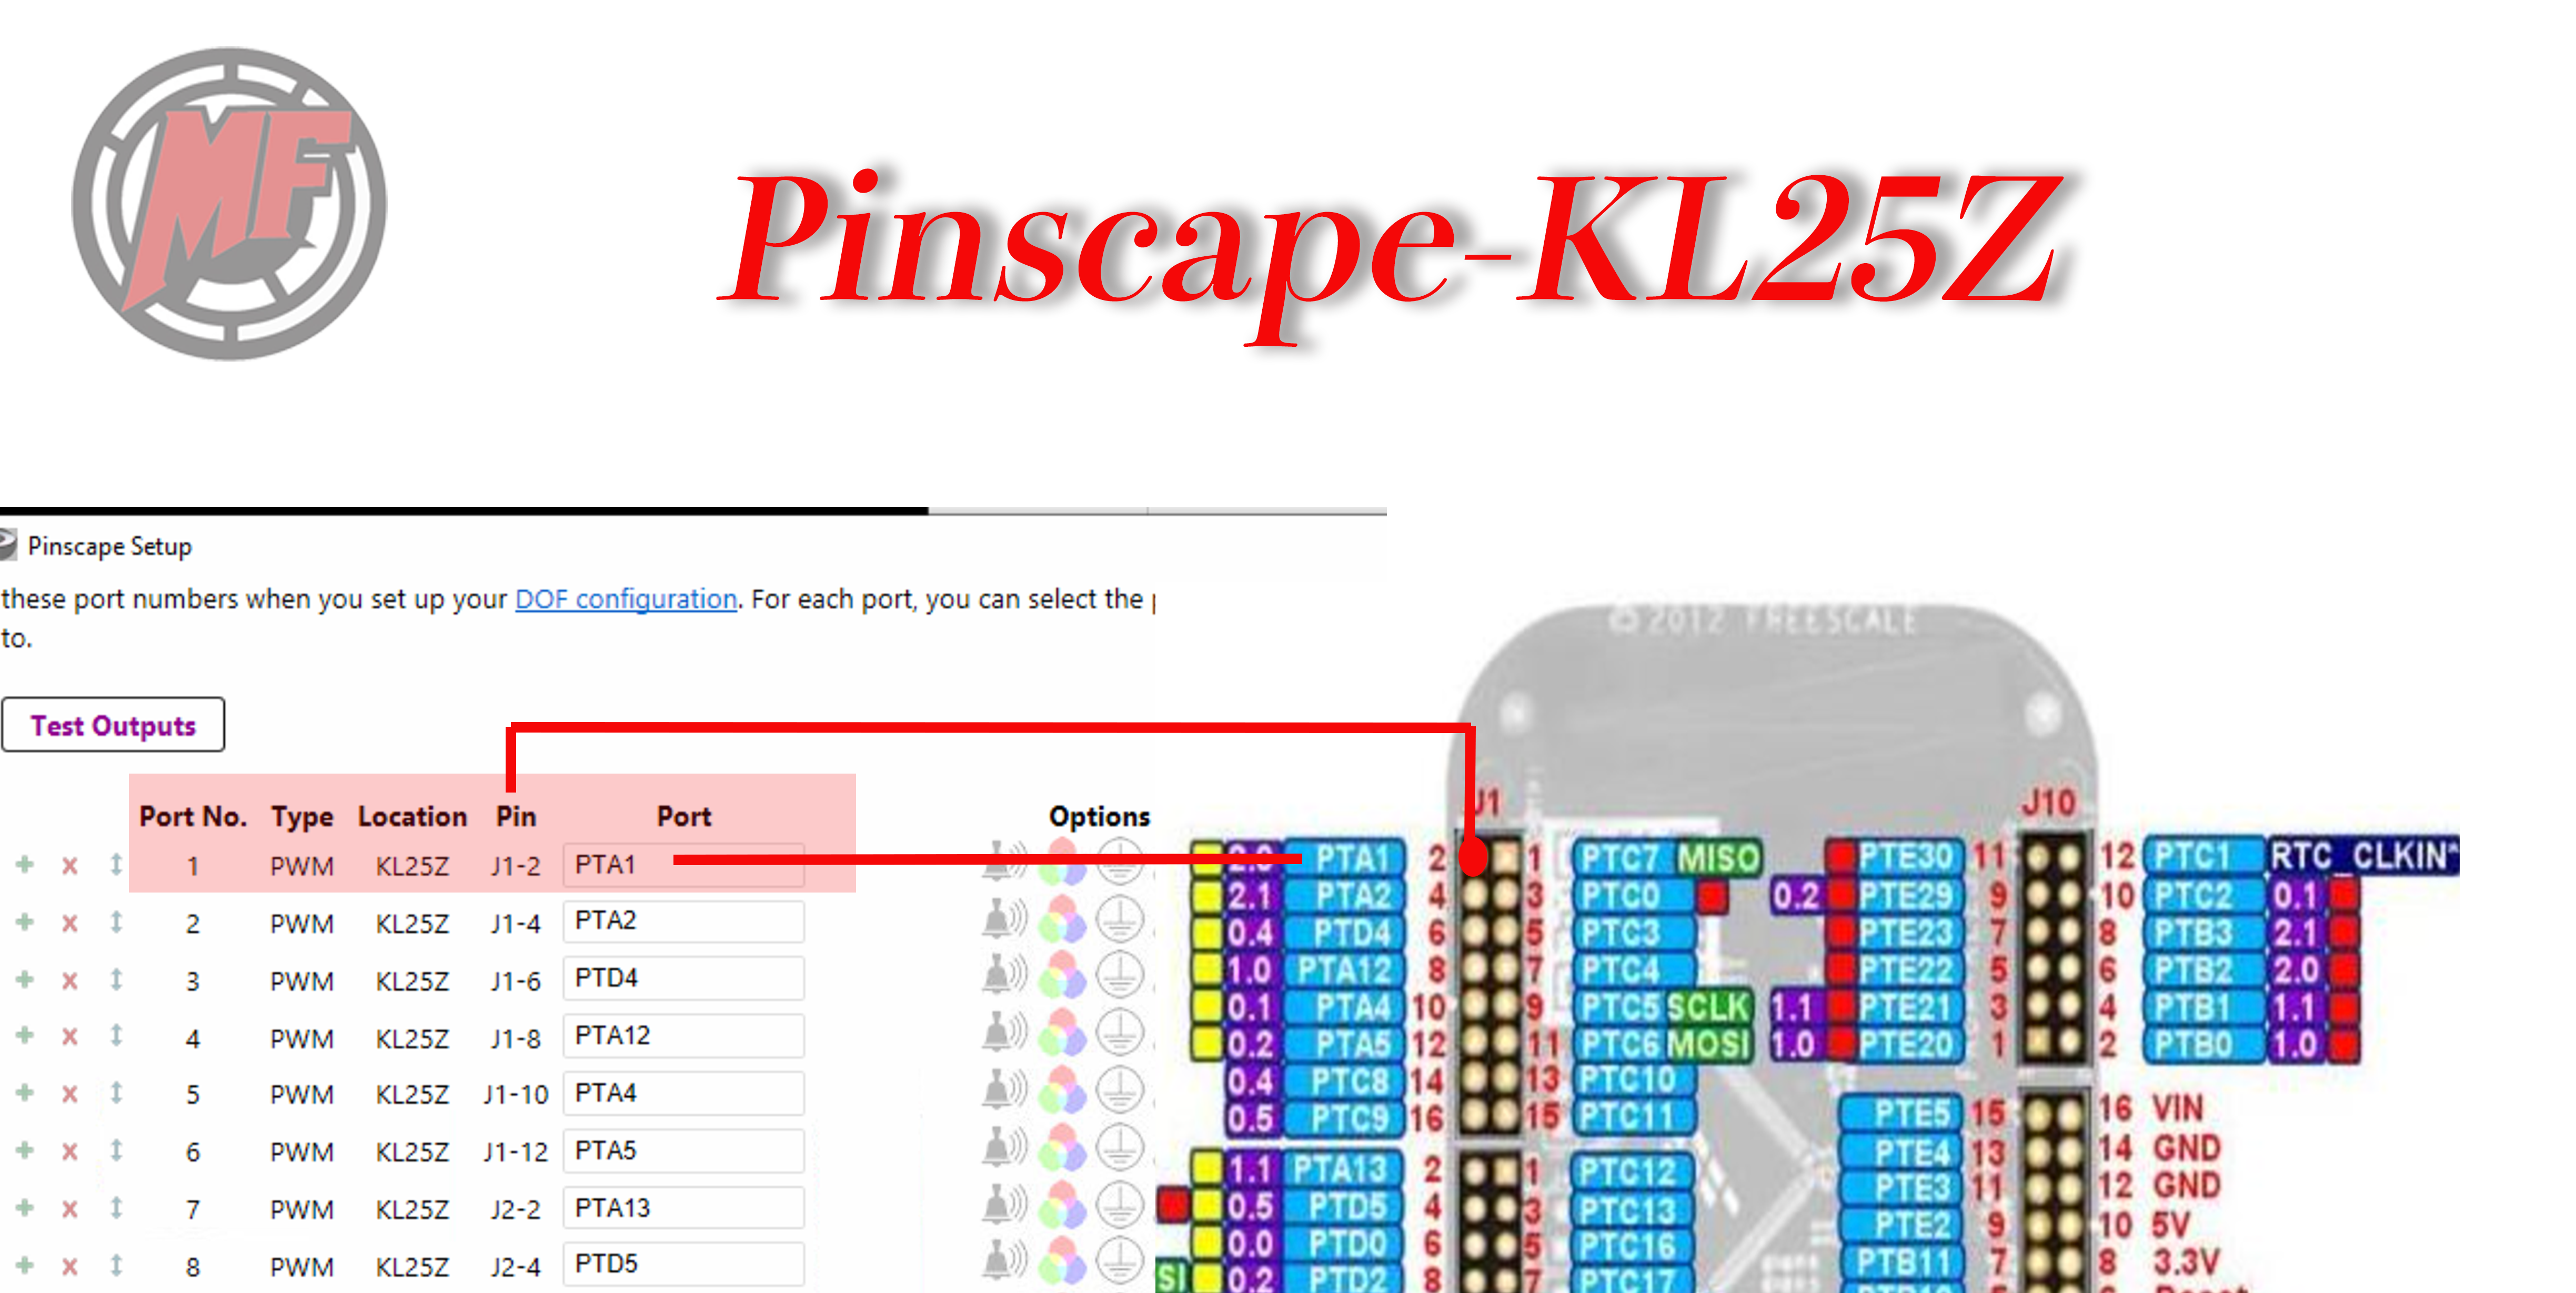
Use the KL25Z Pinout diagram to find the toy output ports (purple and yellow). Test one toy at a time using the Pinscape software.

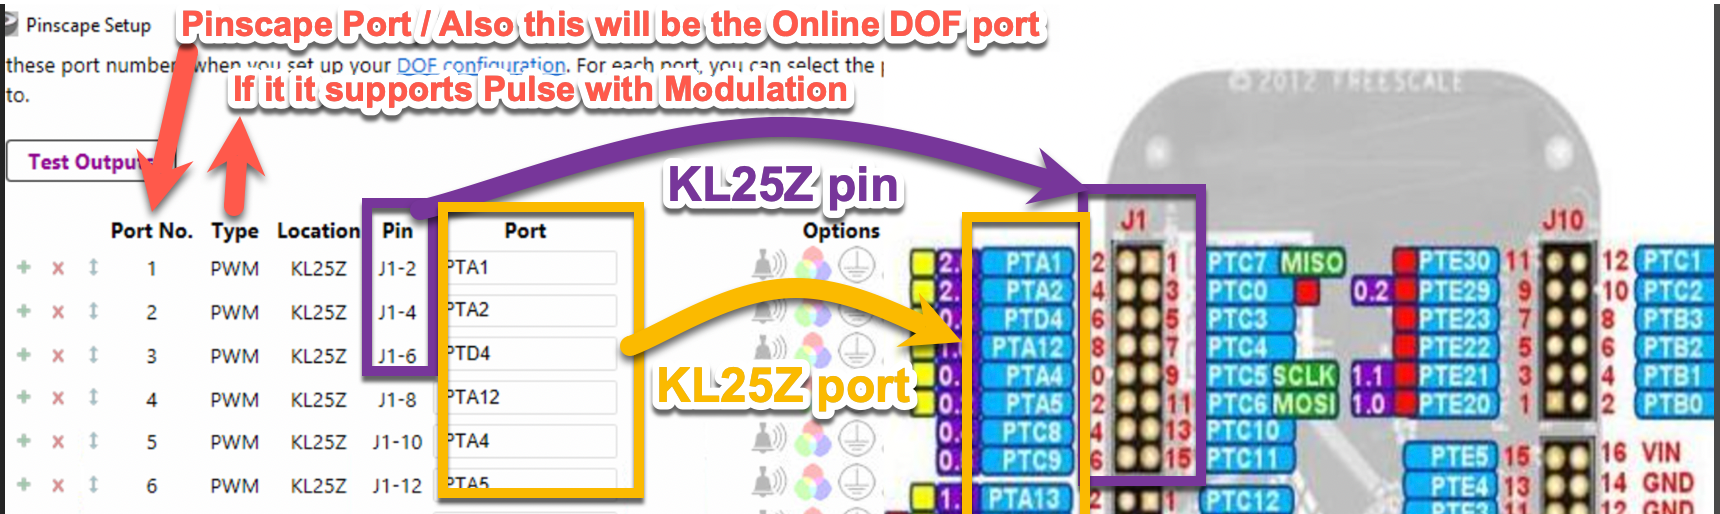
Pinscape software ports (left) mapped to KL25Z header pins (right). For example:
- Toy on Pin #2, Header J1 → Pinscape Port No. 1
- Toy on Pin #4, Header J1 → Pinscape Port No. 2
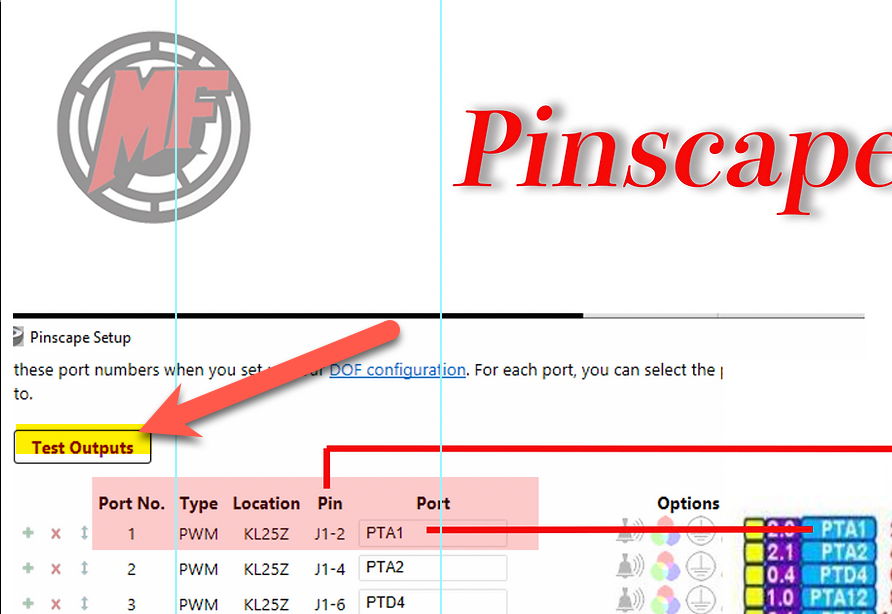
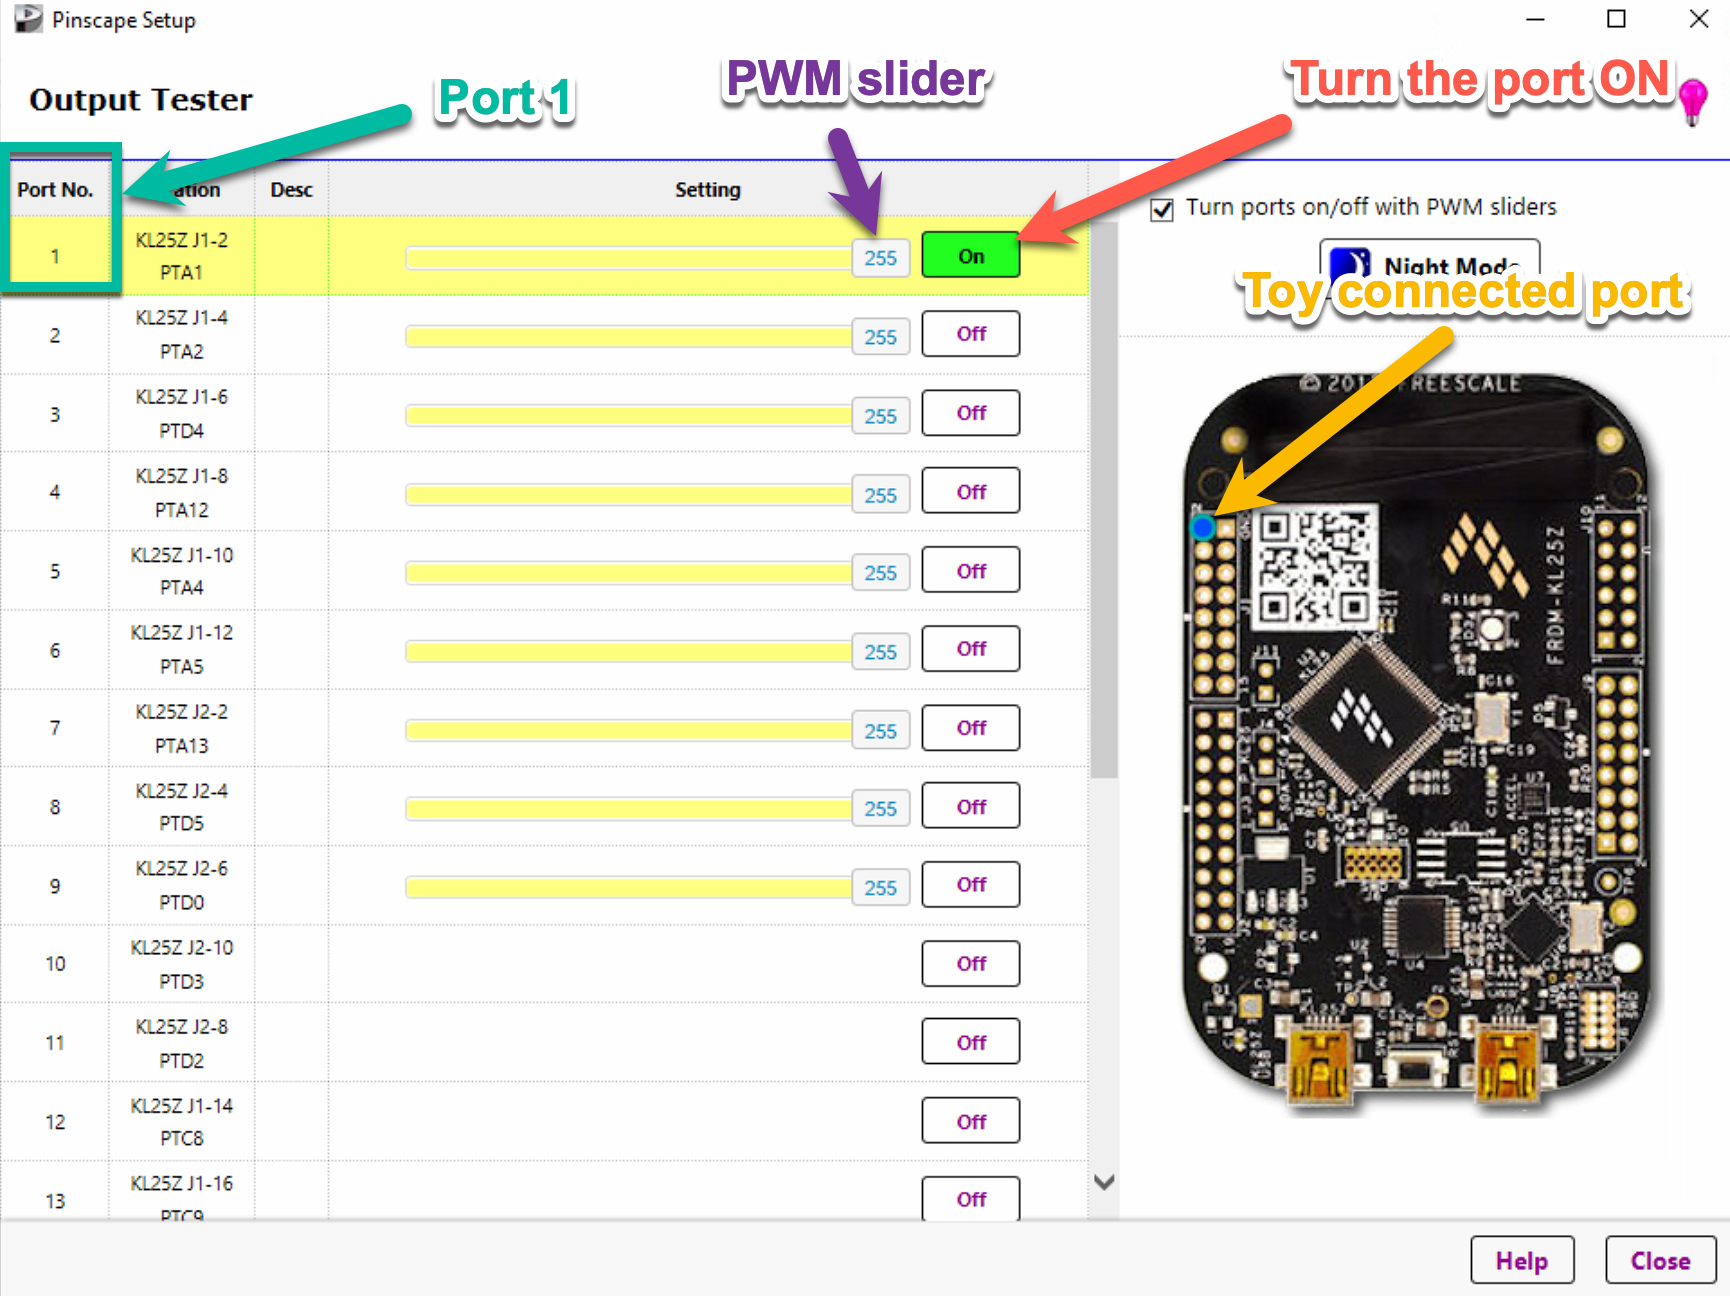
The Output screen lets you click ON to test each toy on its matching port. The slider bar dims lights or controls shaker motor speed.
Alternative Controllers
Other devices can be used as a replacement or extension for the KL25Z:
- Rigmaster — All-in-one board using the KL25Z with extra ports
- KLShield — KL25Z extension board for more connections
- LEDWIZ — Buttons and devices solution similar to KL25Z
- Pinscape Oak Micros AIO — KL25Z expansion with many extra ports
See the Toys / Force Feedback page for a full comparison of all controller boards.
---Related: DOF Setup · SainSmart Tutorial · Toys / Force Feedback · Addressable LEDs