PinUP Popper

Click any image to enlarge it.
PinUP Popper Files
What is PinUP Popper?
PinUP Popper is a front end designed to manage tables. It is the front end of choice for many virtual pinball enthusiasts, partly because the developer Nailbuster is very active in the community and releases many guides on popular features.
PinUP Popper is loaded with functionality — including a built-in multimedia server where users can download artwork for their tables with a single click.
One of PinUP Popper's killer features is PUP Packs — additional video animations synchronized with gameplay. When a certain action is triggered on the table, the animation plays on the backglass. It can also be text or an image on a topper screen or full DMD.
PUP Packs are available for free download on VPUniverse.
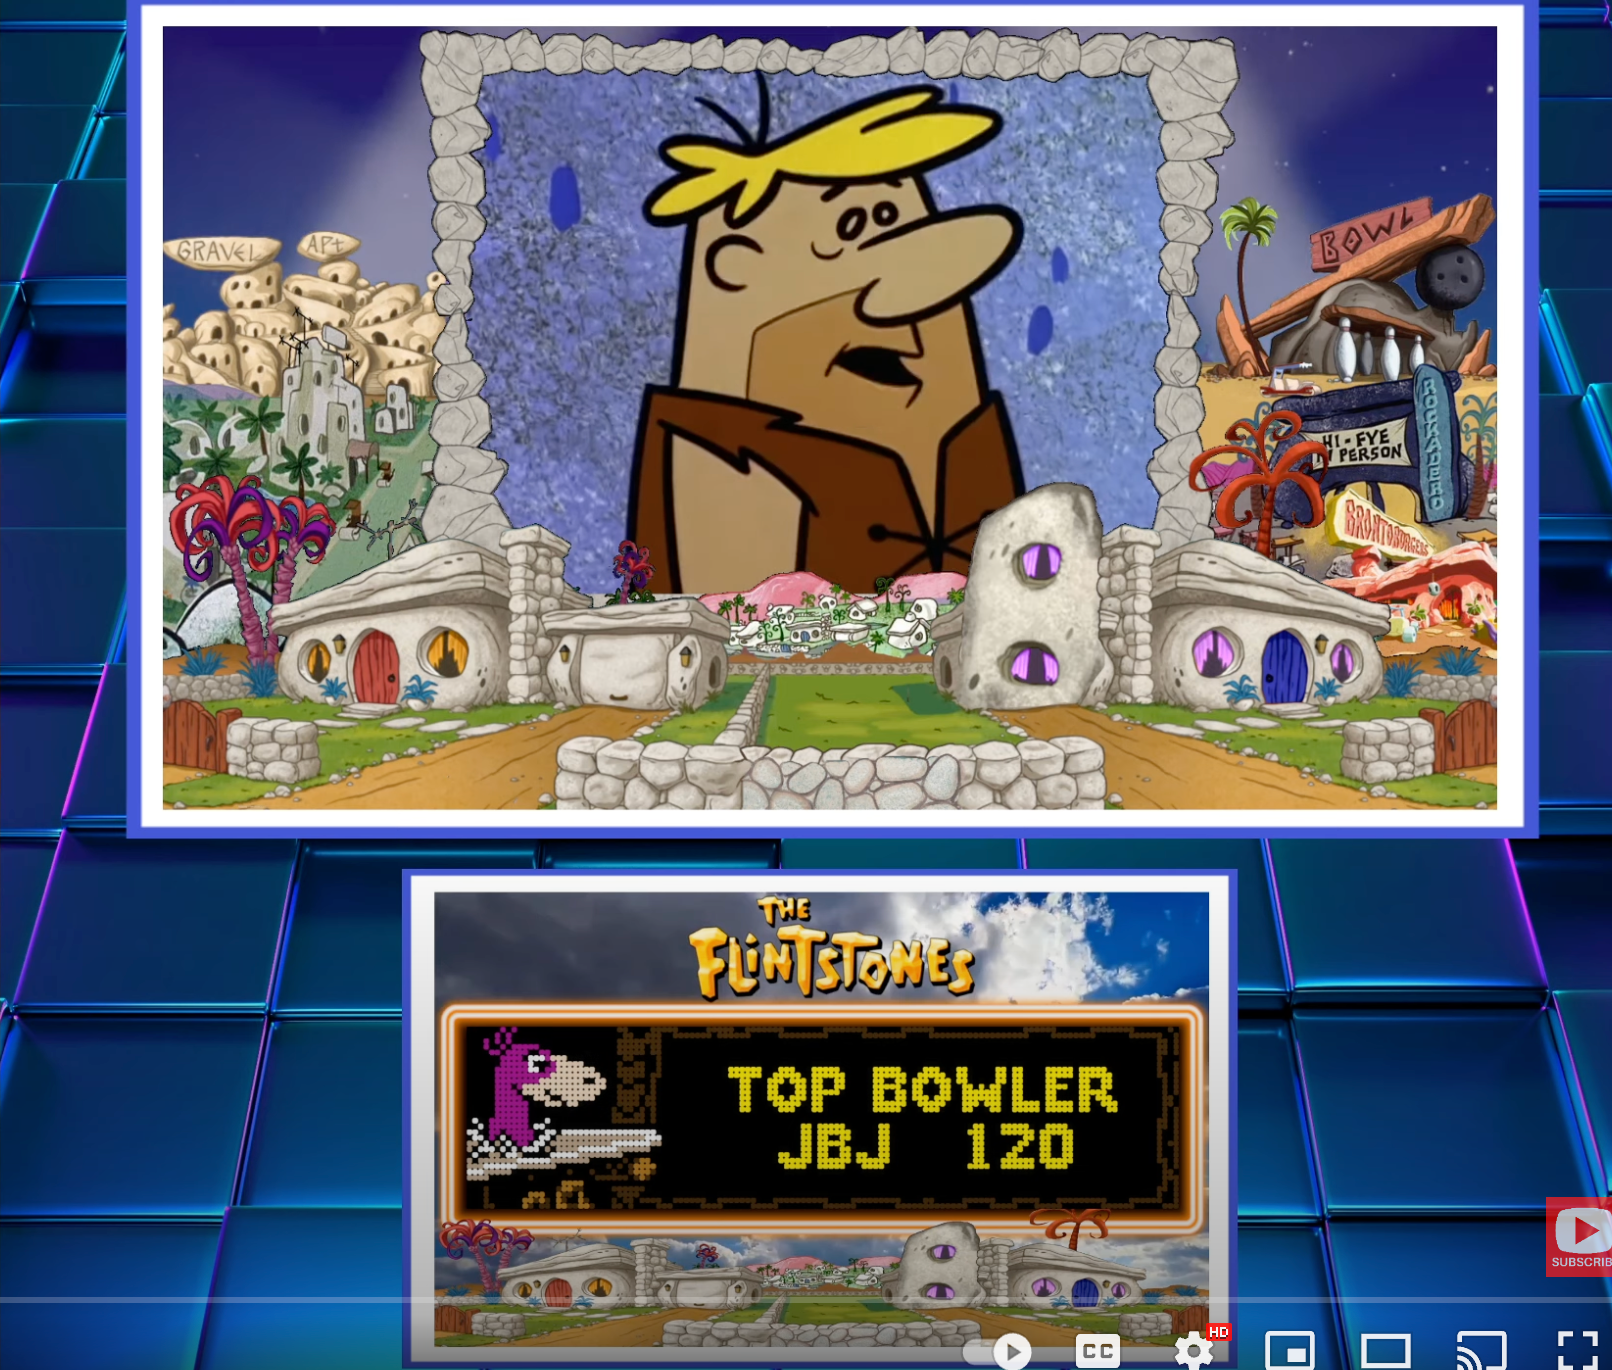
A PUP Pack for the Flintstones VPX.
Pre-Requisites
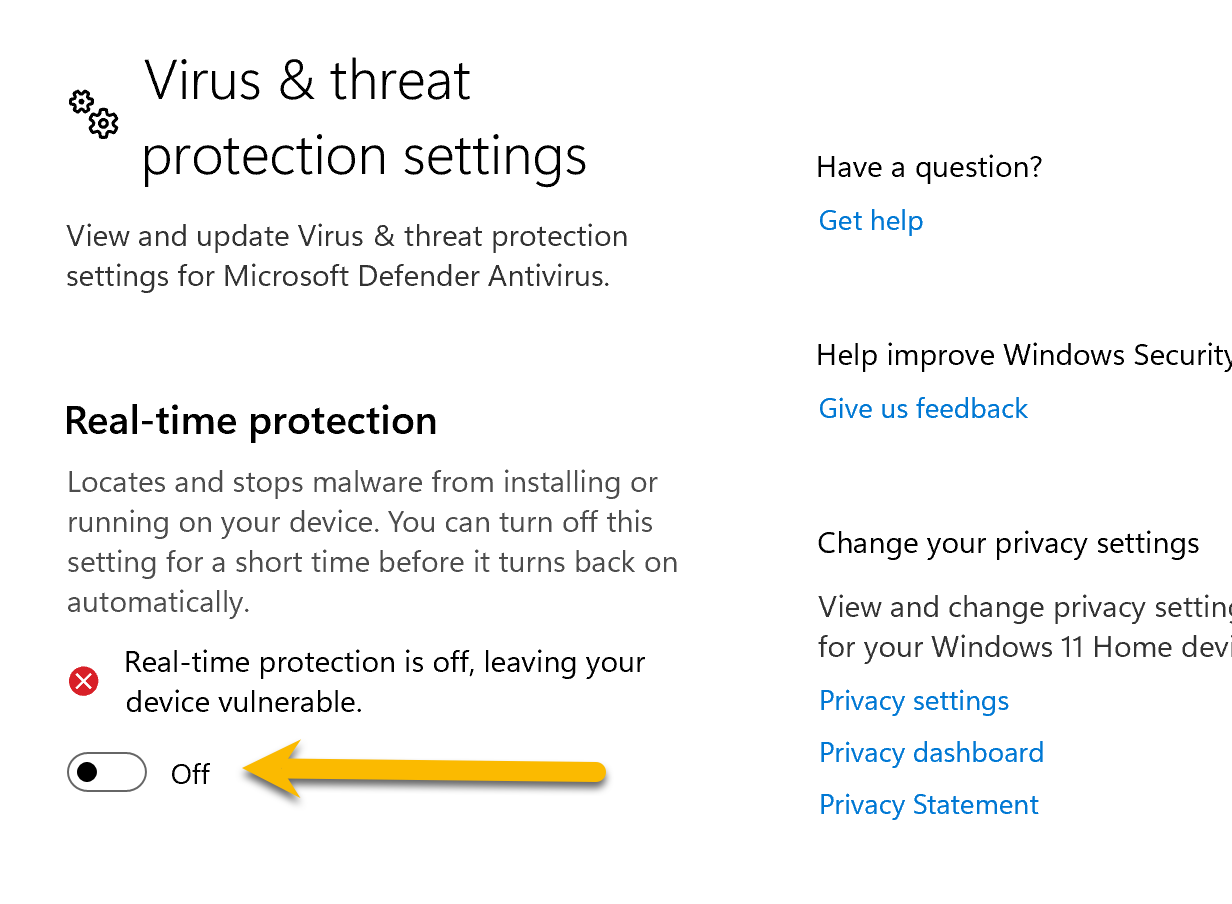
Disable Antivirus
Disable your antivirus from day one. It can create false positives, block files, and make tables sluggish.
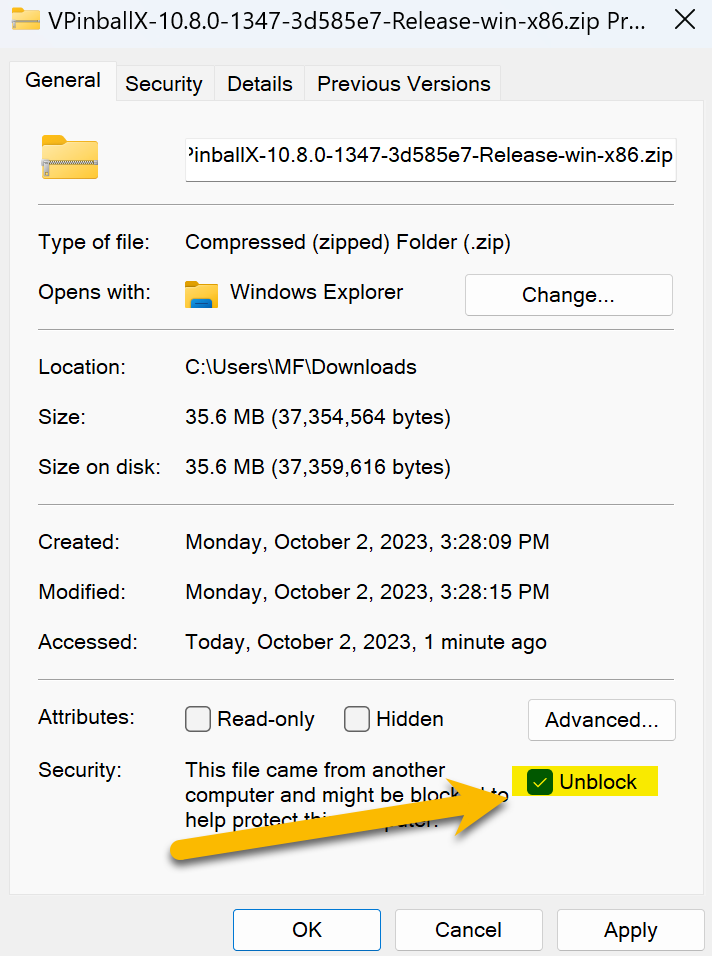
Always Unblock Downloaded Files
Right-click → Properties → check Unblock → Apply. This unblocks files downloaded from the internet so Windows will run them.
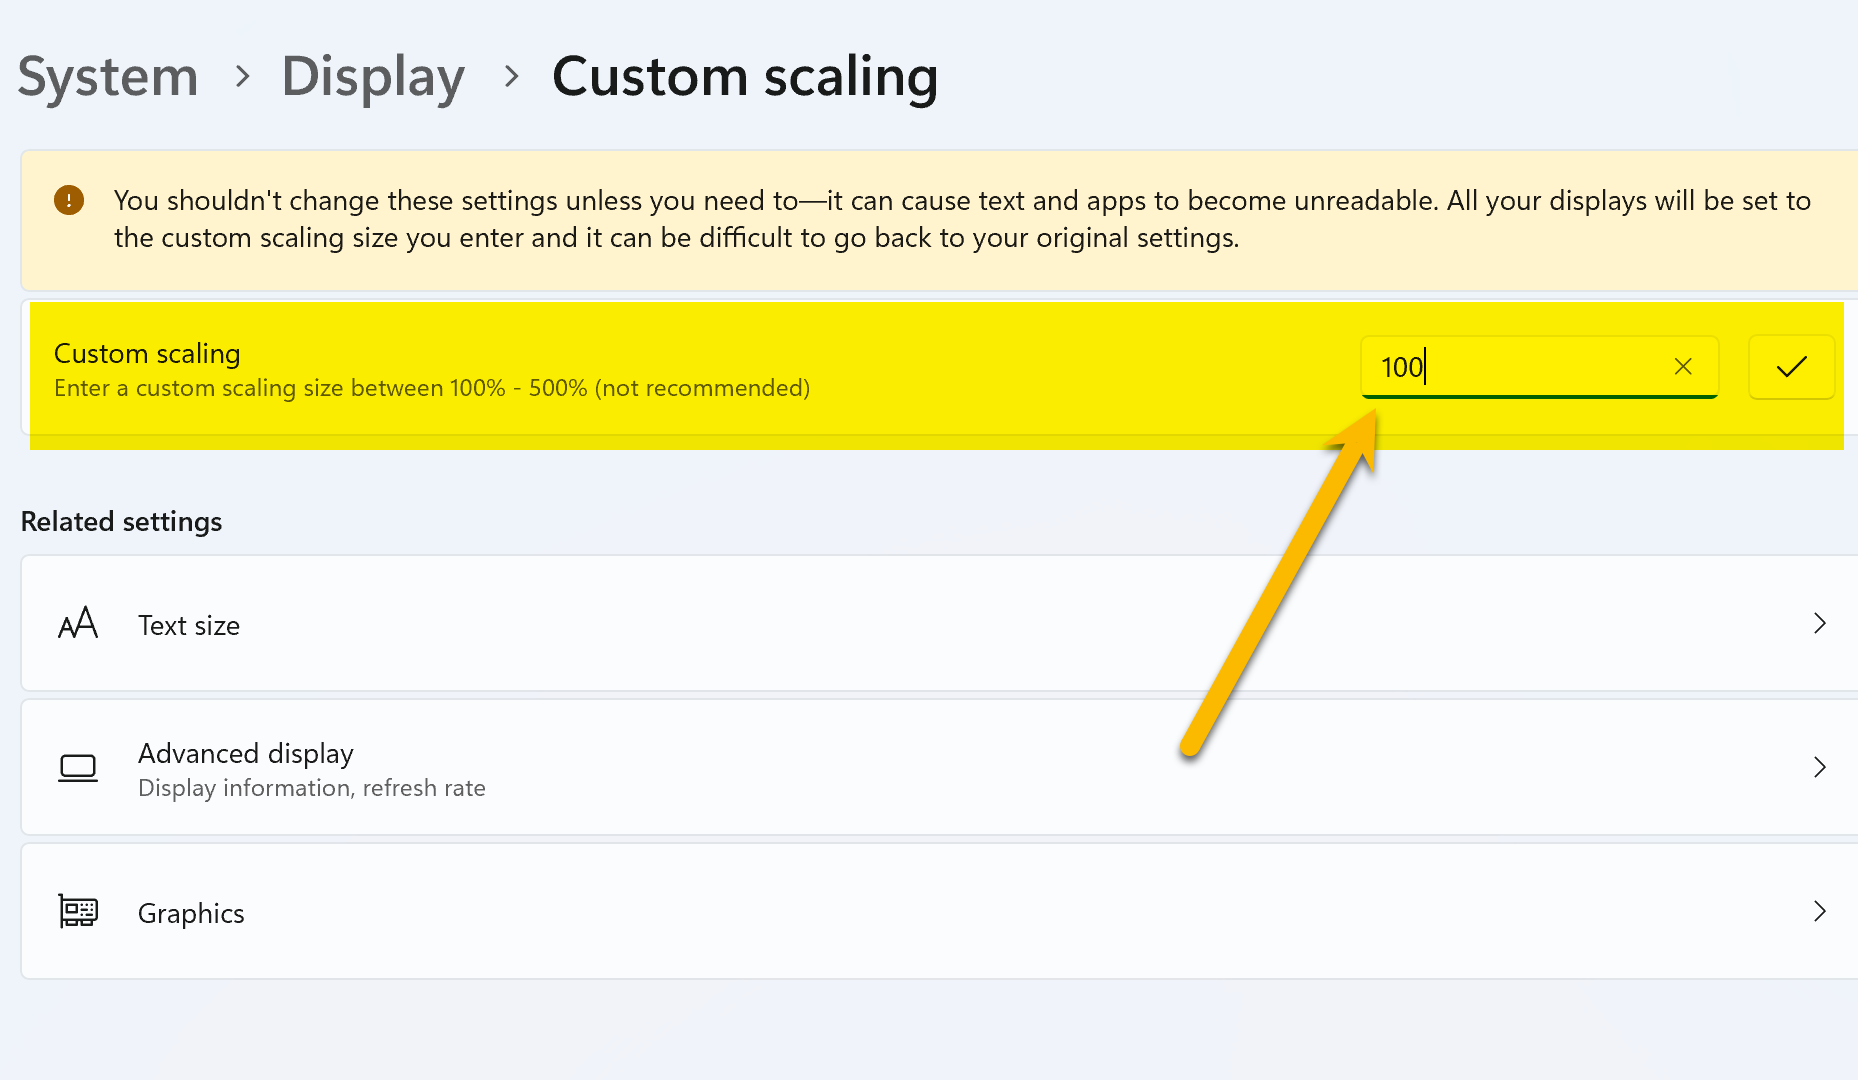
Set Display Scaling to 100%
Make sure Scaling is set to 100% on all displays in Windows display settings.
Getting Started
Be prepared to be frustrated when things don't work at first. PUP Packs require everything to be configured correctly. Read The Manual. The author(s) put enormous effort into creating and documenting this software — read it, read it, read it.
Once configured correctly, you will be amazed at the overall experience.
Step 1: RTFM. All steps, images, and videos are available online. Take the few hours required to get to know the software — it is so much more fun when you understand everything you're doing.
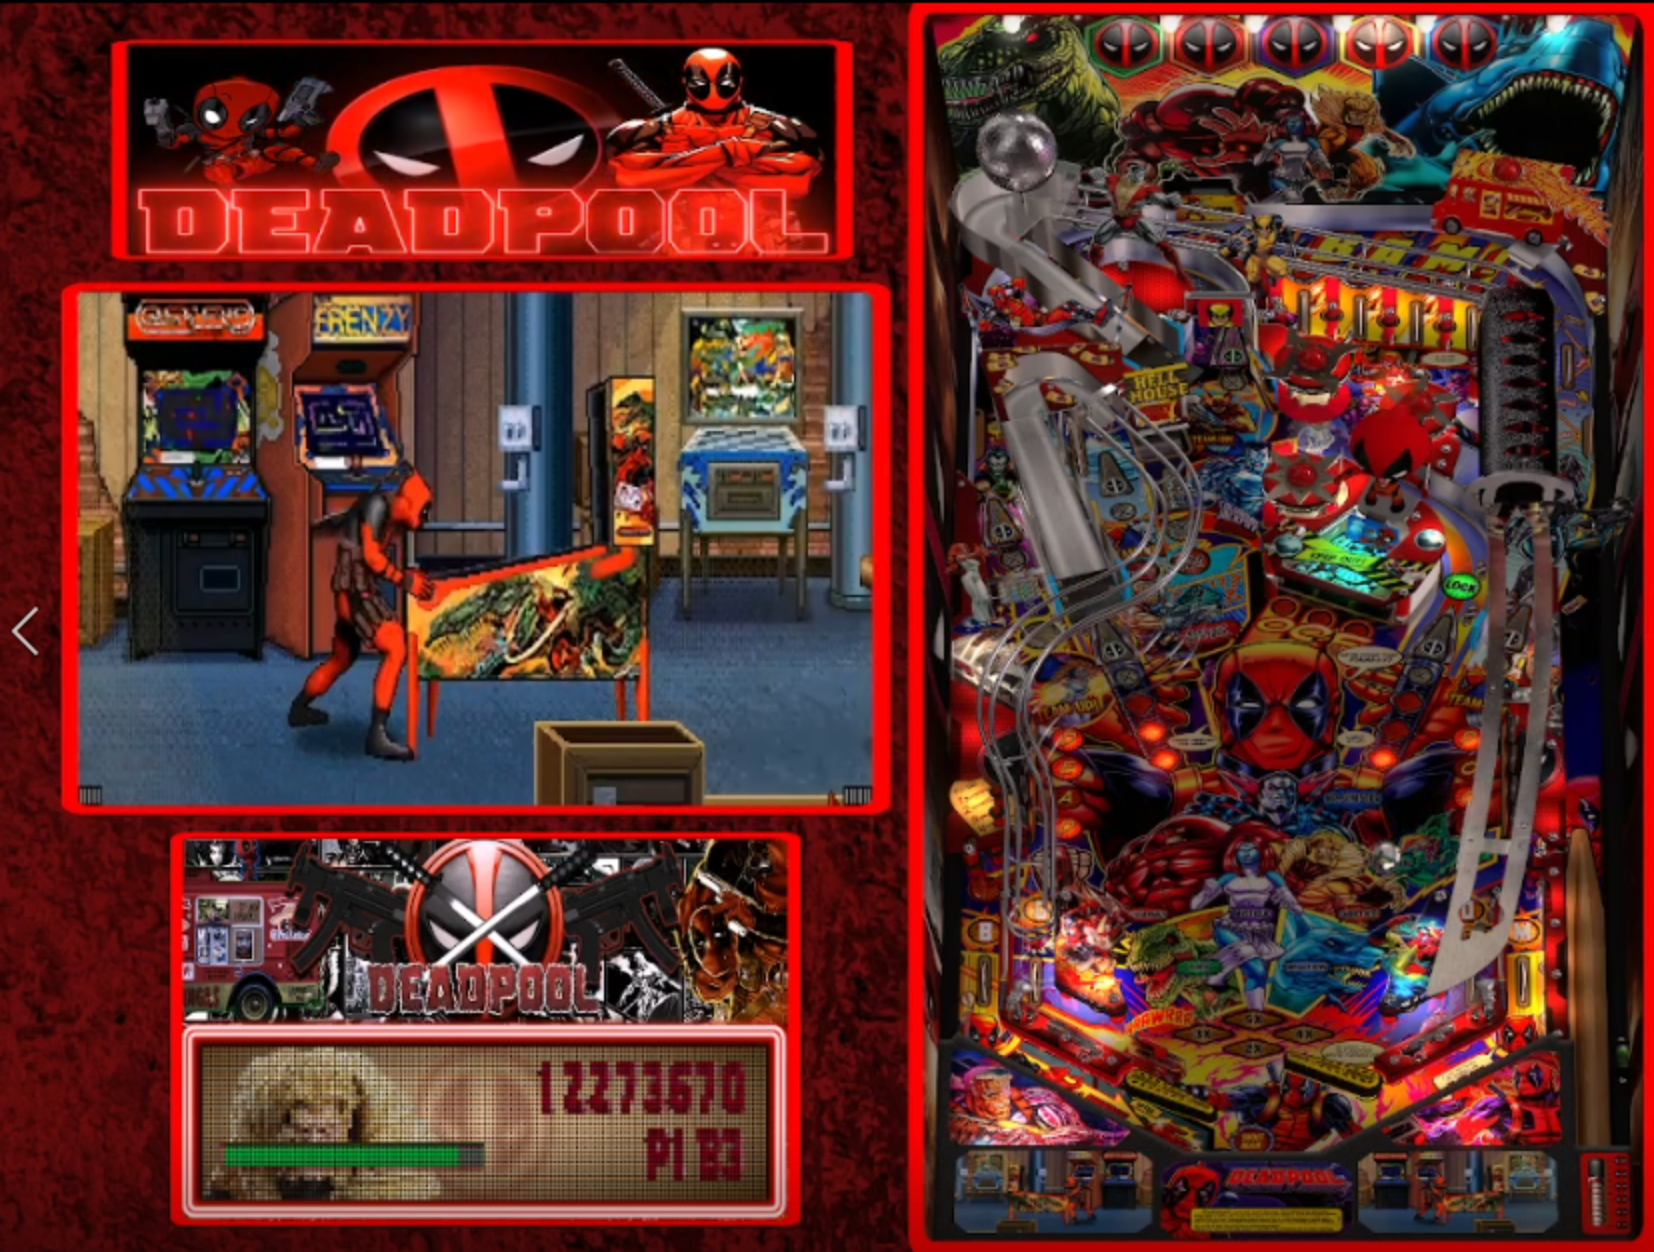
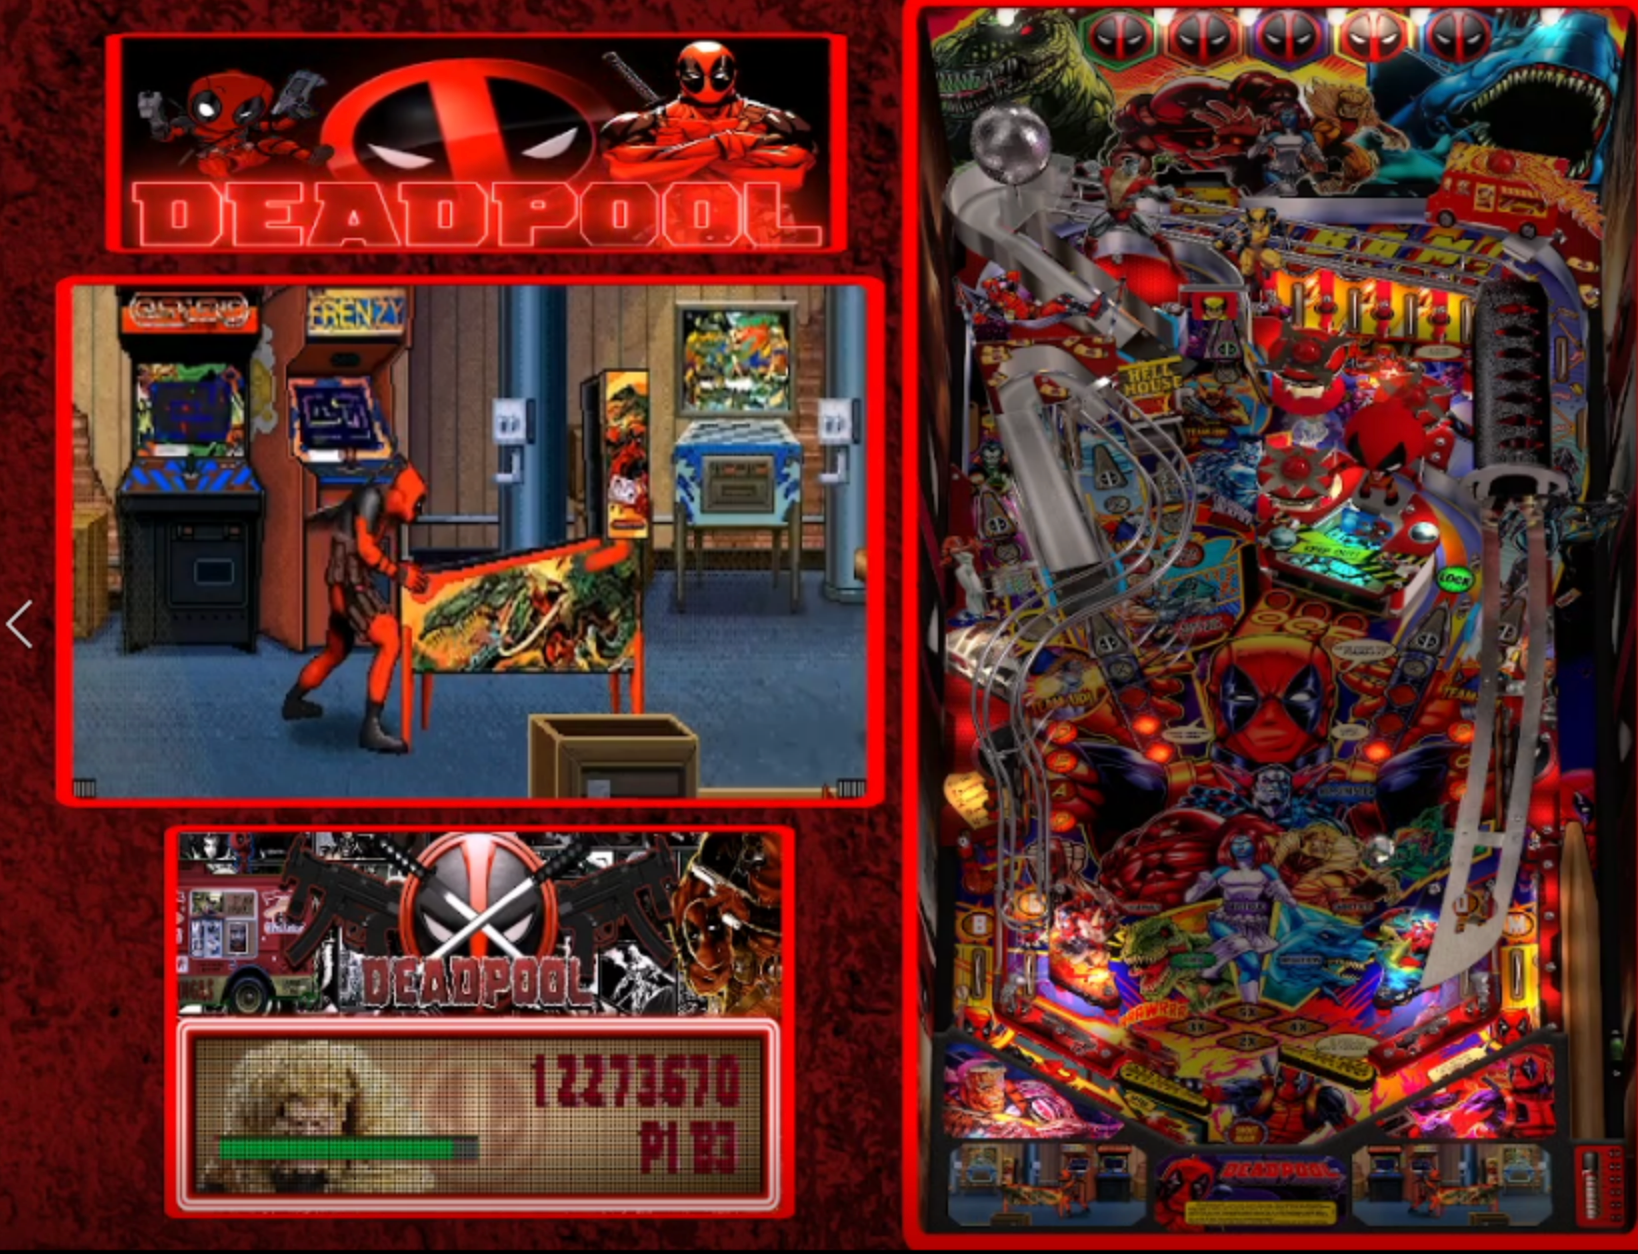
A PUP Pack for JP's Deadpool.
PinUP Player Installation
Install PinUP Player first, before the front end. Download link at Nailbuster's wiki.
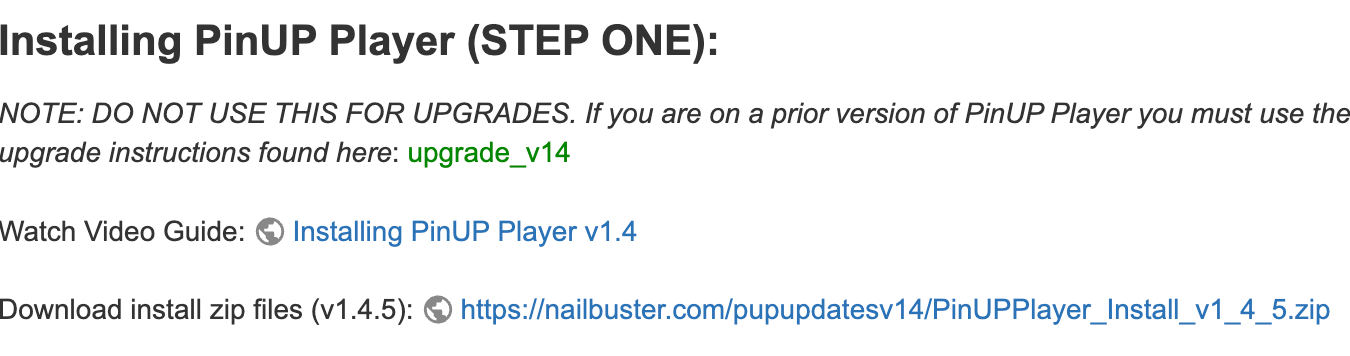
- Download PinUP Player, unblock, and extract
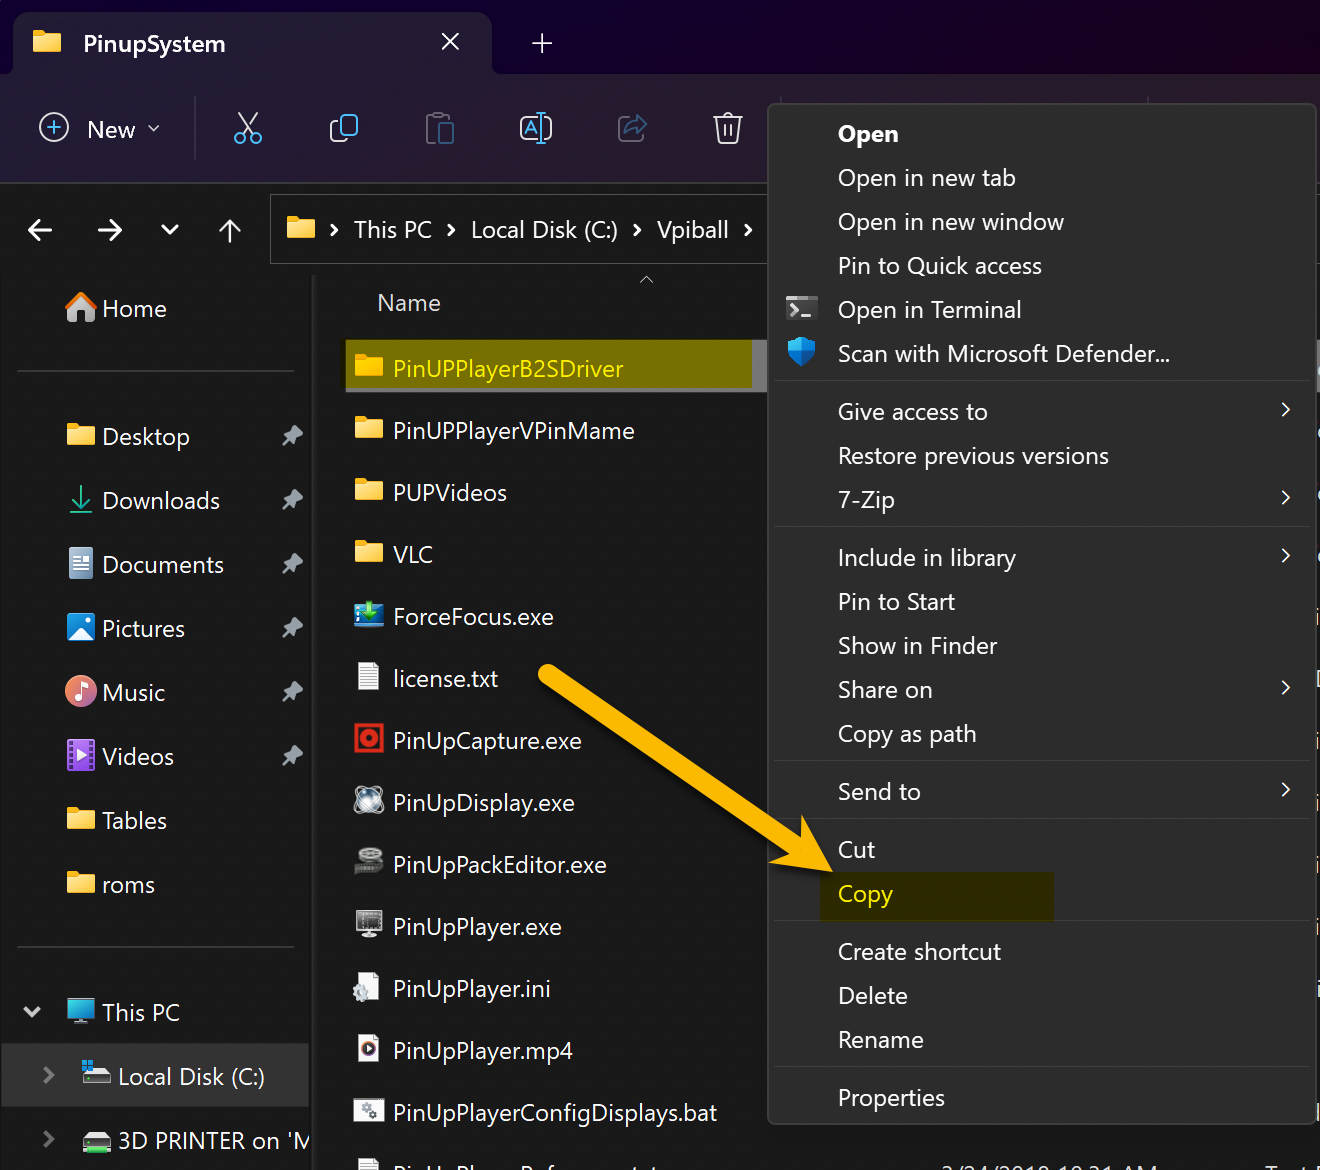
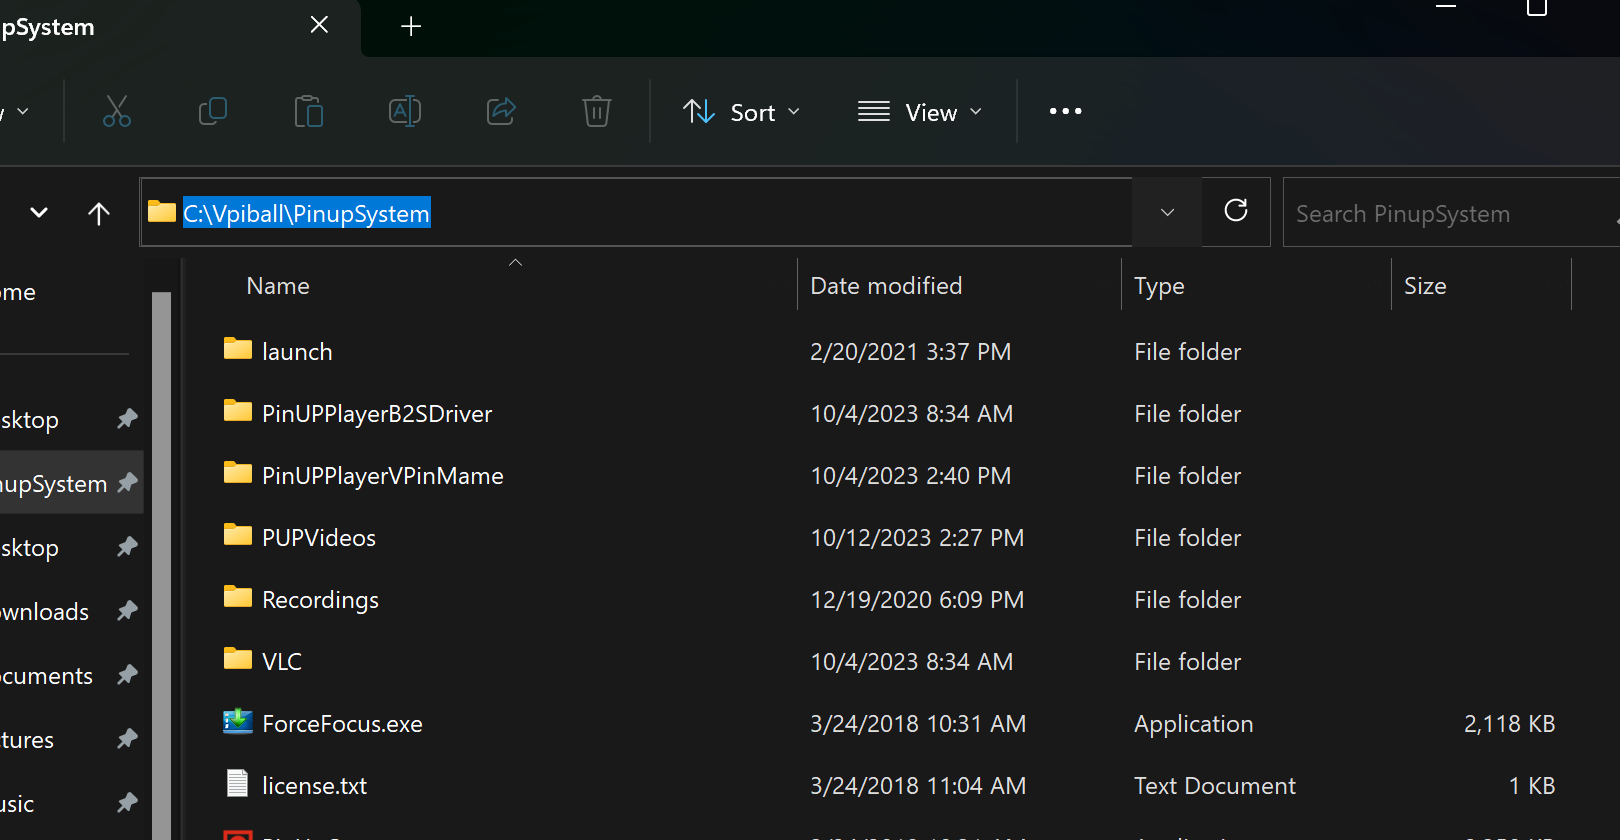
- Copy all files to a folder of your choice — recommended:
C:\Vpinball\PinupSystem
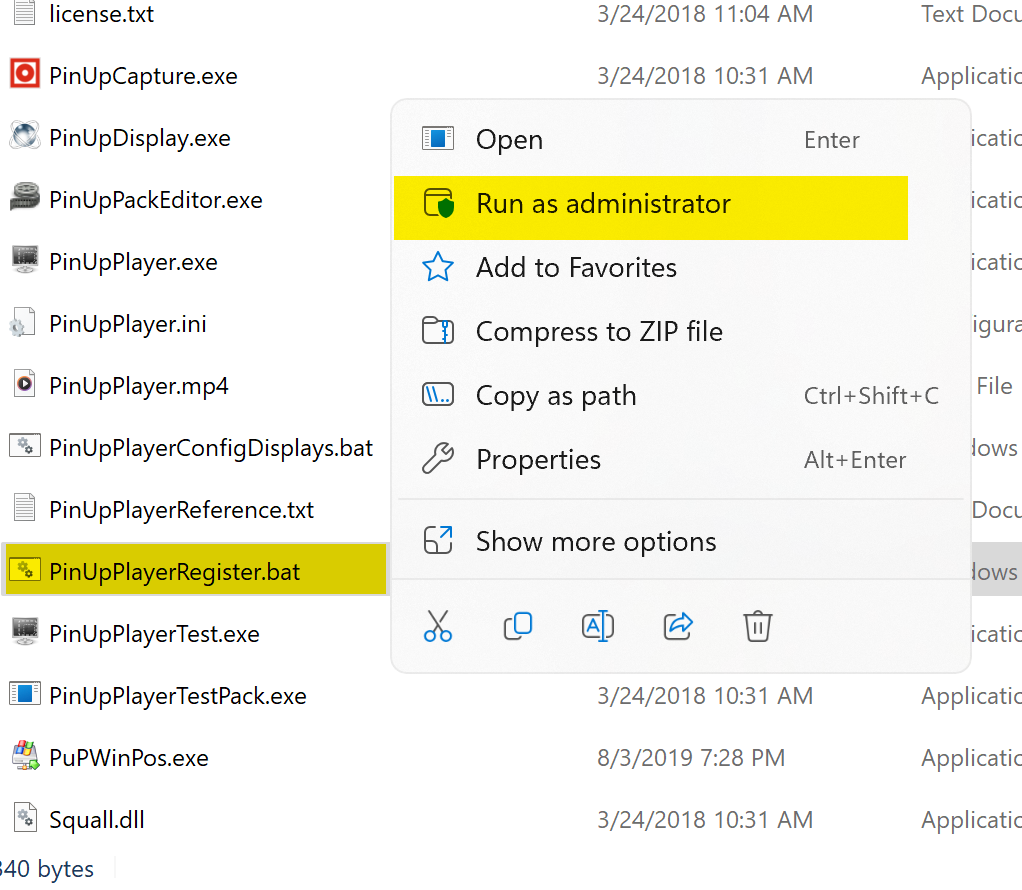
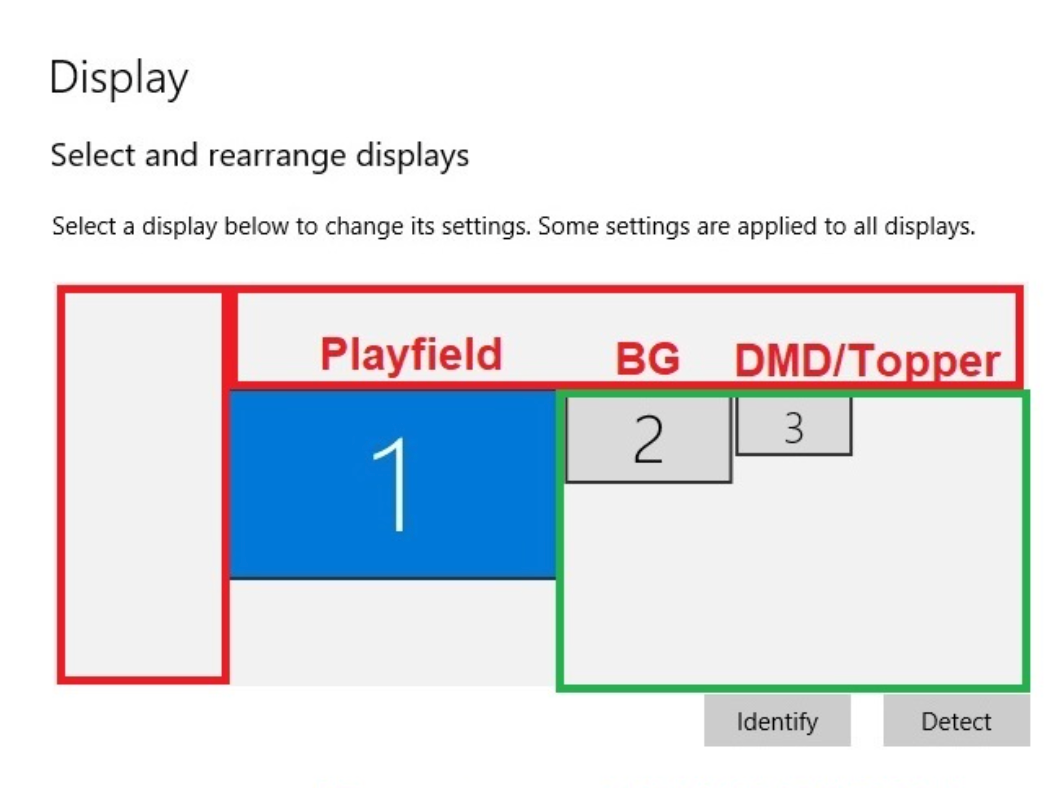
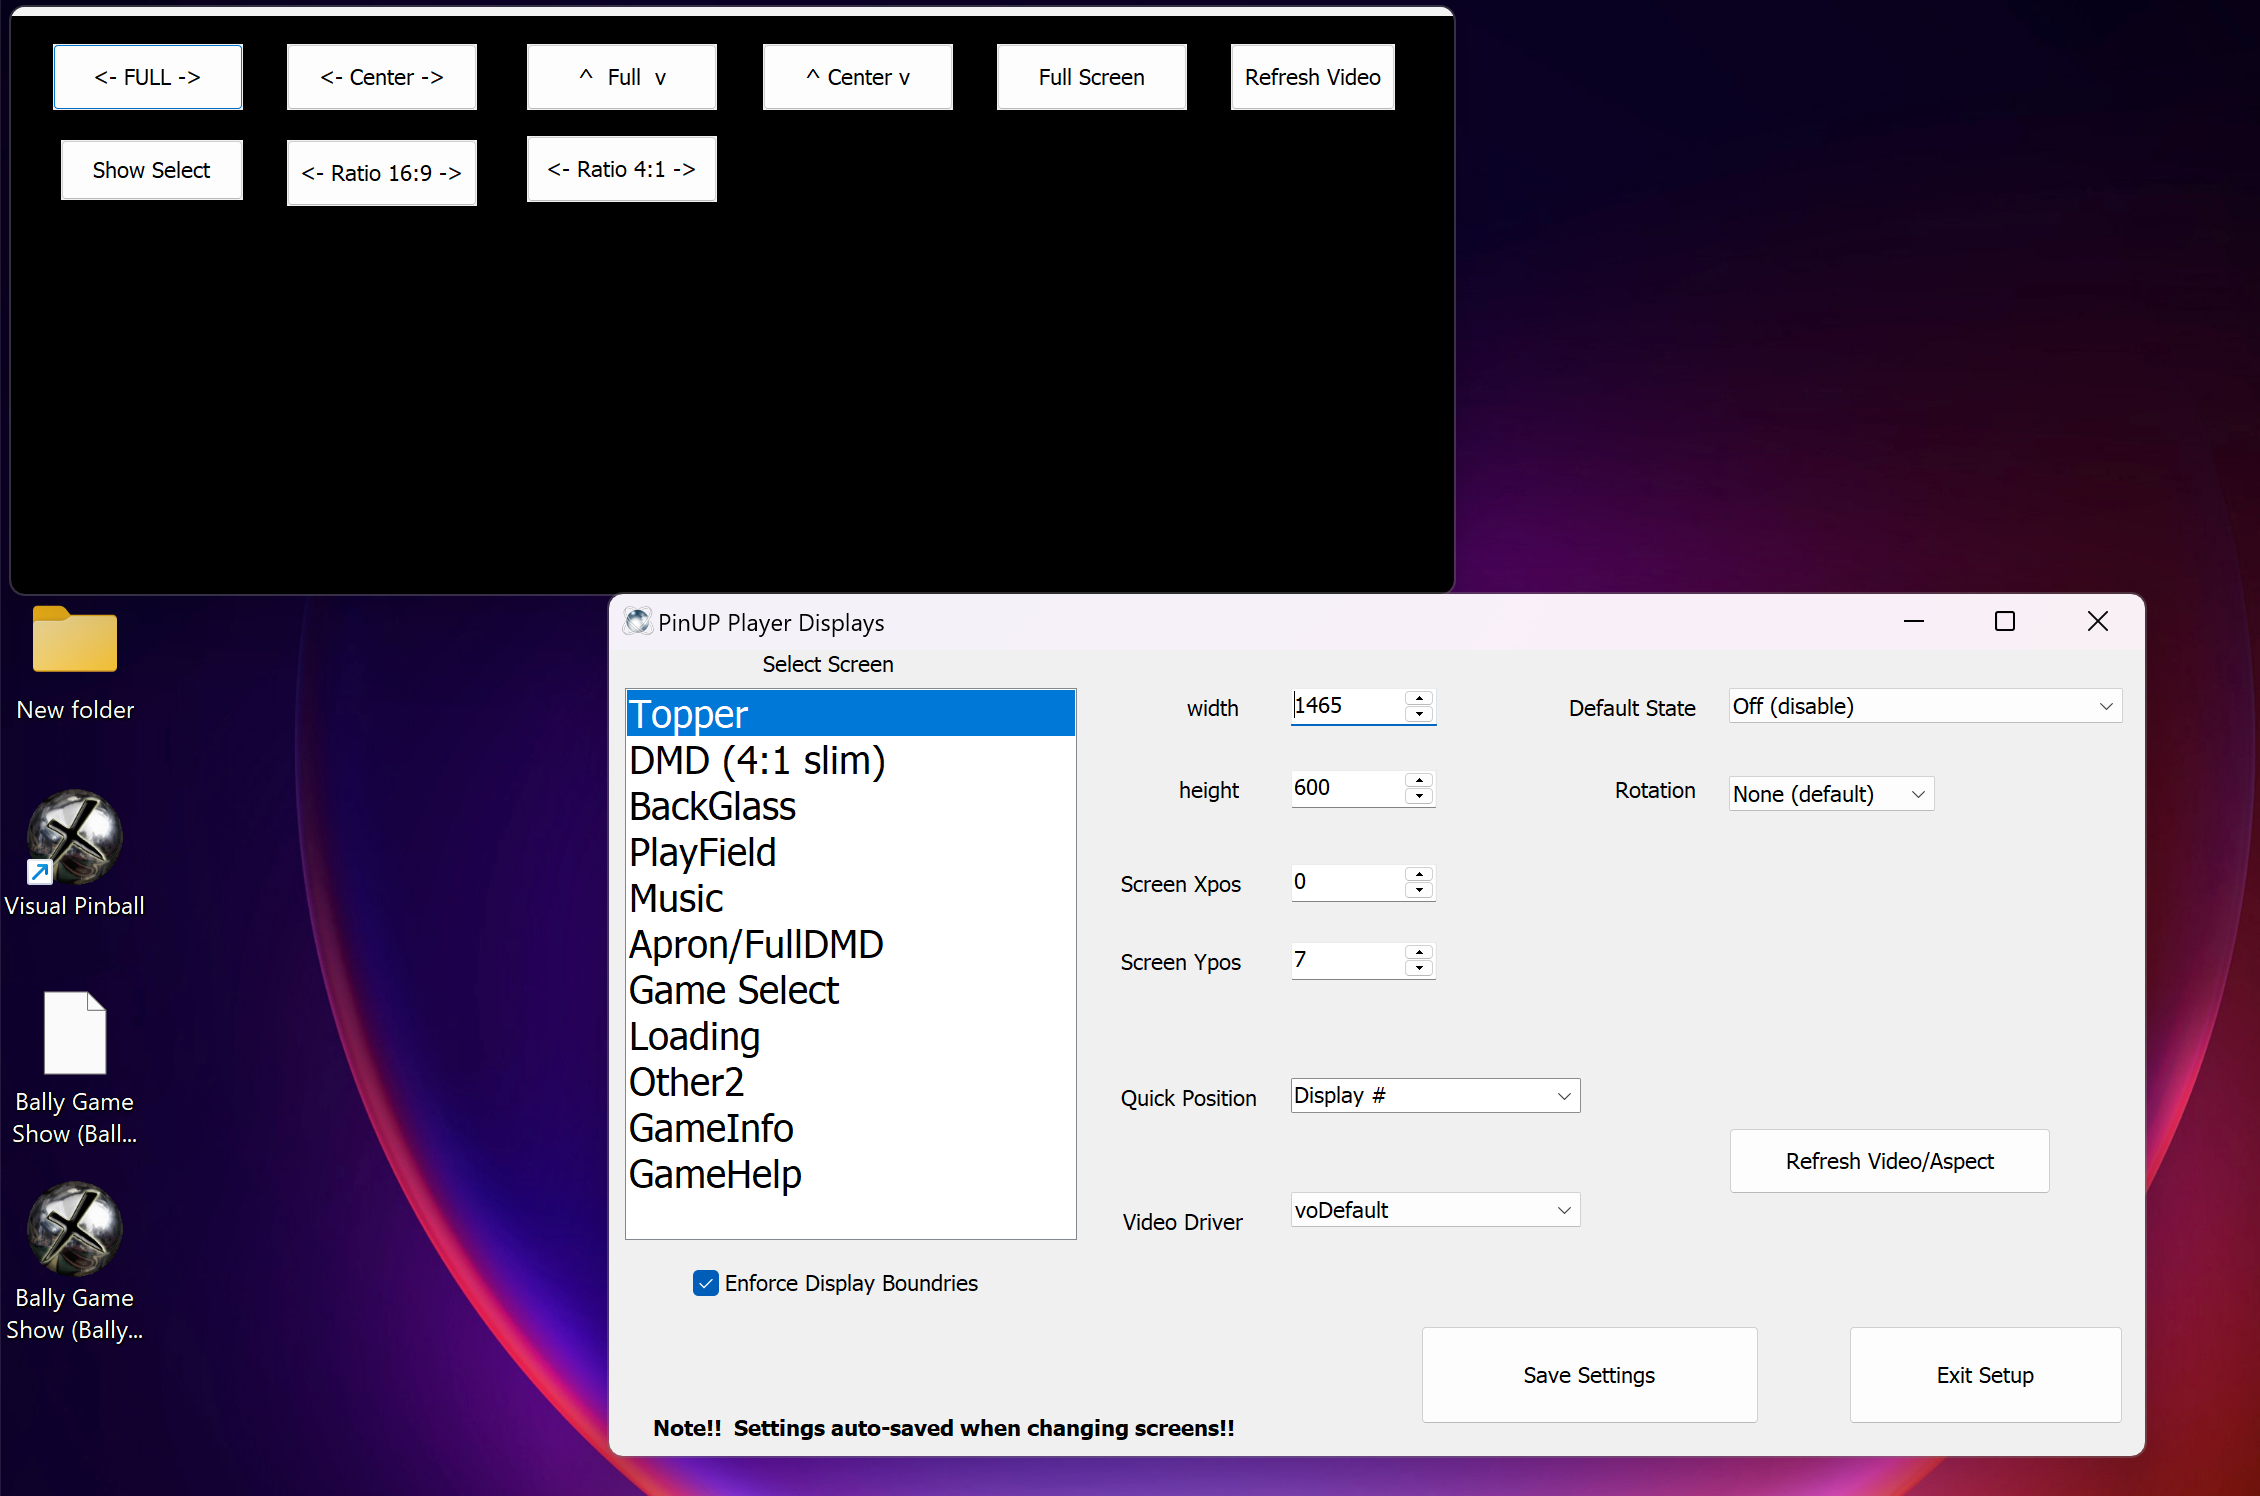
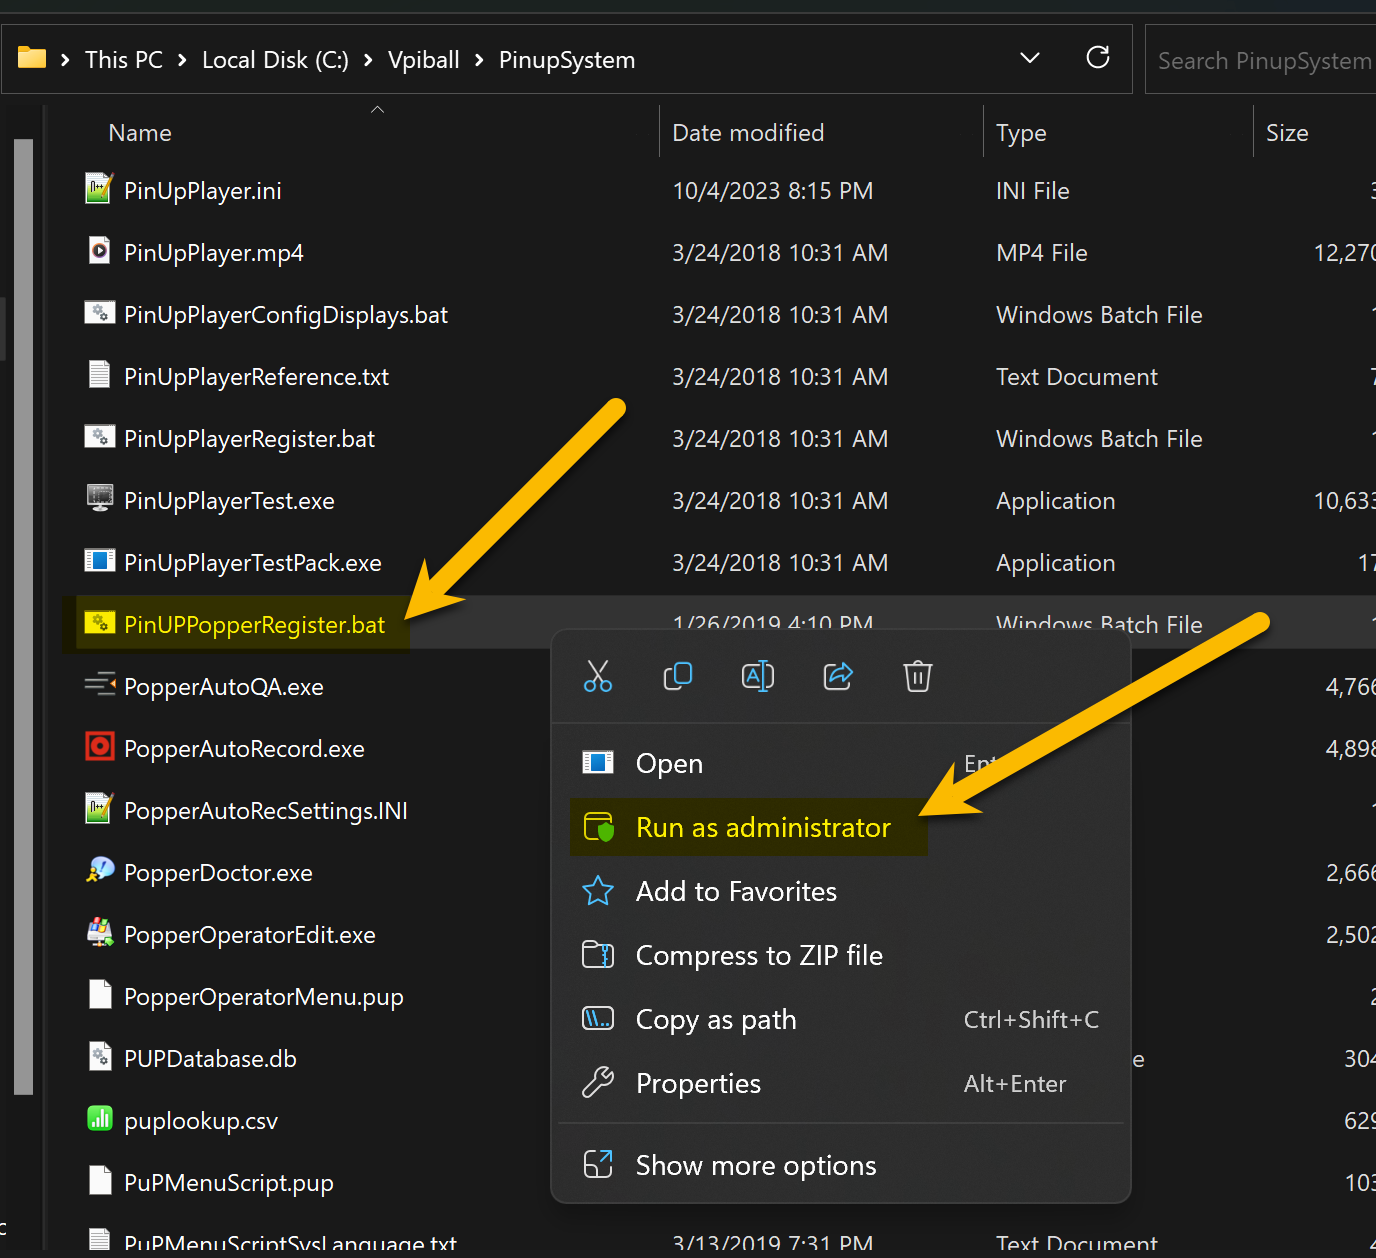
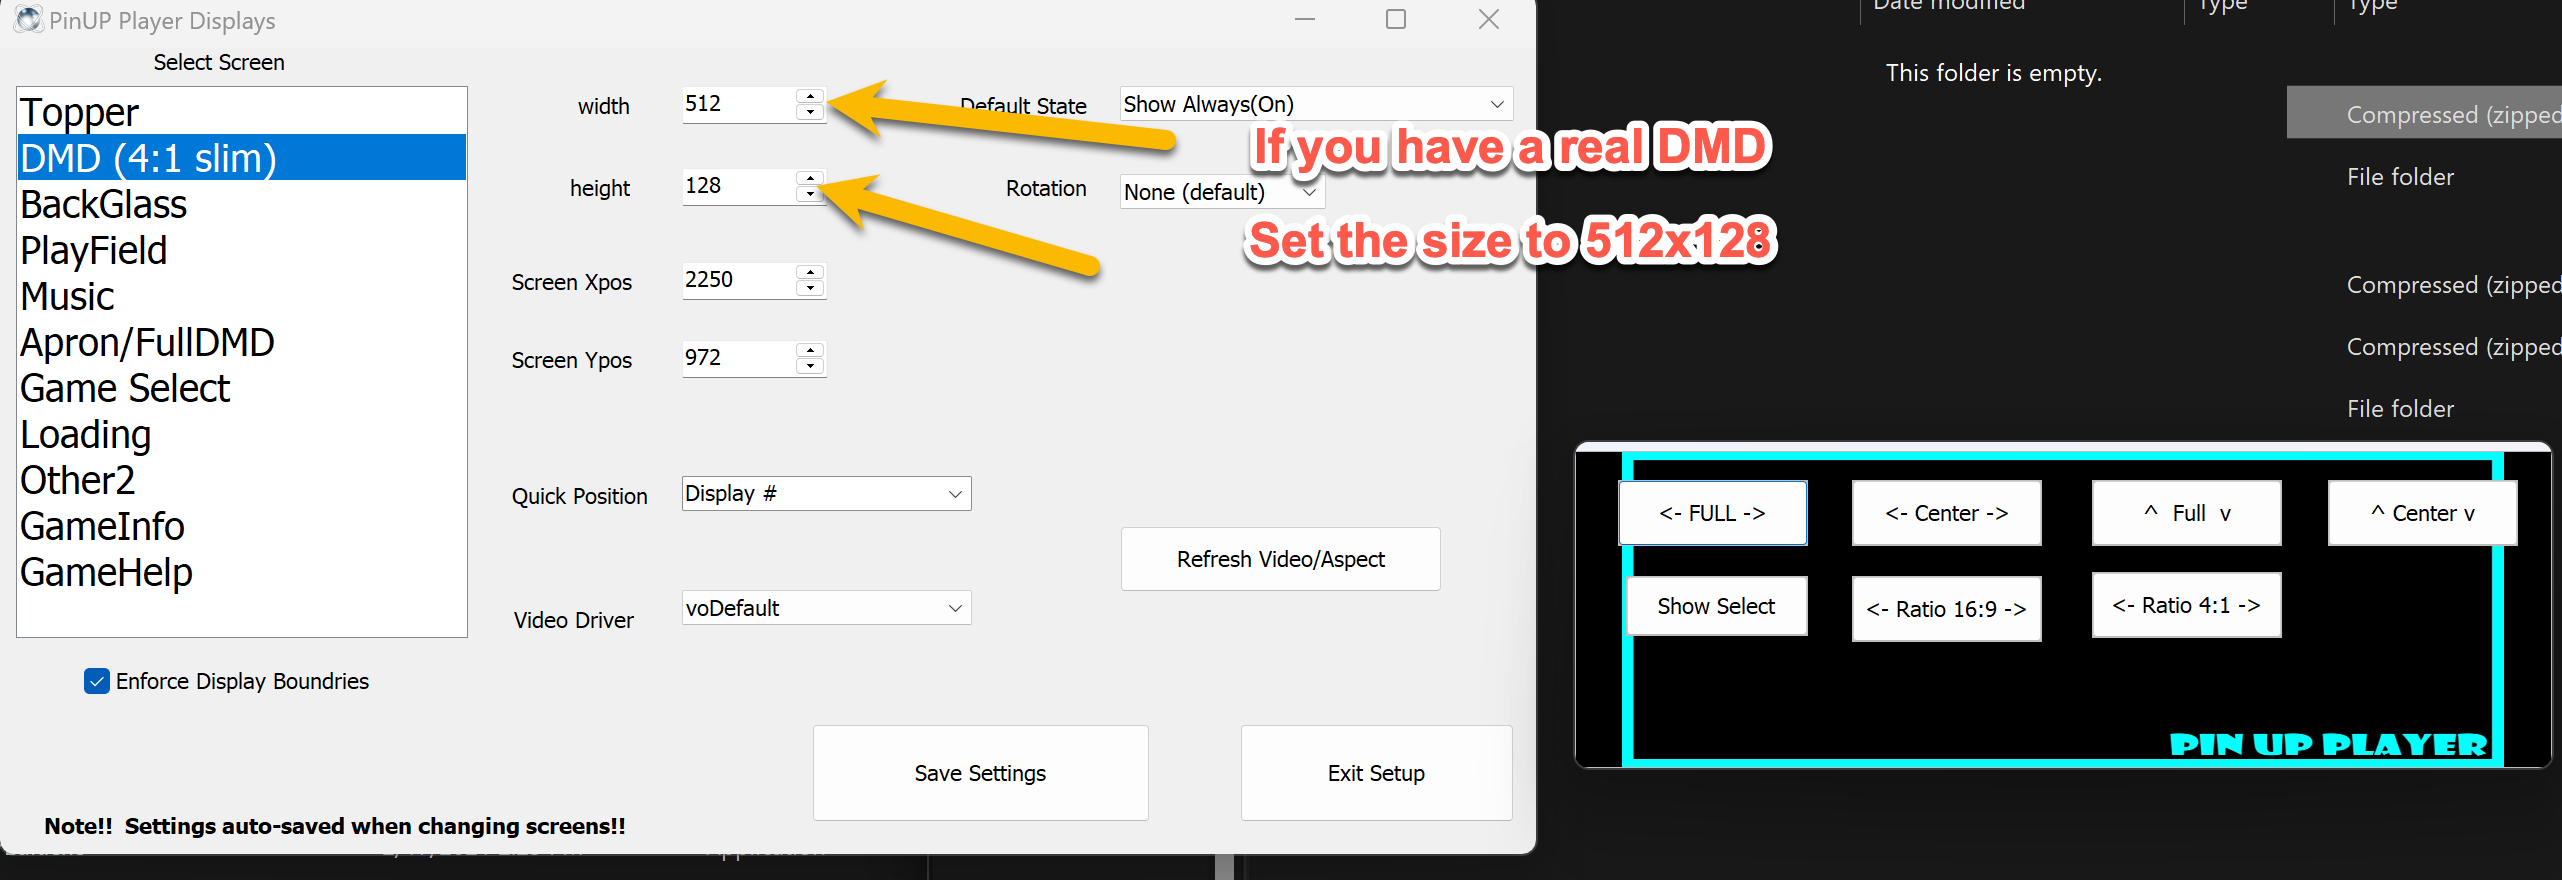
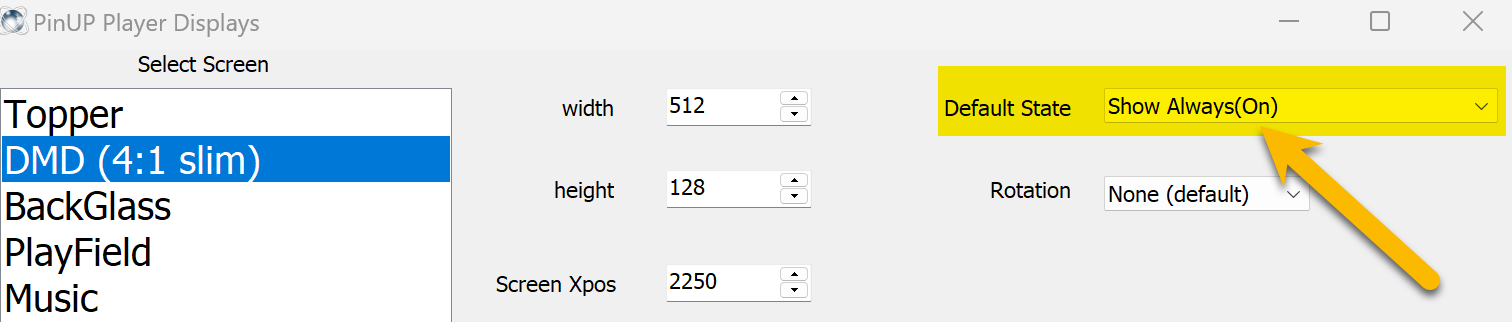
Right-click PinupPlayerRegister.bat → Run as Administrator. You'll be presented with the PinUP Player Screen Config setup.
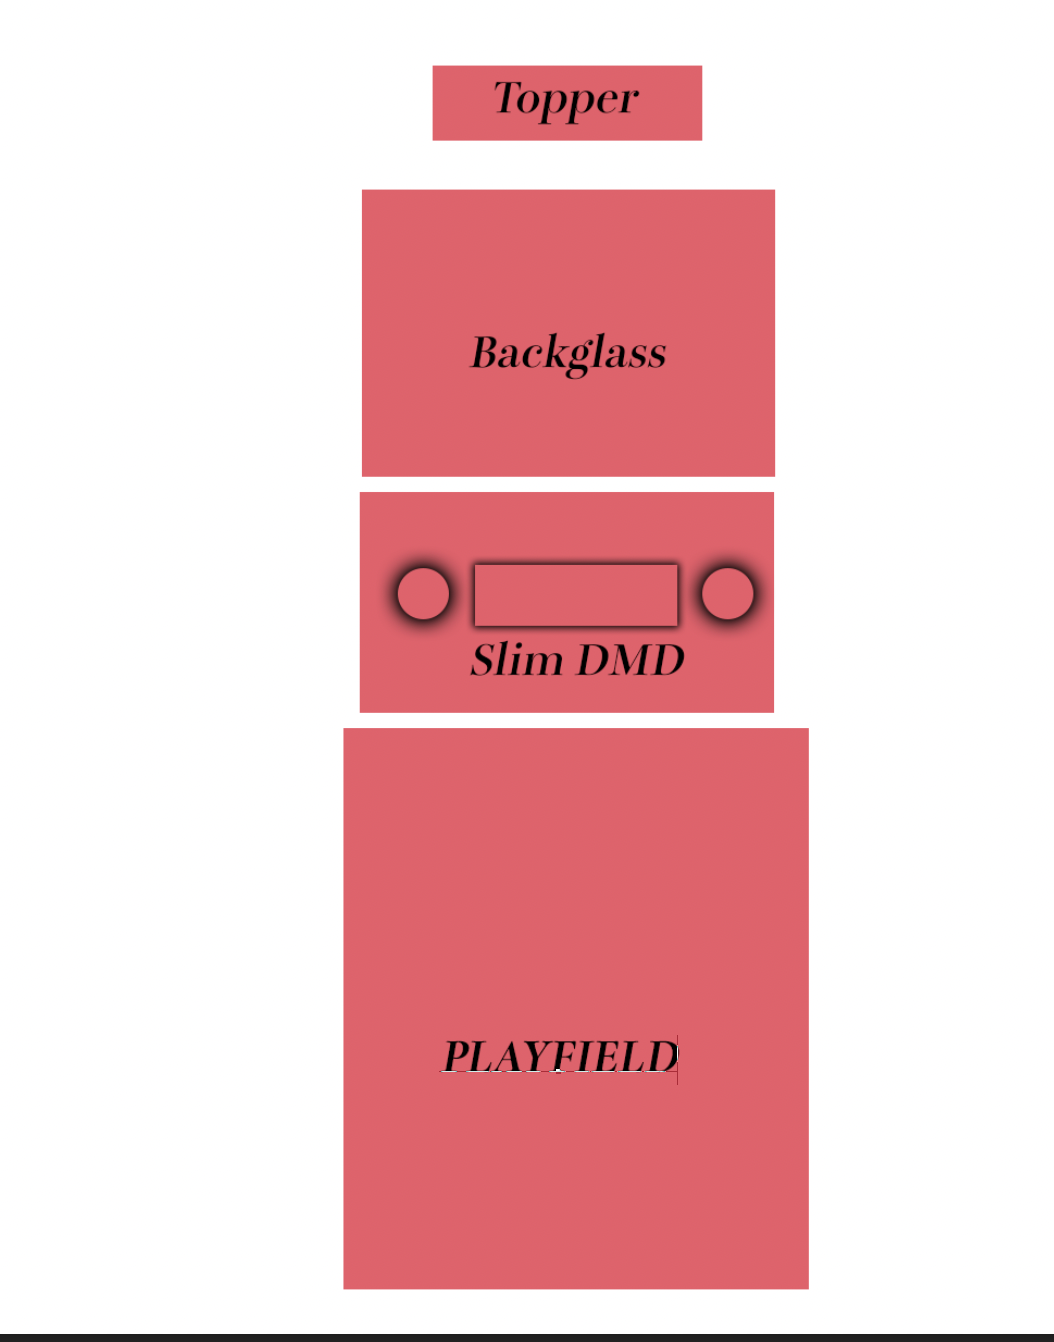
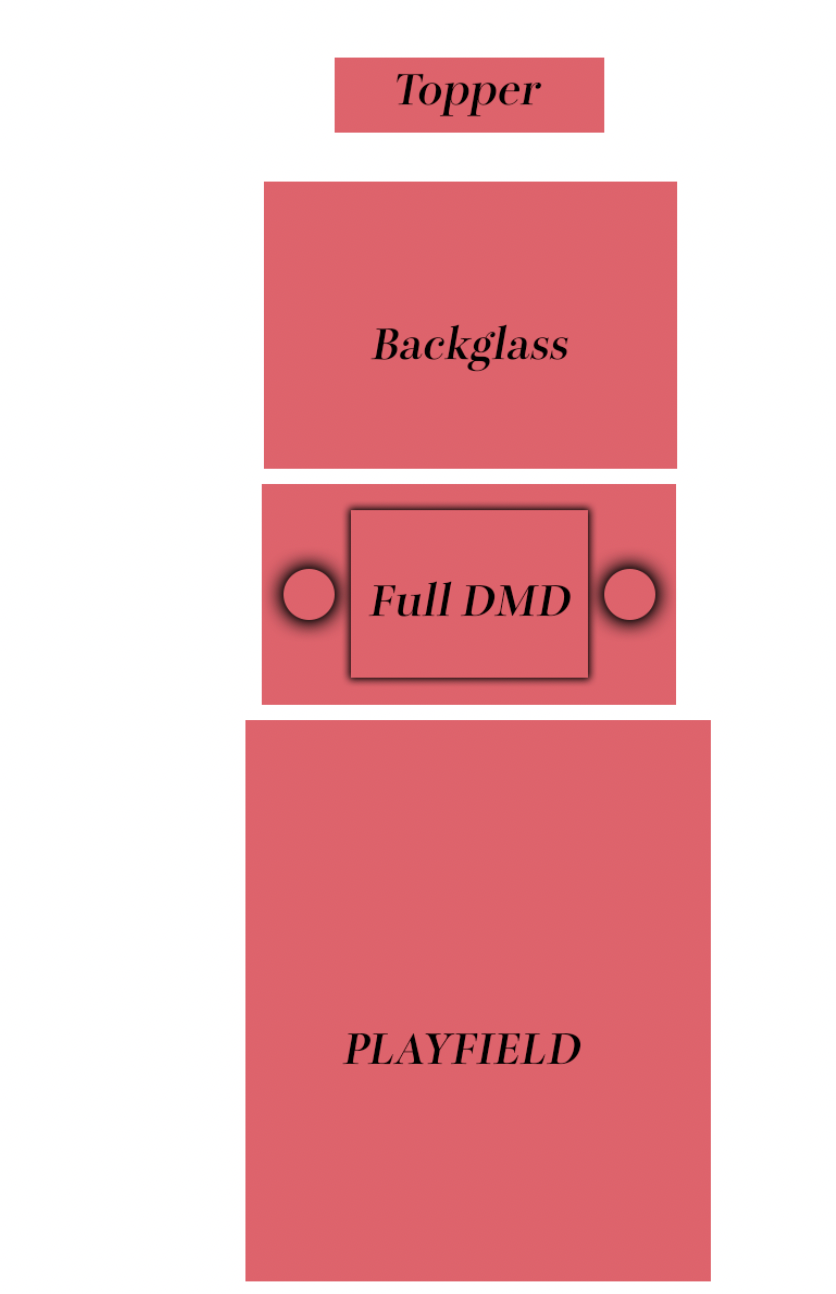
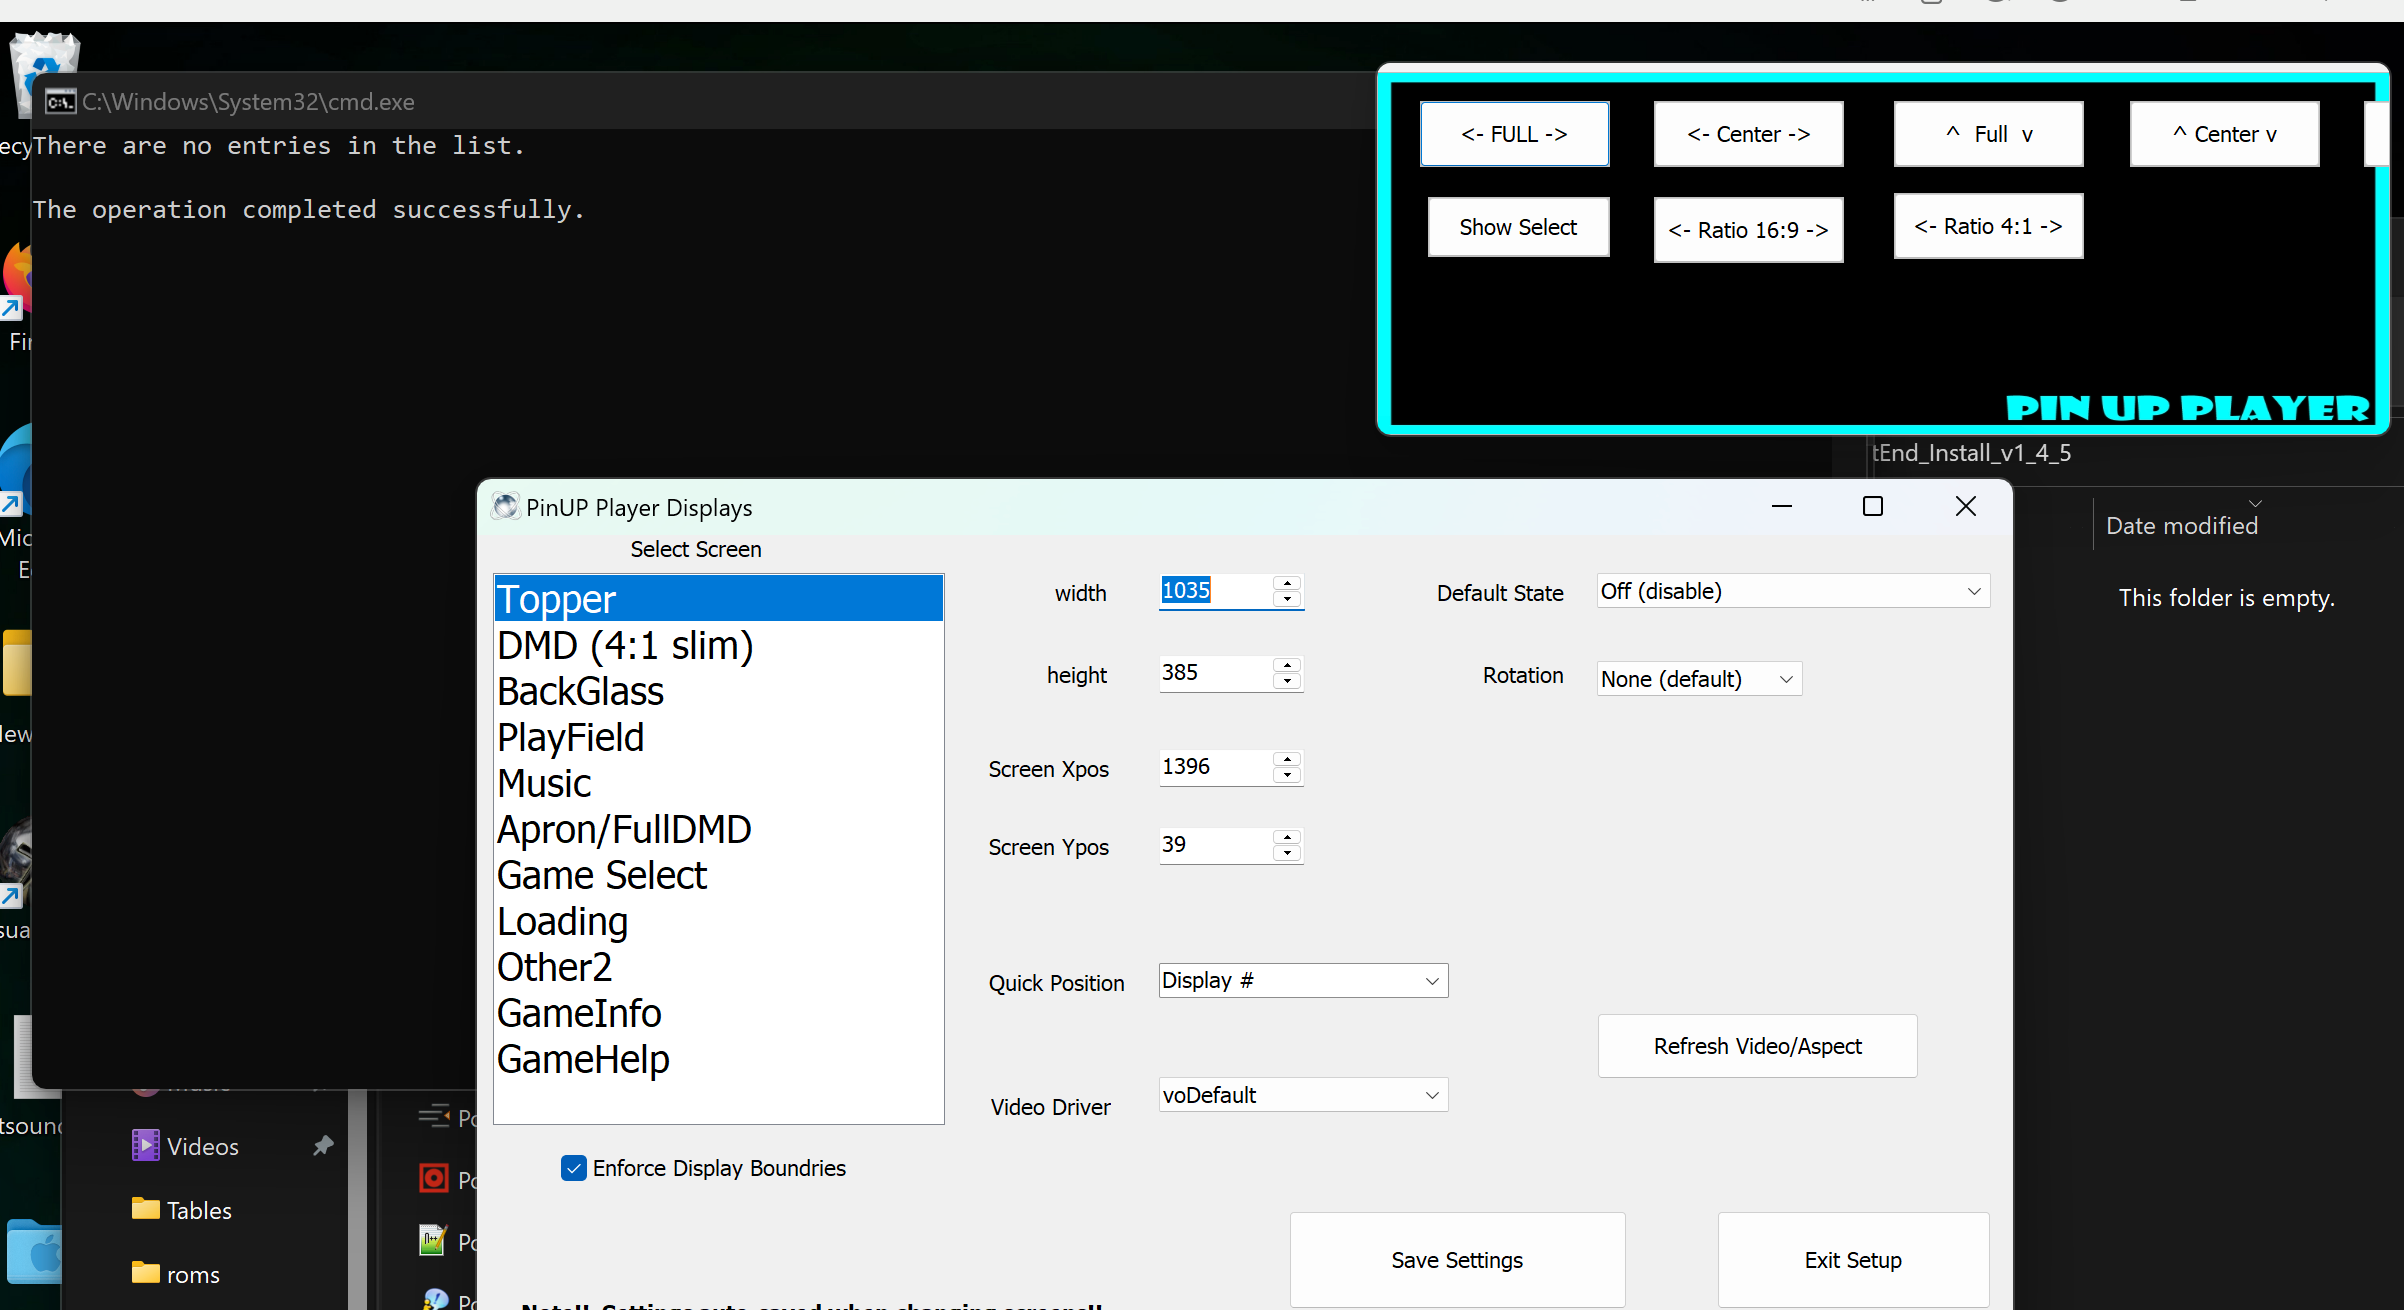
A topper is an additional screen above the backglass. If you don't have one, allocate a space on the backglass screen. Toppers display images, text, or looping videos.
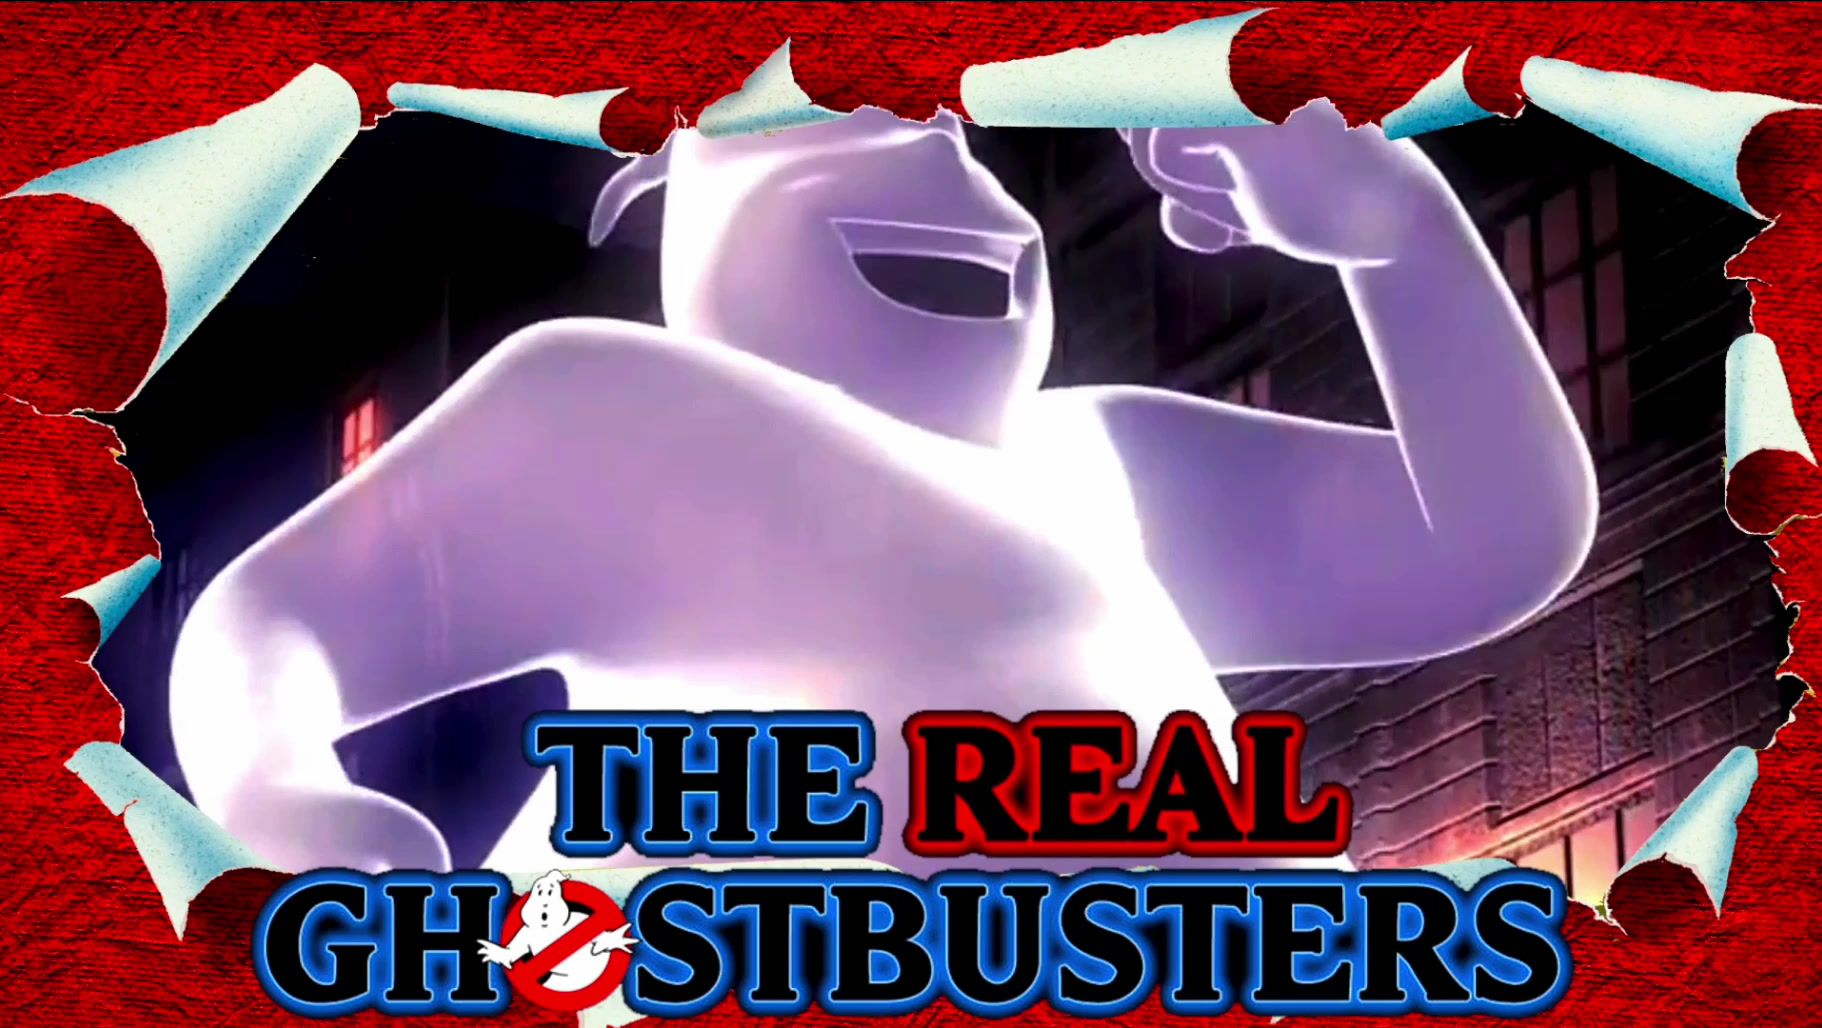
Example topper animation: The Real Ghostbusters by SERGIOSOUZA. Toppers can be downloaded from Facebook Groups, Discord, VPUniverse, VPForums, and the built-in media server.
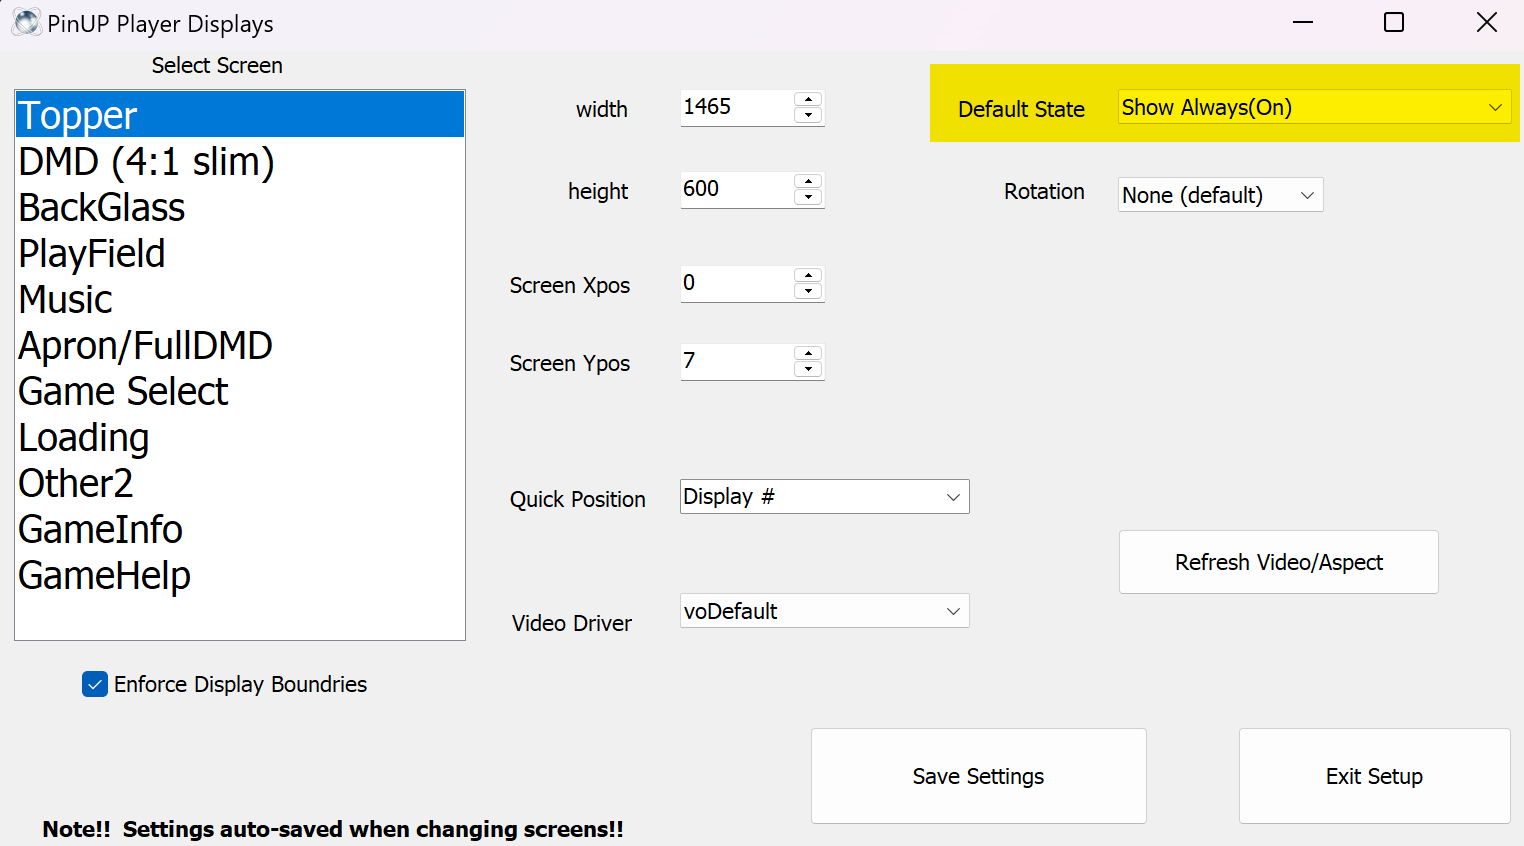
Select all screens and size to your desired proportions. For a single-screen setup, place the topper and Slim DMD at non-overlapping locations on your main screen. You can always adjust this later — for now, Save and Exit.
Copy PinUPPlayerB2Sdriver to the folder where your B2S server files are (where B2S_Setup.exe is located).
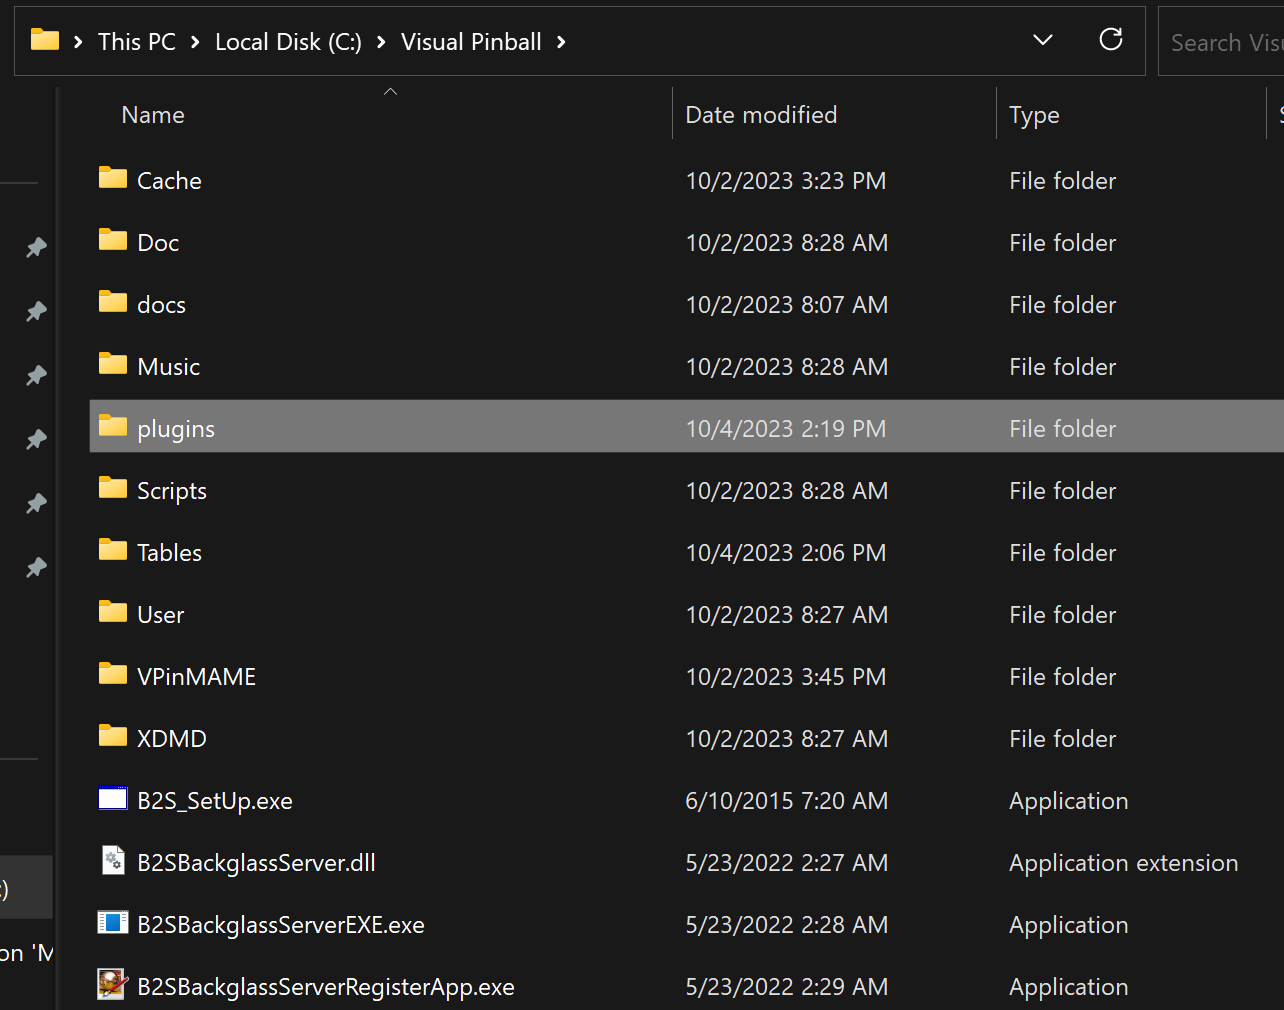
Open (or create) a plugins folder, right-click inside it and select Paste Shortcut.

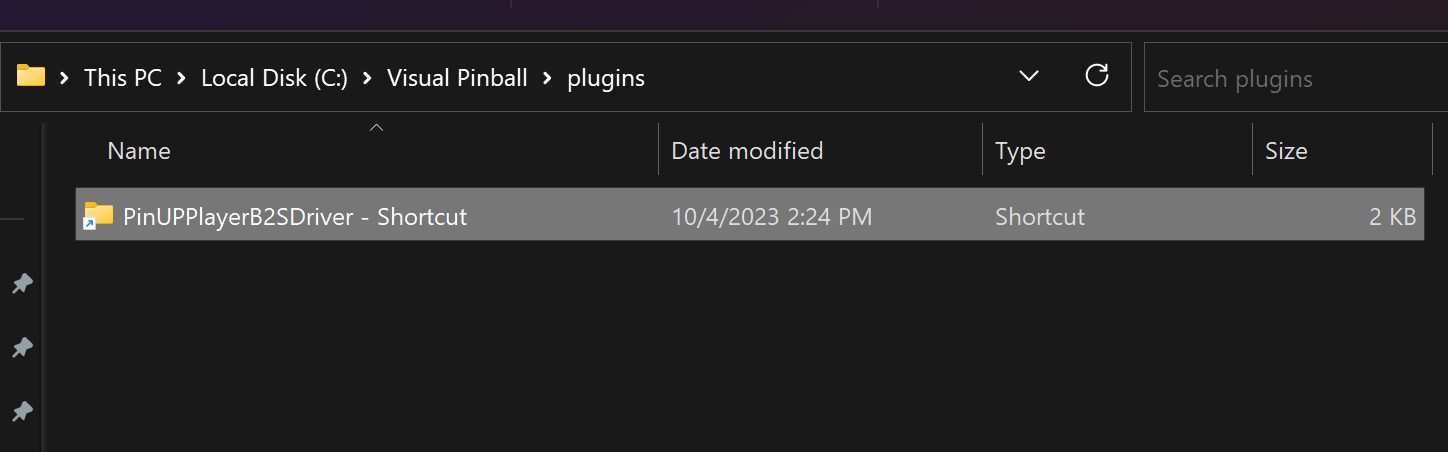
This is what your folder should look like. The B2S driver is now installed.
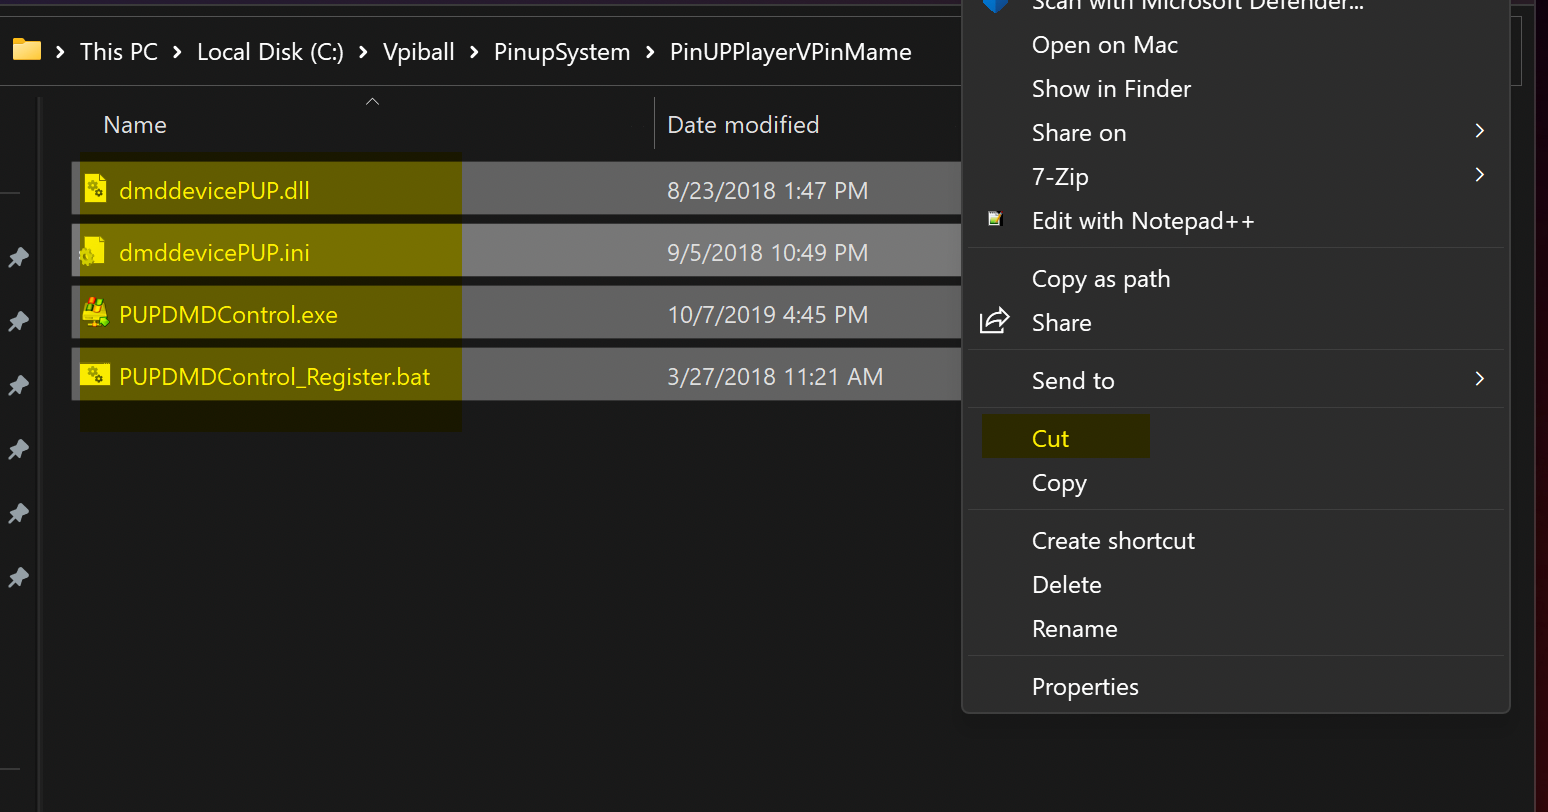
Navigate to C:\Vpinball\PinupSystem\PinUPPlayerVPinMame, select all files, cut, and paste into C:\VisualPinball\VPinMAME.
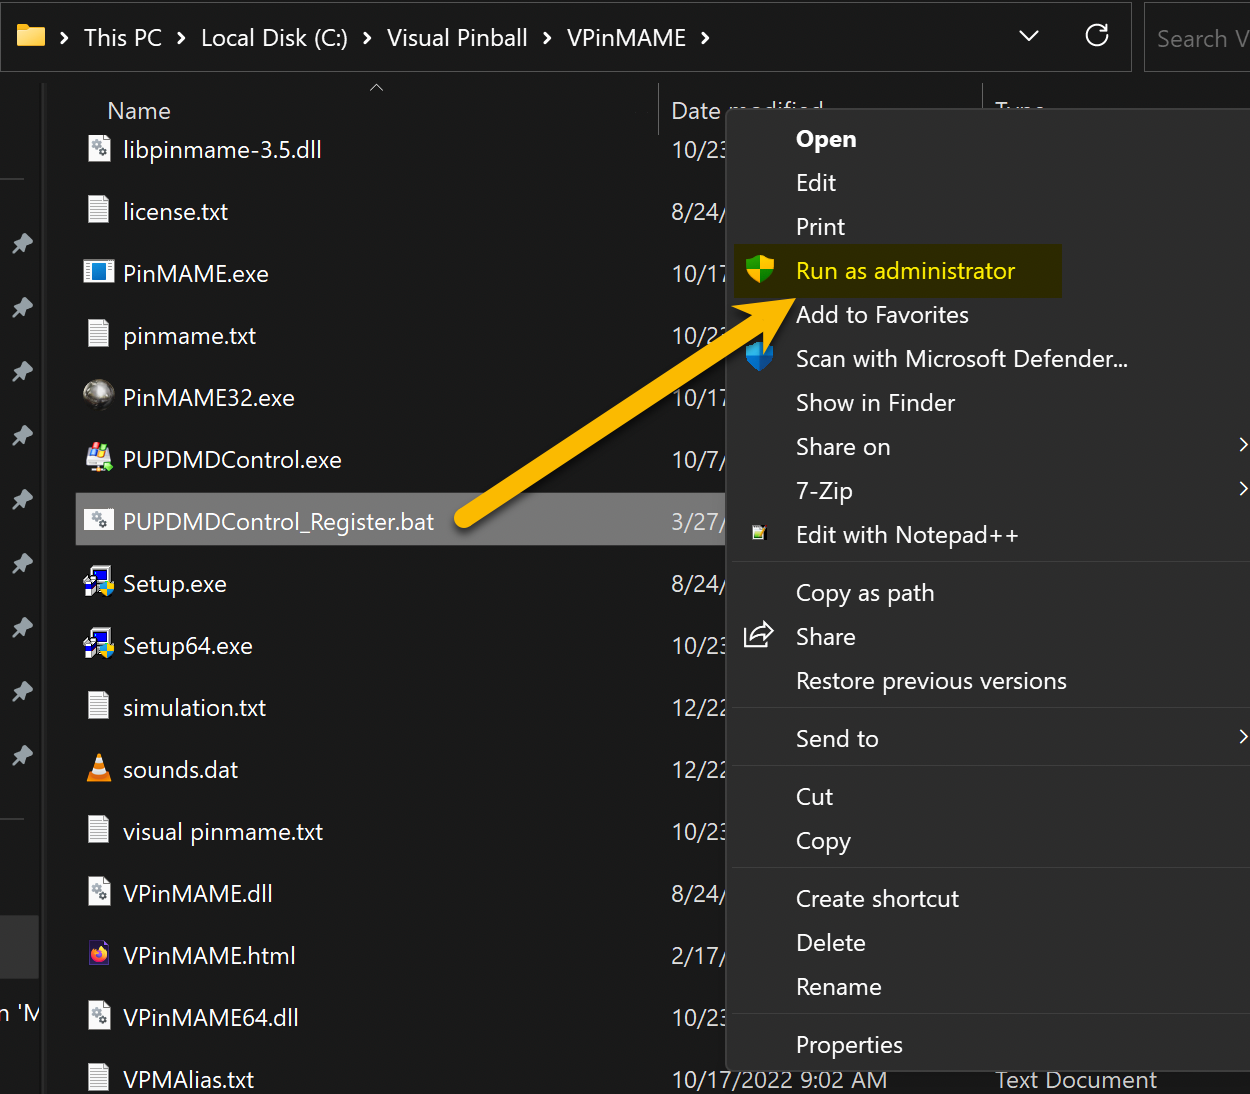
In the Vpinmame folder, right-click PUPDMDControl.bat → Run as Administrator.
Edit DmdDevice.ini to enable PinUP Popper. Use Notepad++ for easy editing.
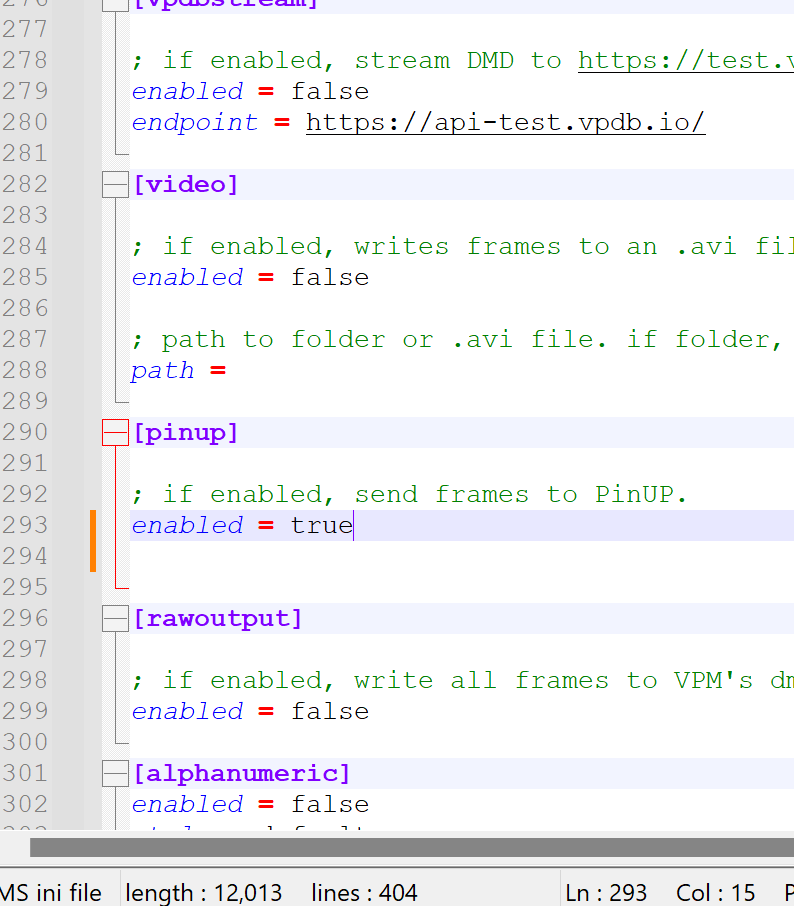
Around line 290, find the [pinup] section and set enabled = true.
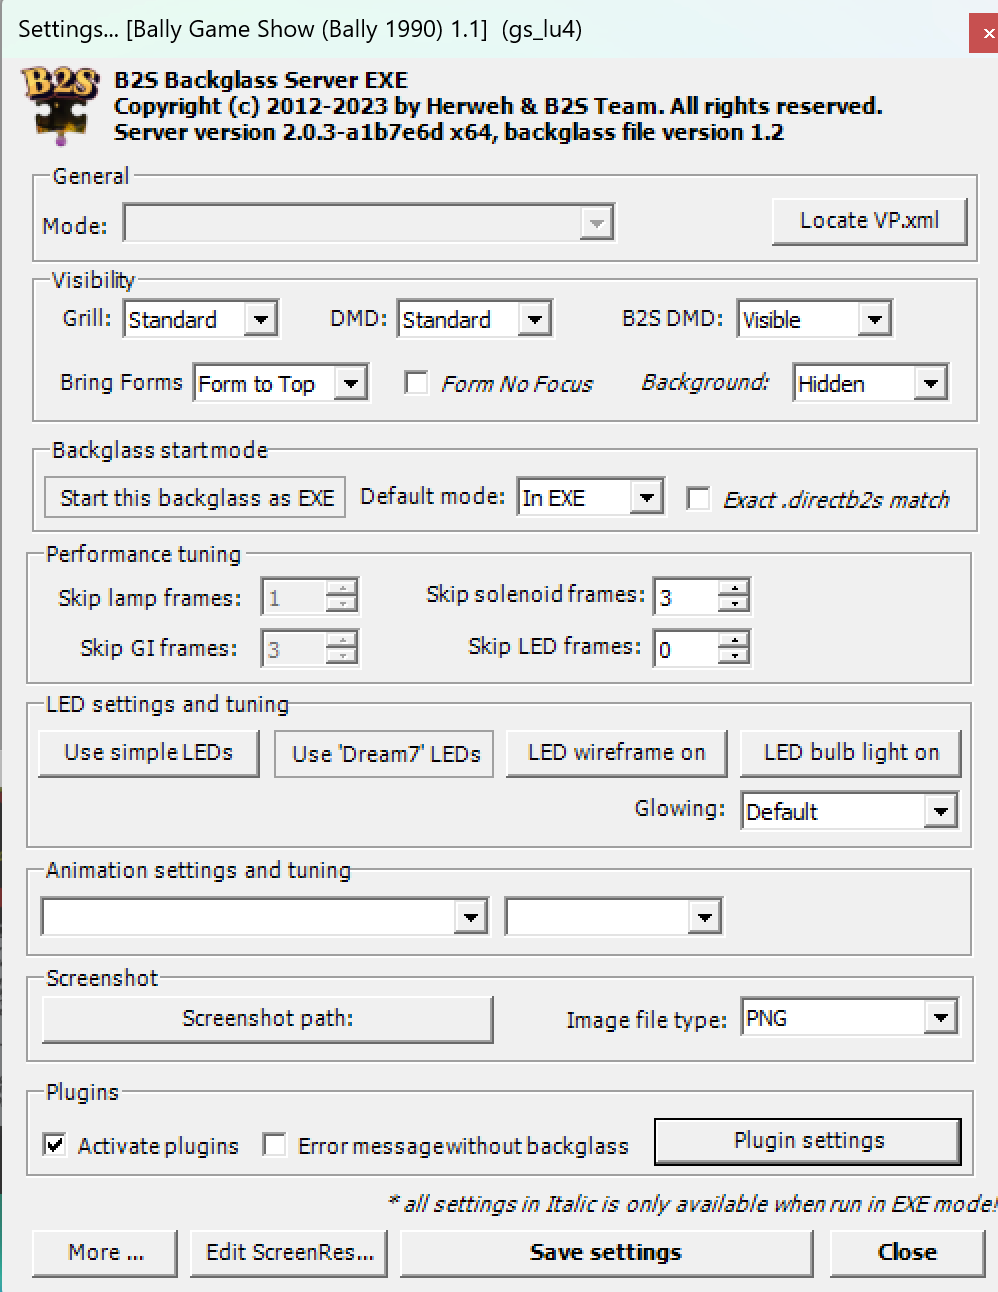
Launch a table. When the backglass opens, right-click it and:
- Check Activate Plugins
- Uncheck Error message without backglass
Close and re-launch the table — the Plugins settings button should now be enabled.
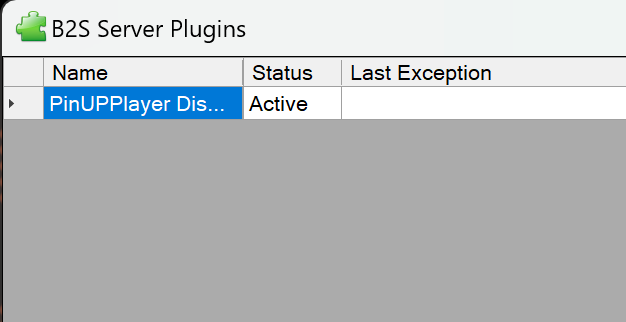
The plugin is active. PinUP Player installation is complete! ✅
Installing PUP Packs
PUP Packs are made by the community and can be complex to create. Synchronizing video triggers with table actions is difficult — sometimes a PUP pack will overlap the table audio. All PUP packs are on VPUniverse. The VPS often links to the PUP pack in the table description.
DeadPool Table V5.1 & PupPack 2.0 ⬇ Download
- Download, unblock, and extract
- Copy
JP's Deadpool v5.1_VPX8(Pup).vpxto your VPX tables folder - Copy the PUP pack folder
jpsdeadpoolto\PinupSystem\PUPVideos
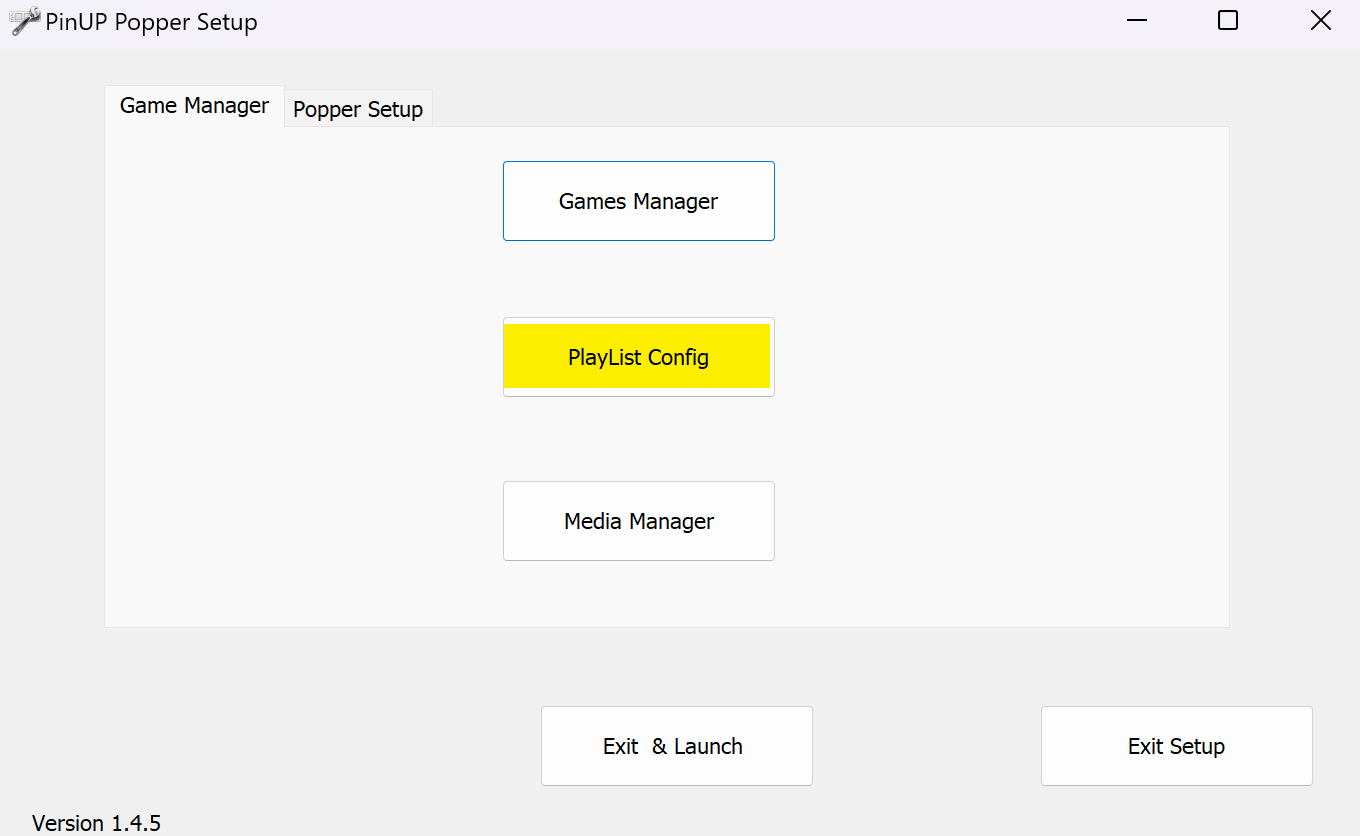
PinUP Popper Front End Installation
This front end lets you add, manage, organise and launch tables. PinUP Player MUST be installed first.
Download, unblock, and extract PinUP Popper. Drop the files into the same folder as PinUP Player (C:\Vpinball\PinupSystem).
You will see the screen config — close it, as we already set up screens during PinUP Player installation.
The most commonly used options are shown below. For full details visit Nailbuster's Wiki.
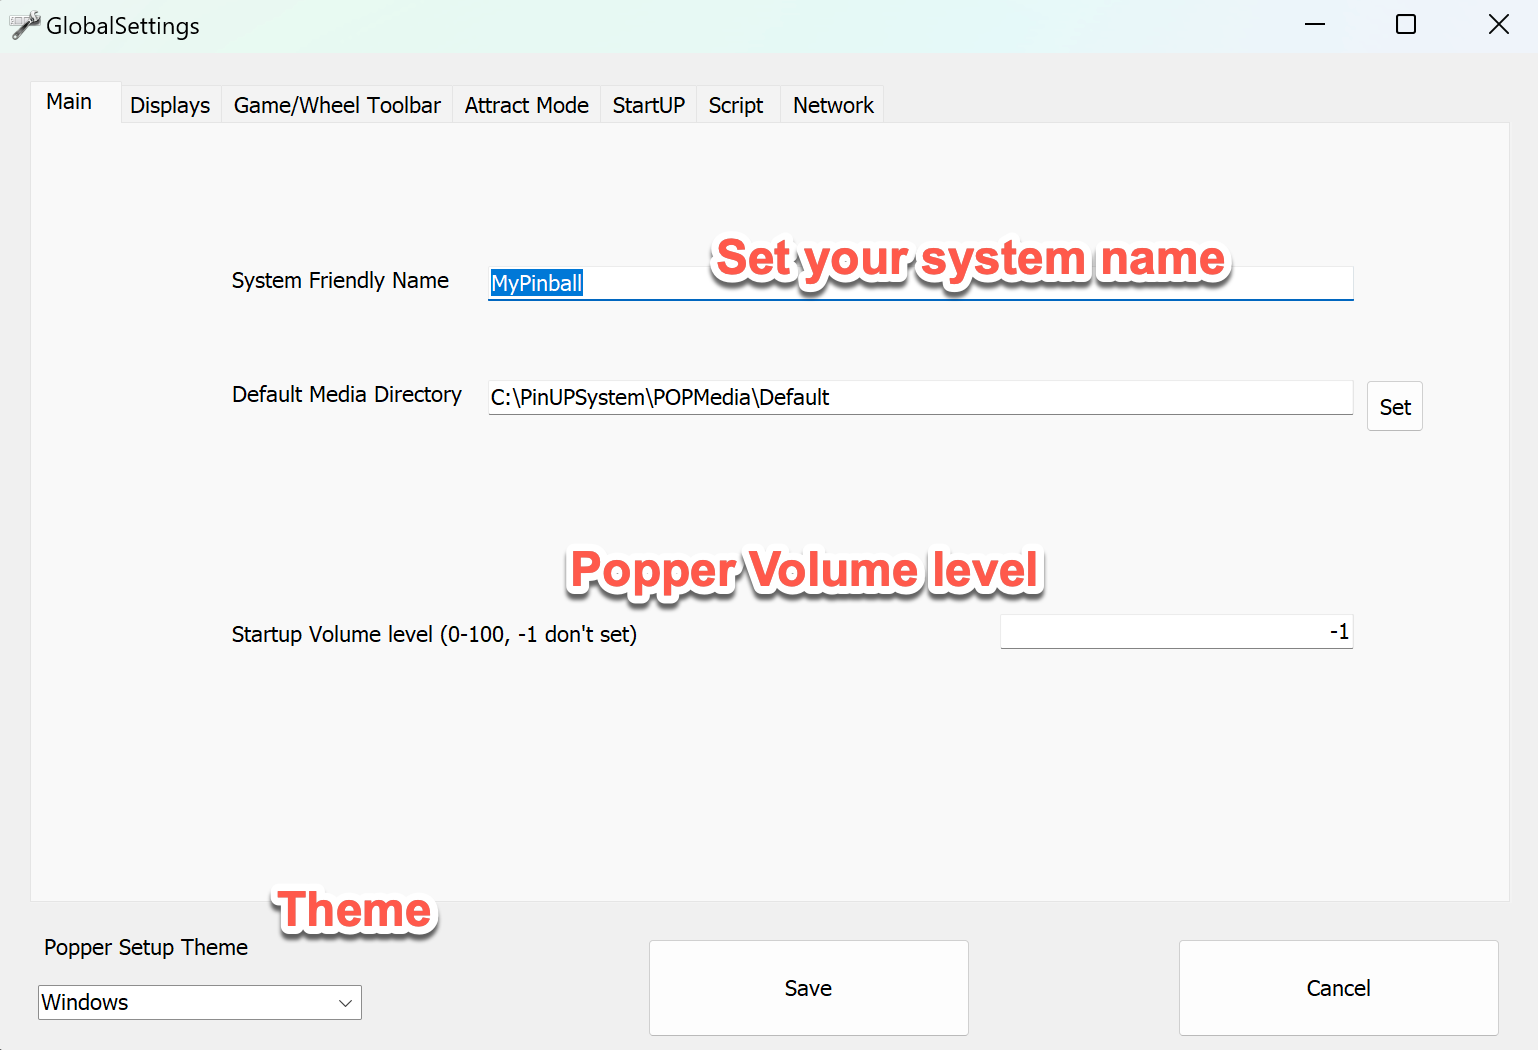
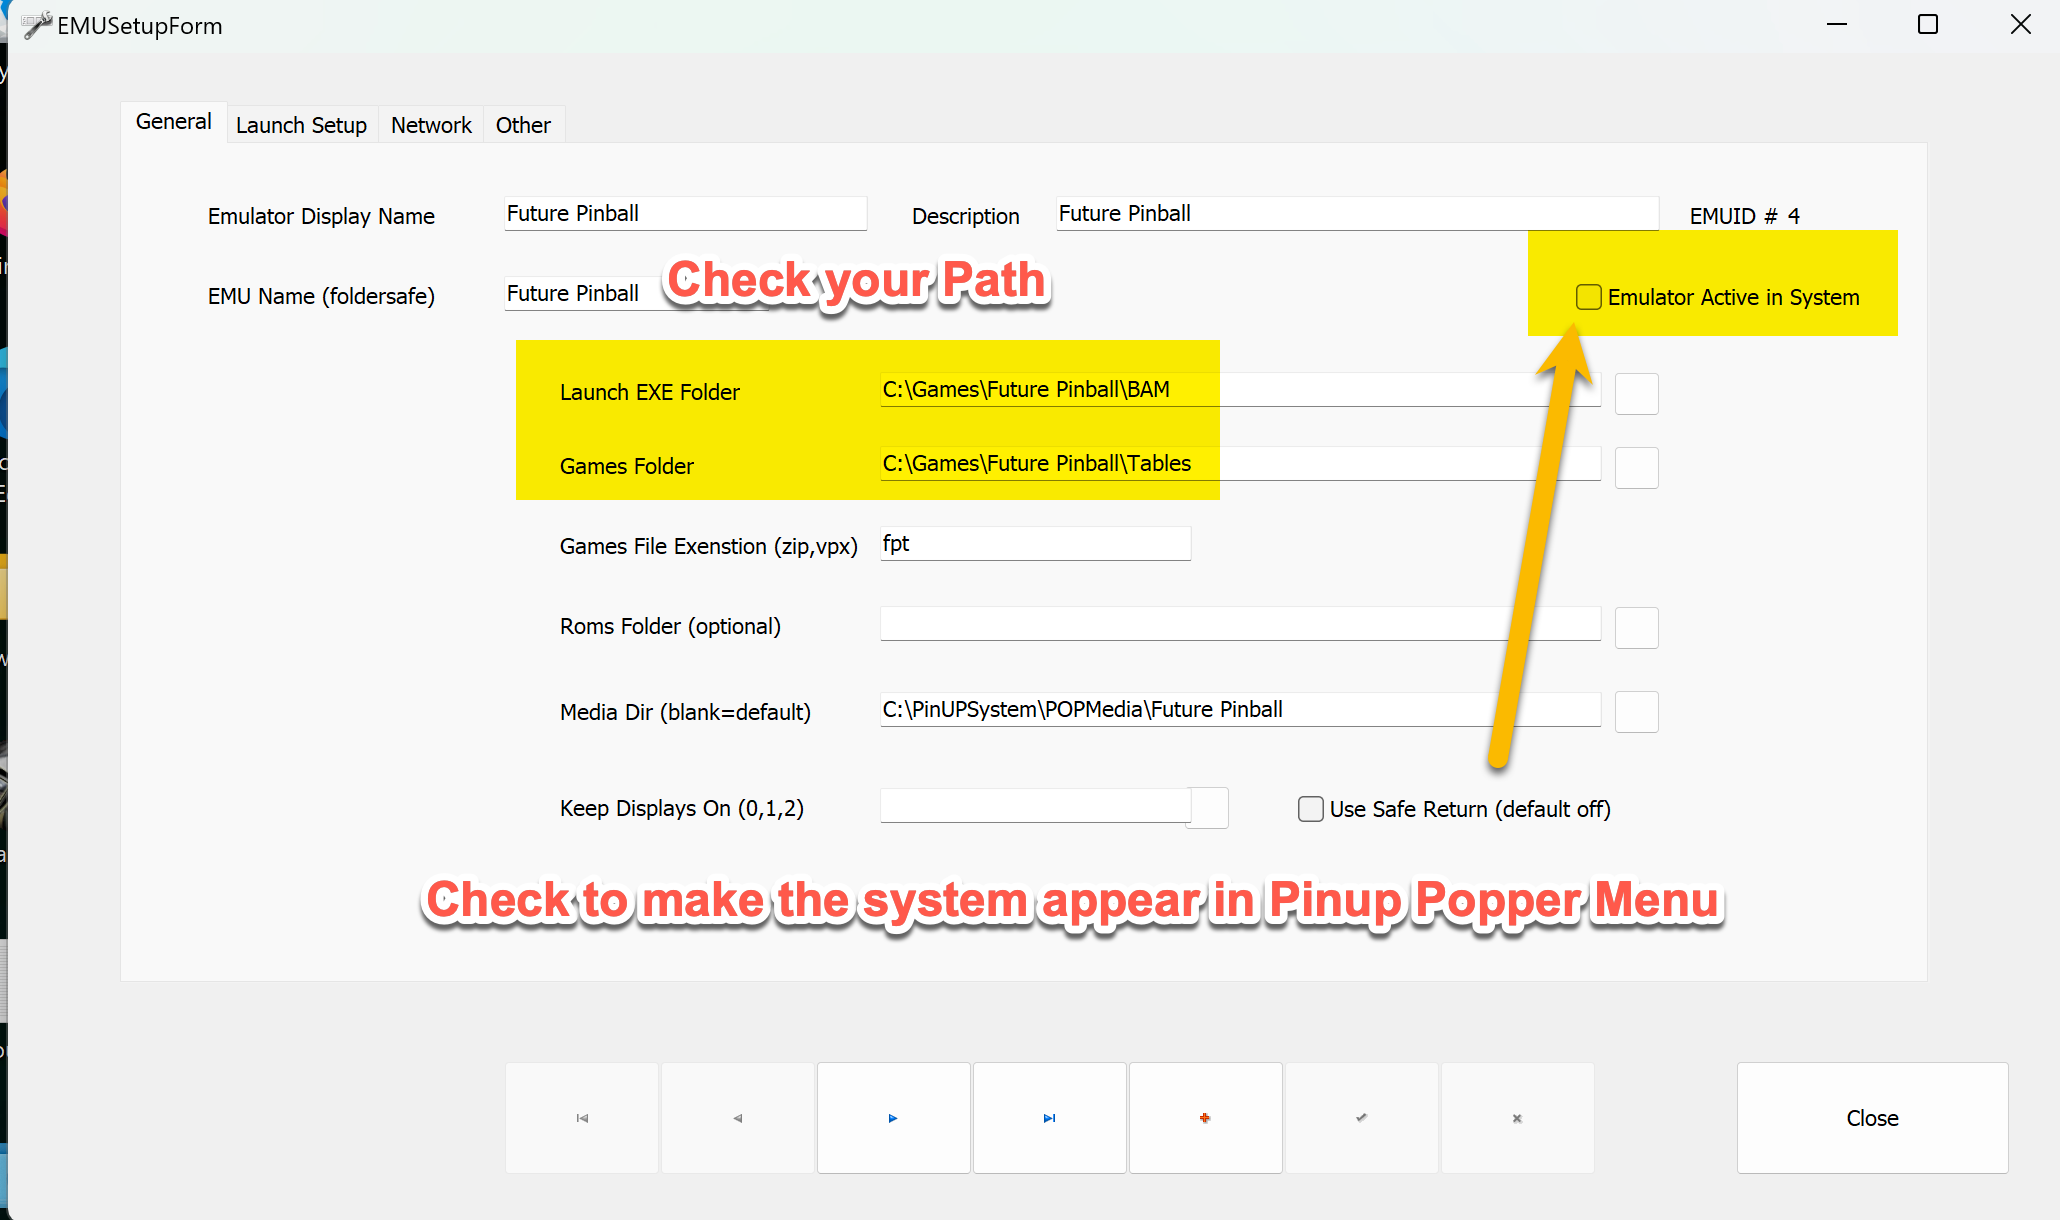
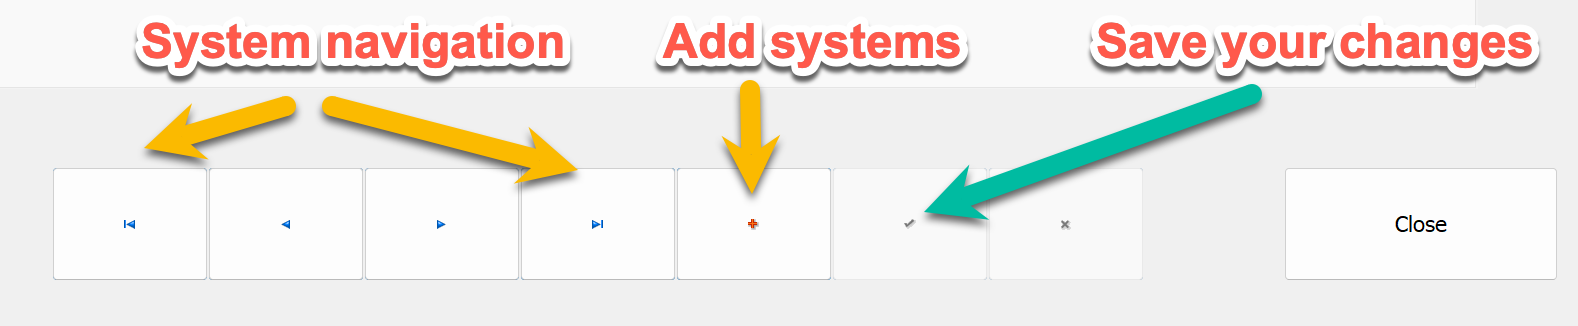
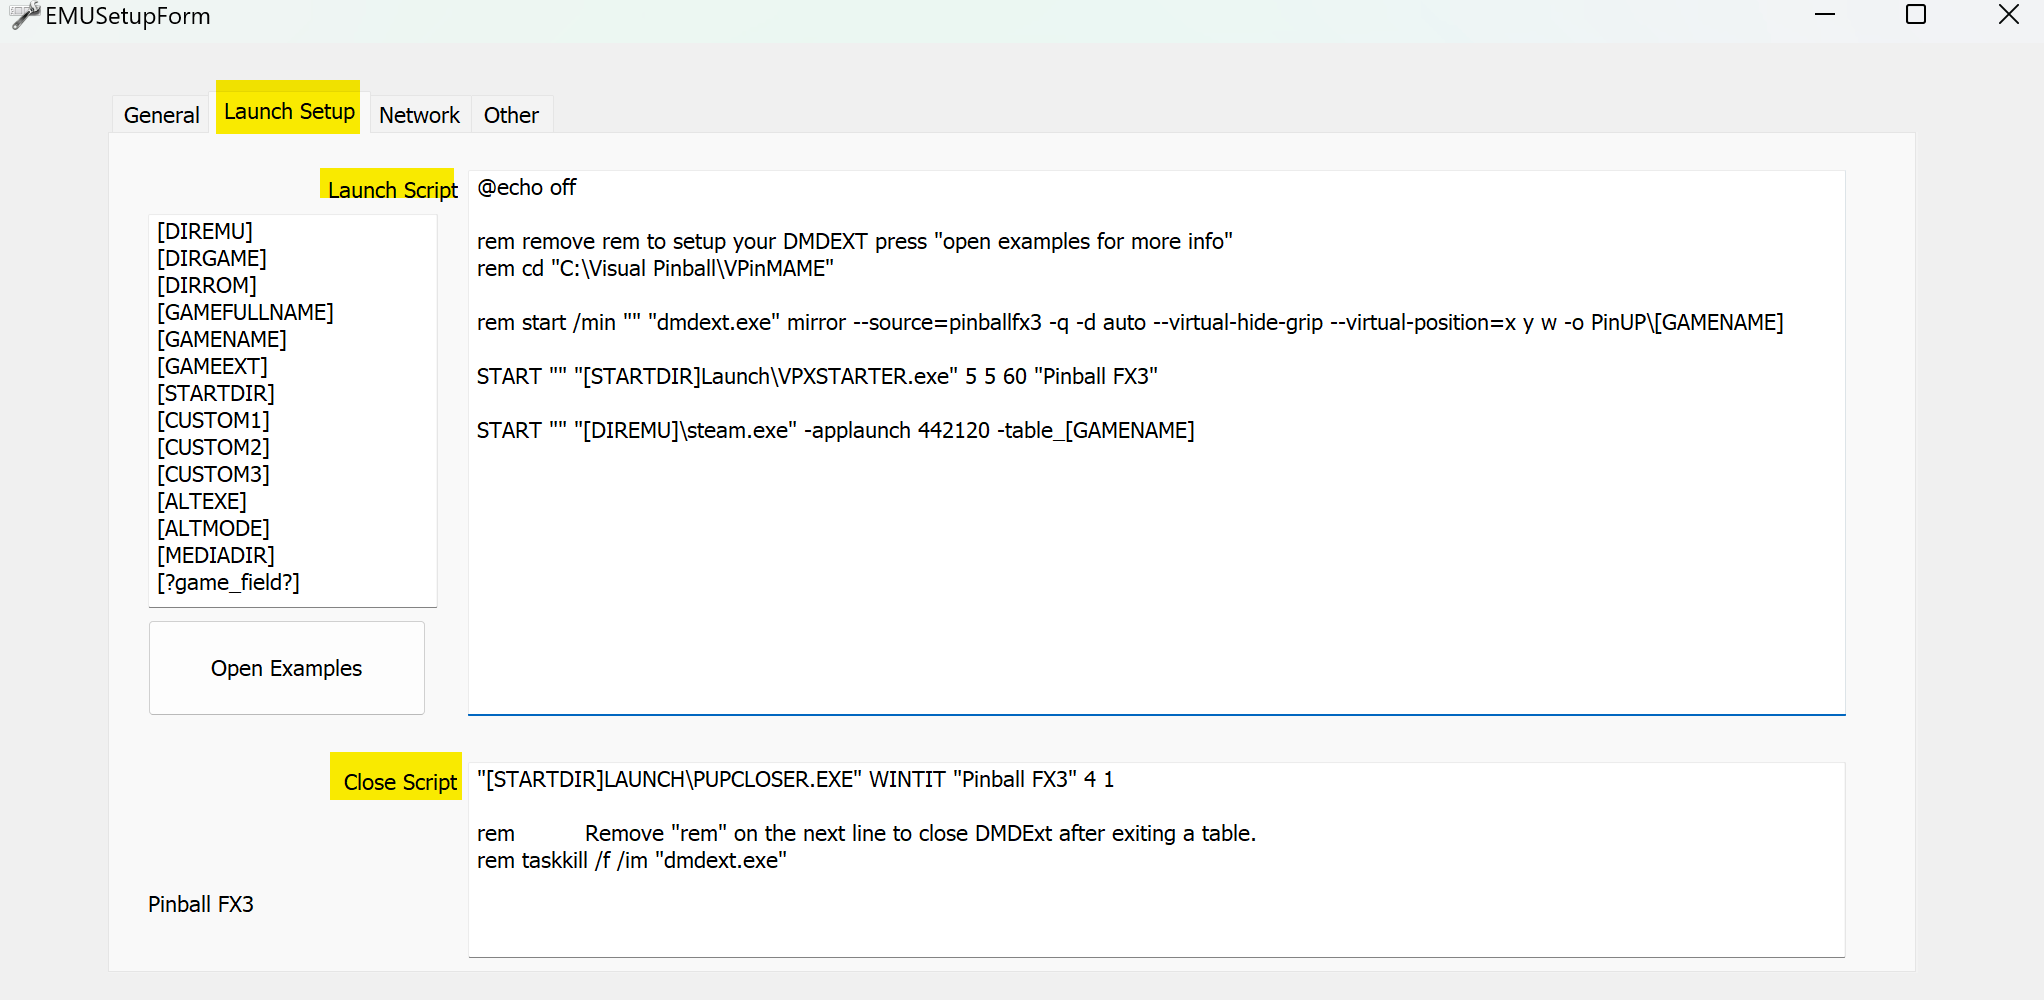
In Emulator/Launch Setup you can add programs and parameters for table launch. All parameters documented here.
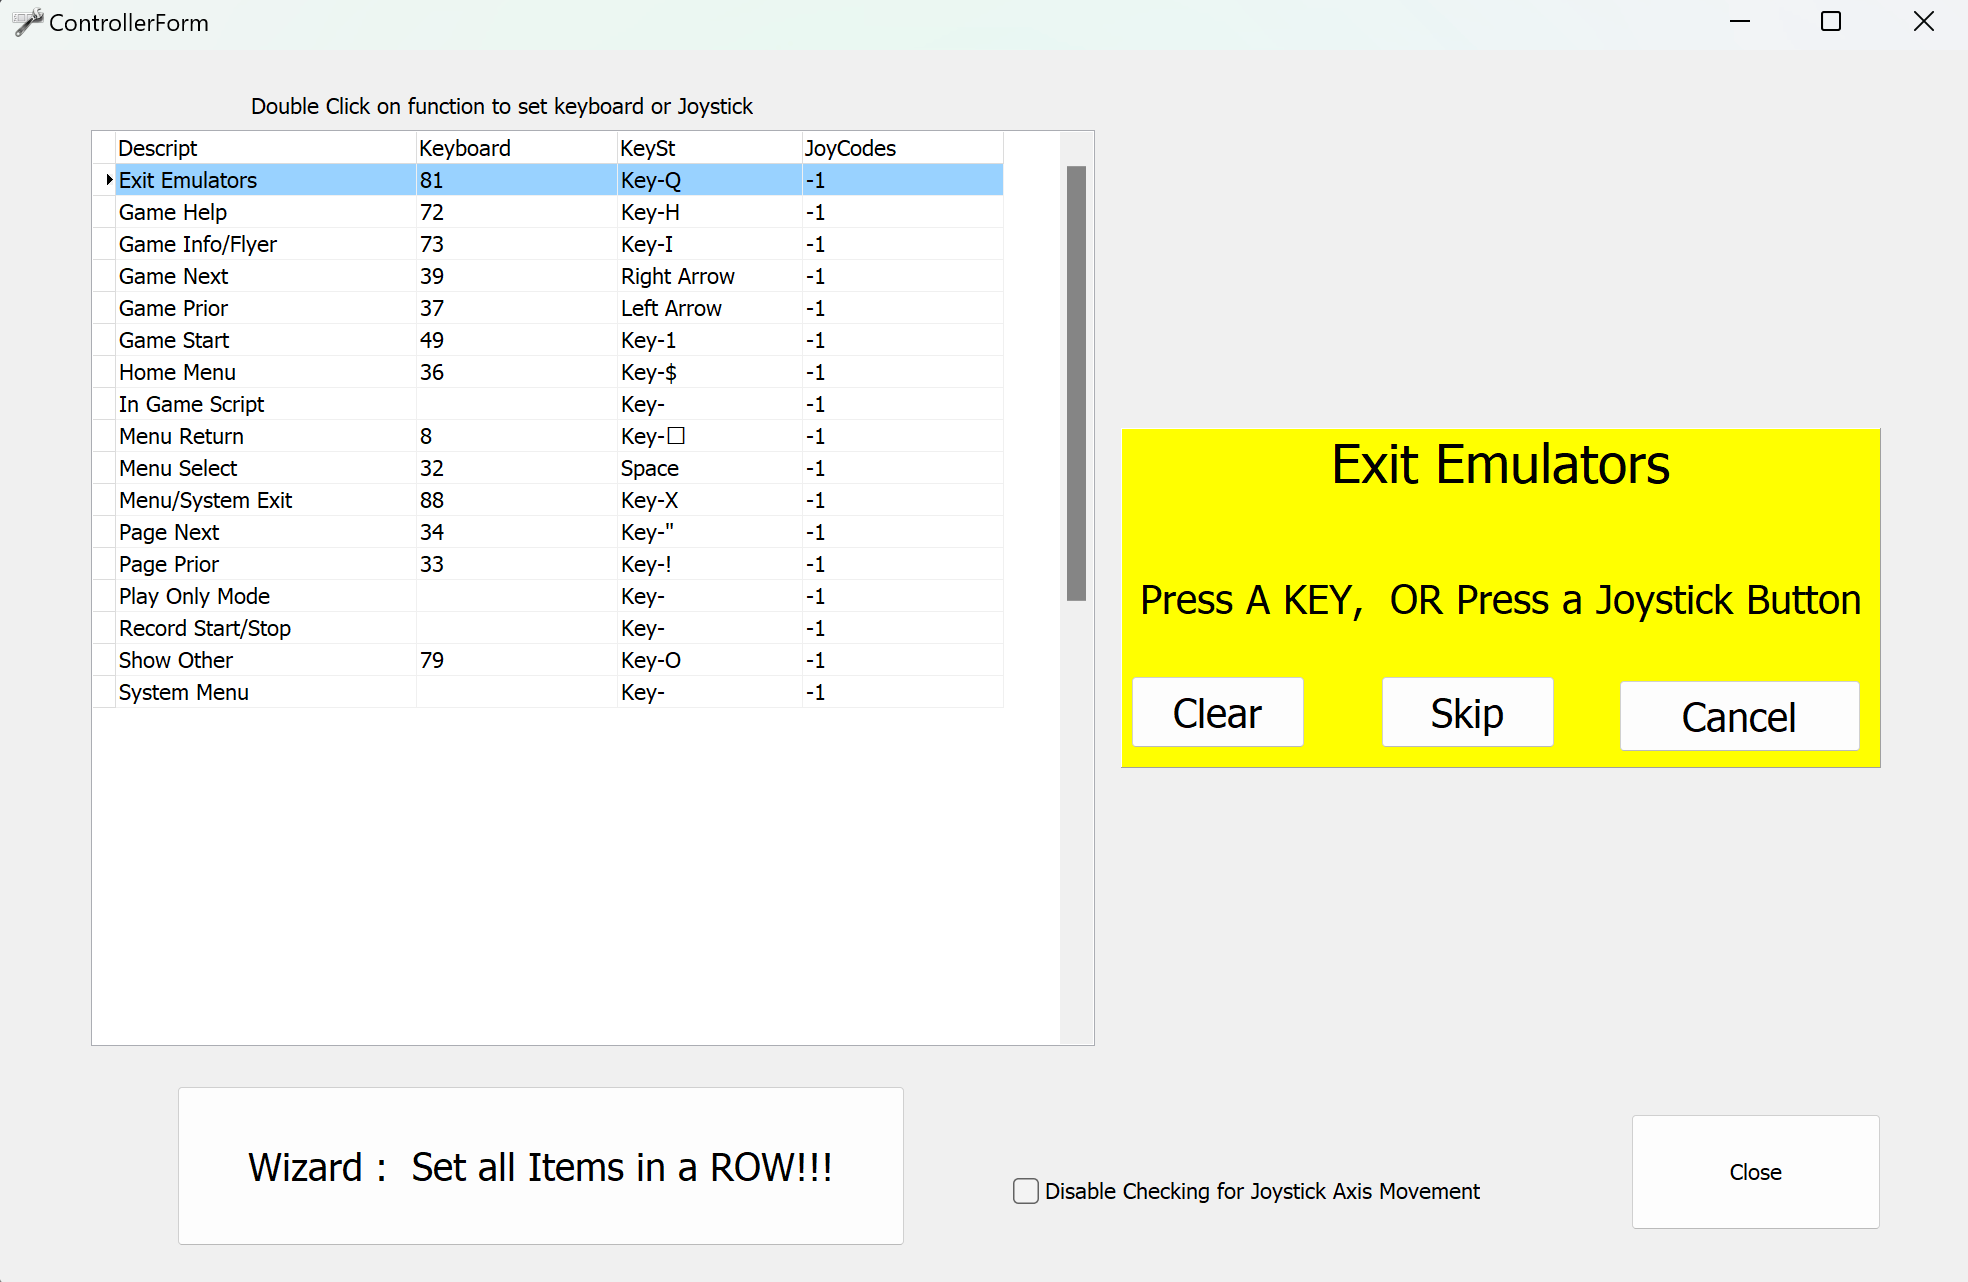
The Controller Setup tab configures keyboard/cabinet button mappings. Double-click an action for a yellow prompt waiting for key input.
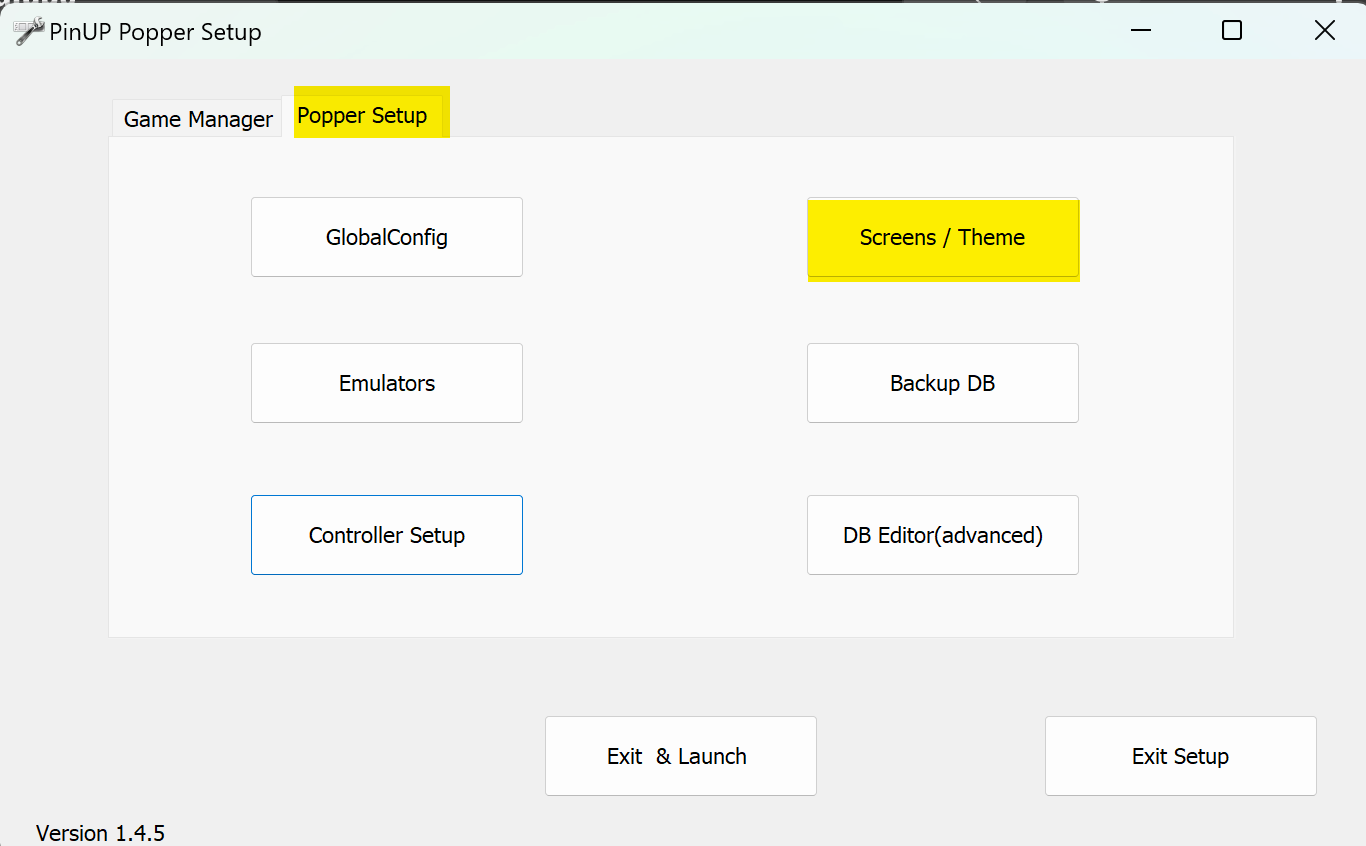
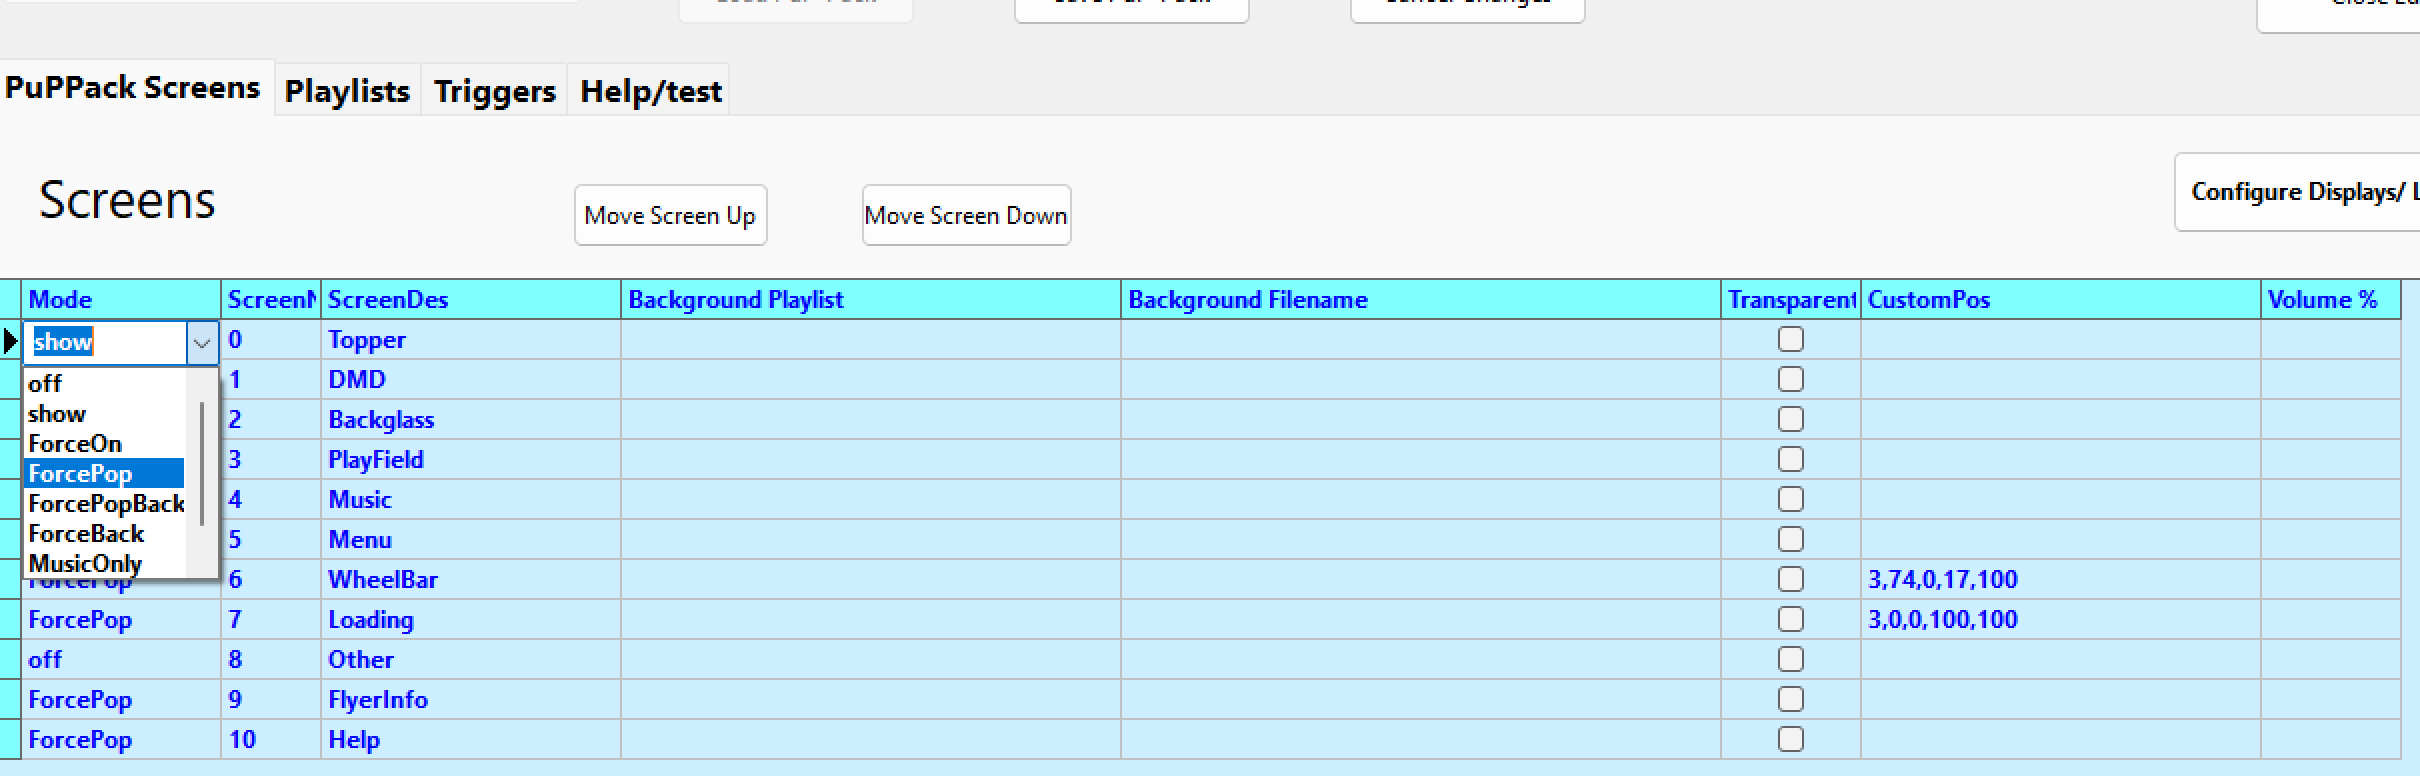
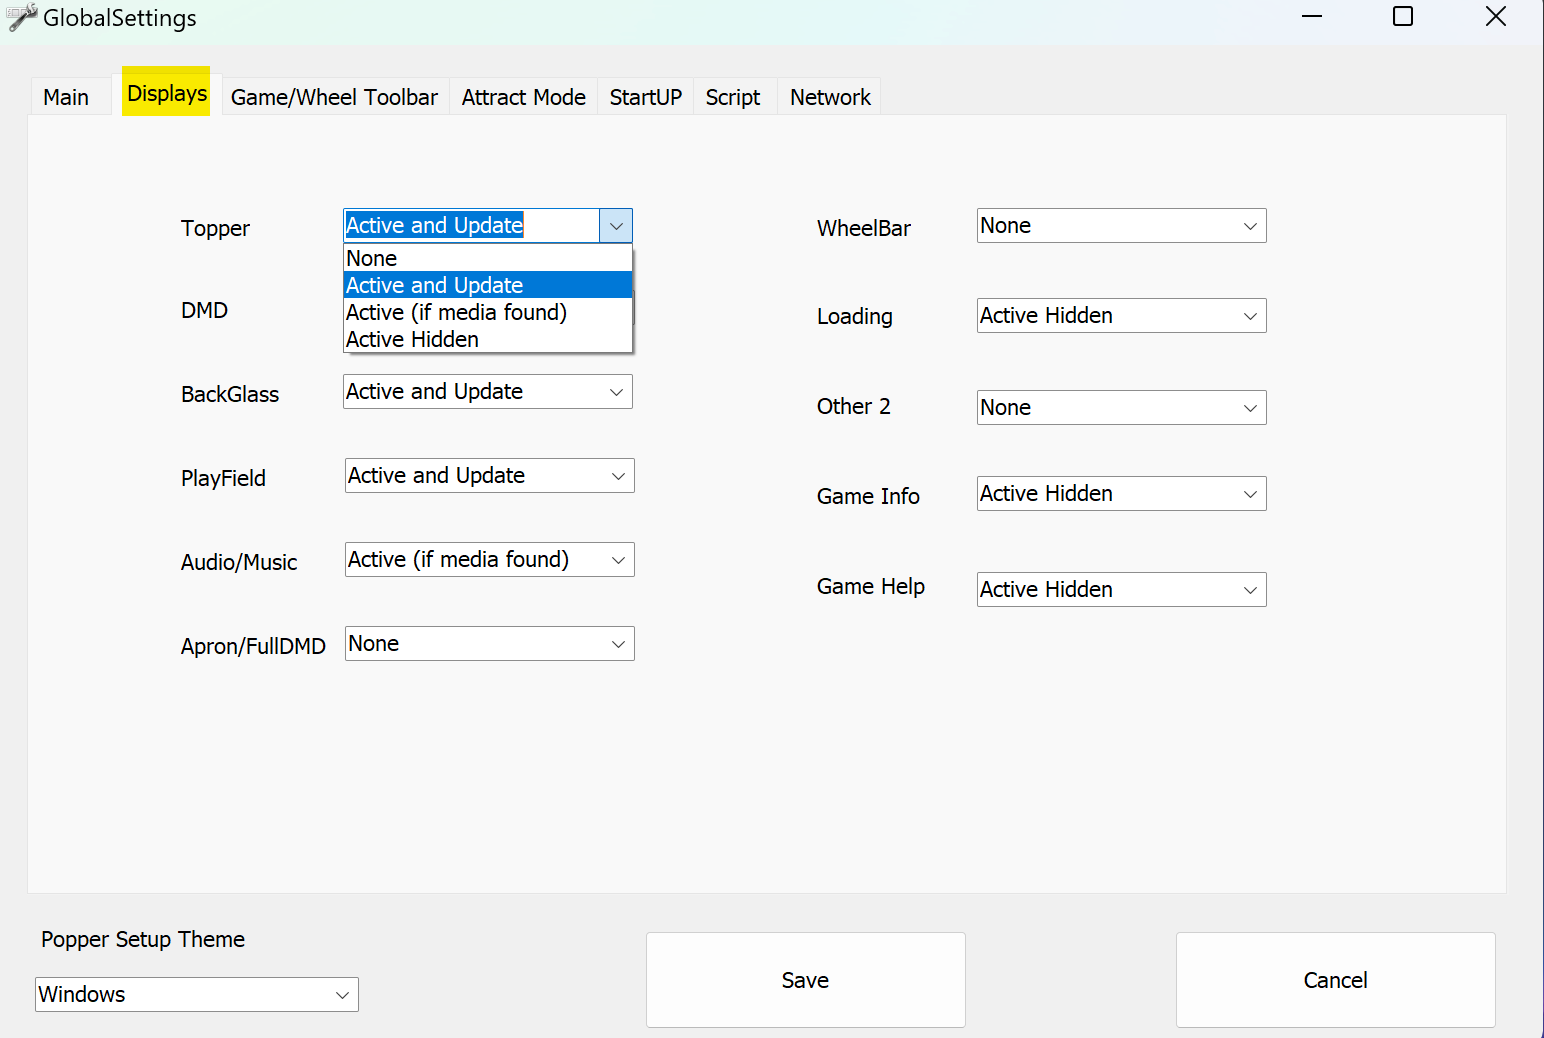
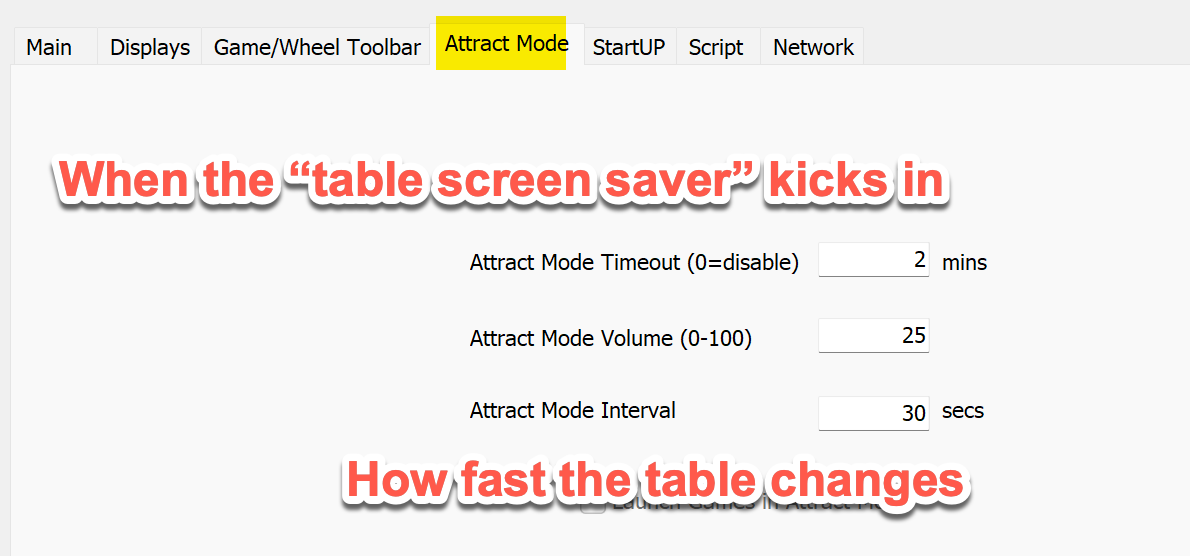
The Screen/Theme section toggles front end screens on or off (does not affect PUP packs).
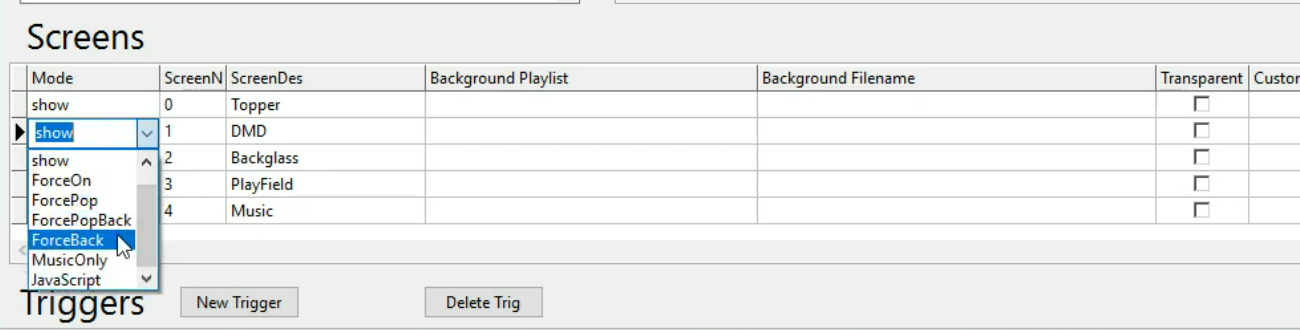

- Real DMD: set DMD to Show forced back
- DOF users: change
useDOFfrom false to true and save
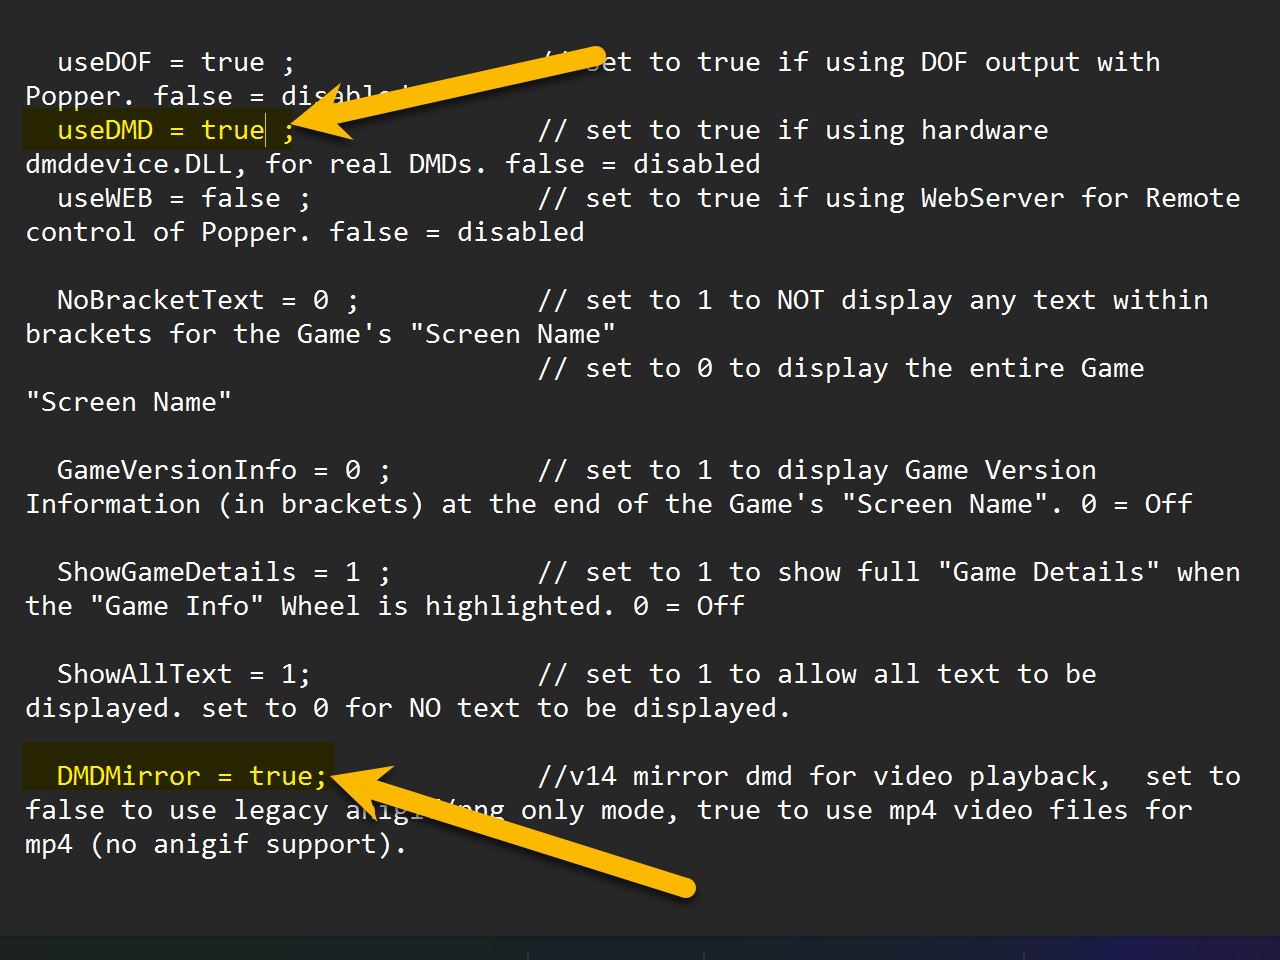
useDMD to true and mirror.Tables Management
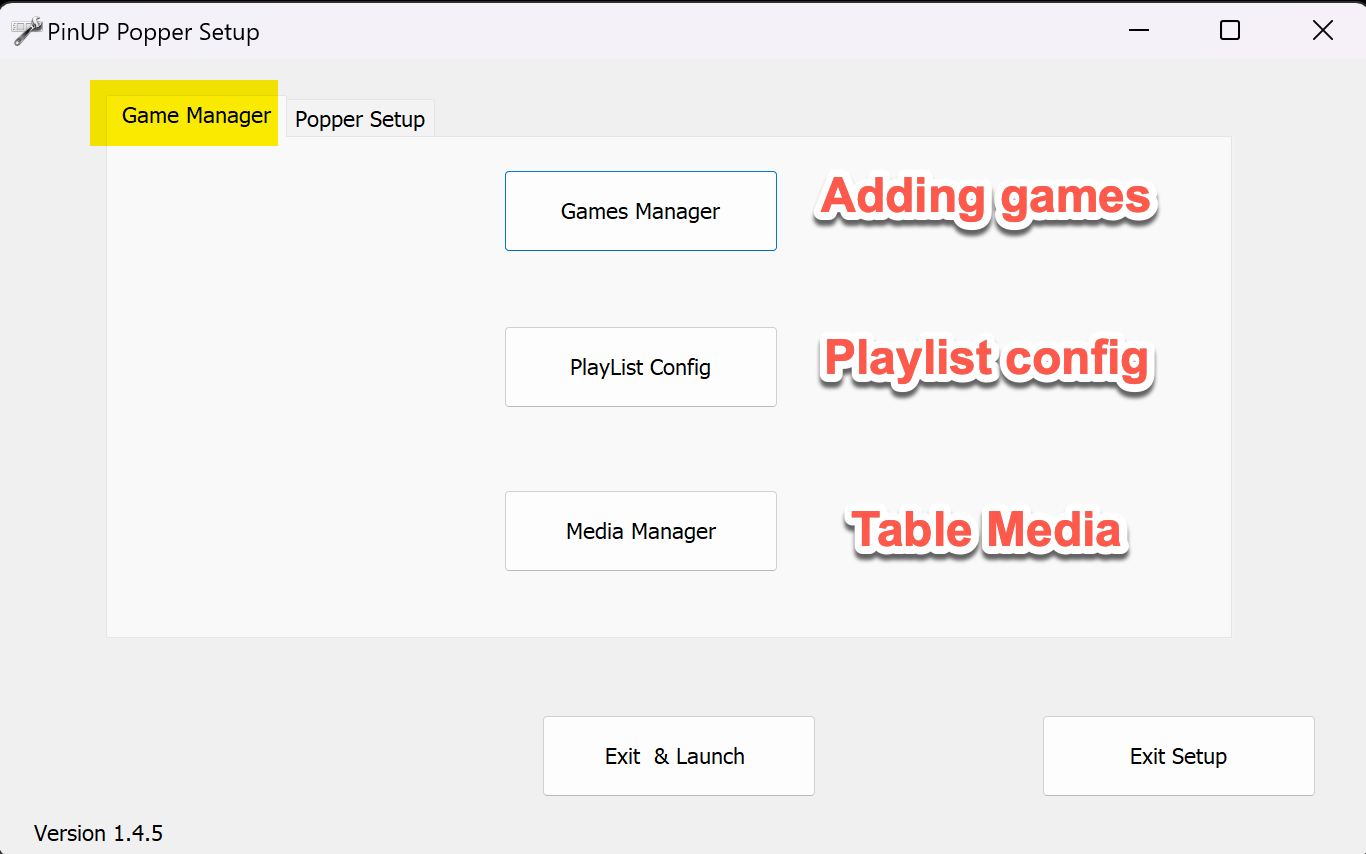
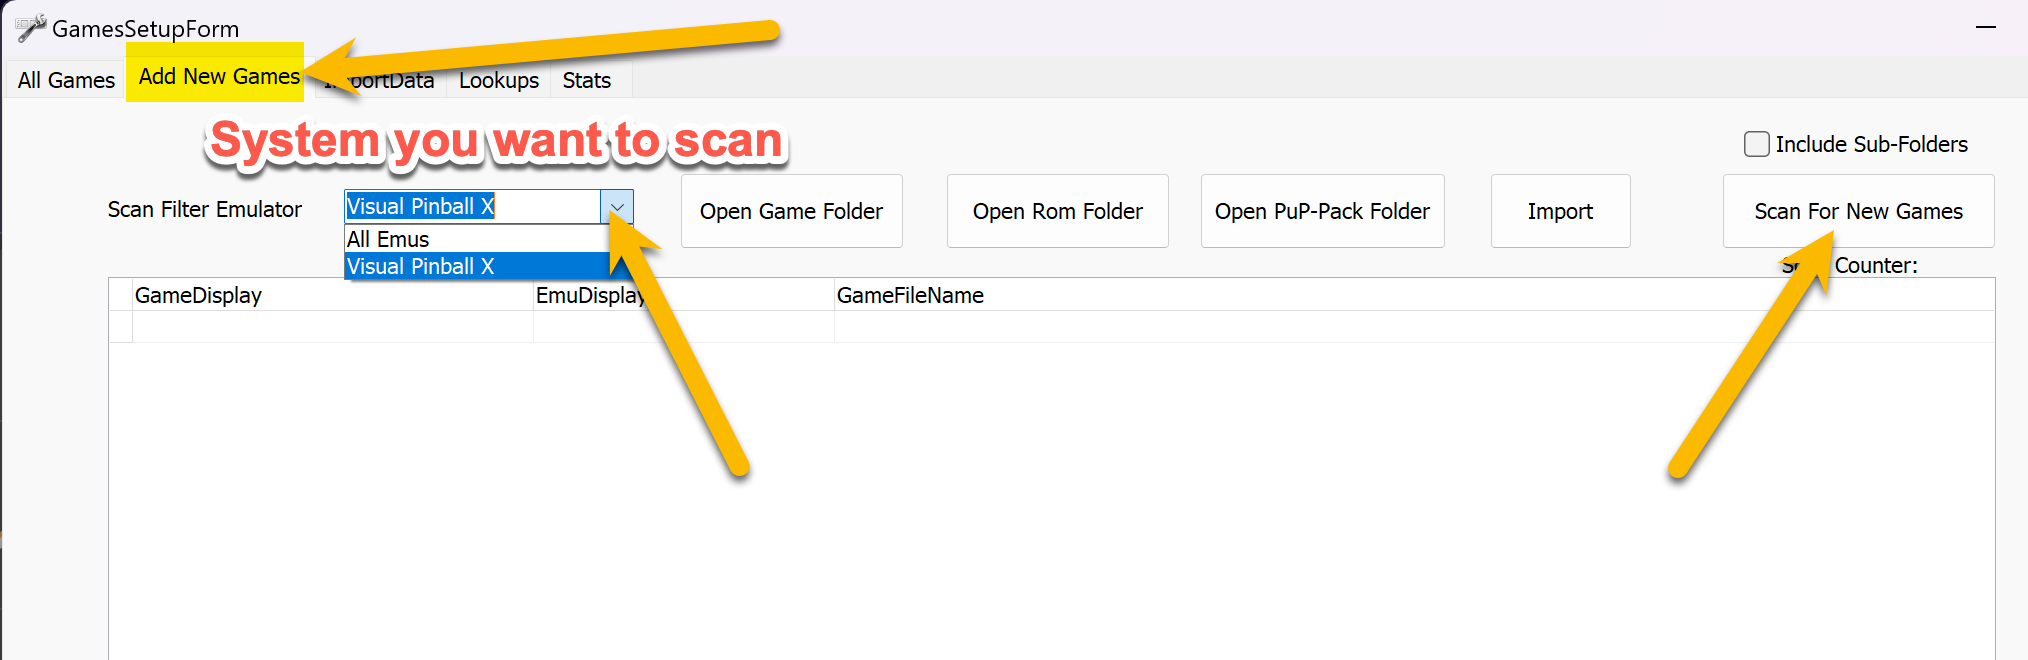
- Click Add Game to open the table scanner
- Use the Emulator dropdown to filter by system
- Click Scan for new games — shows only tables not yet in the front end
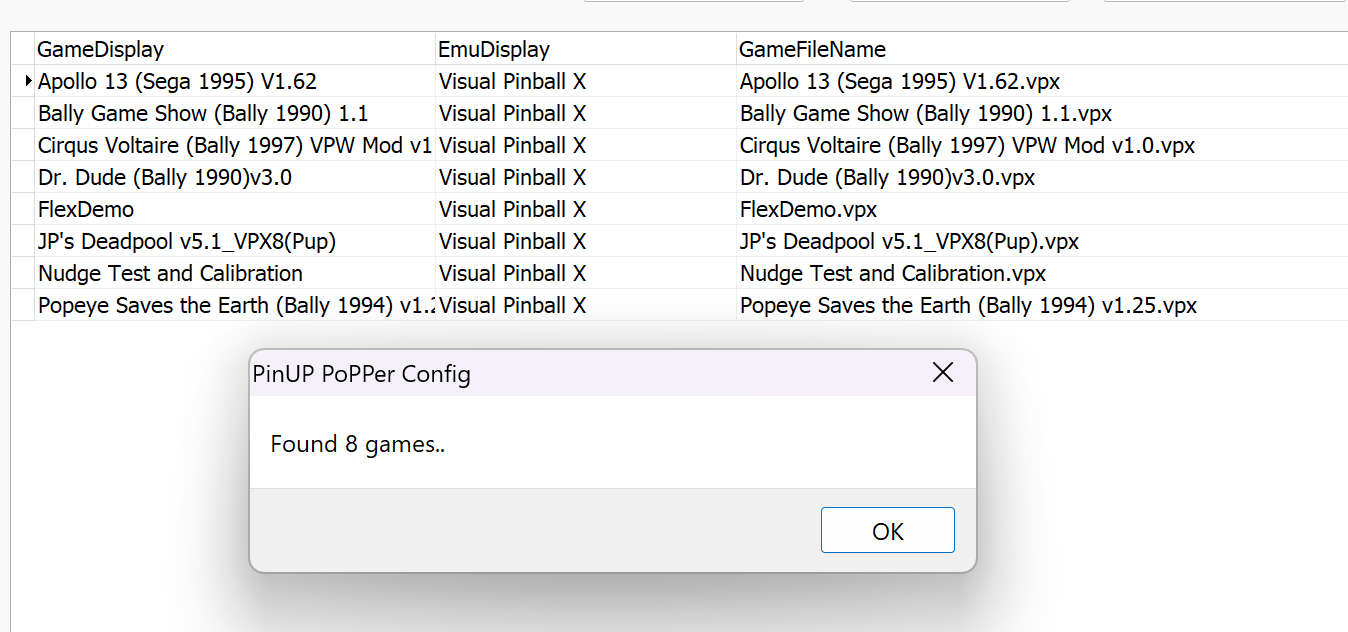
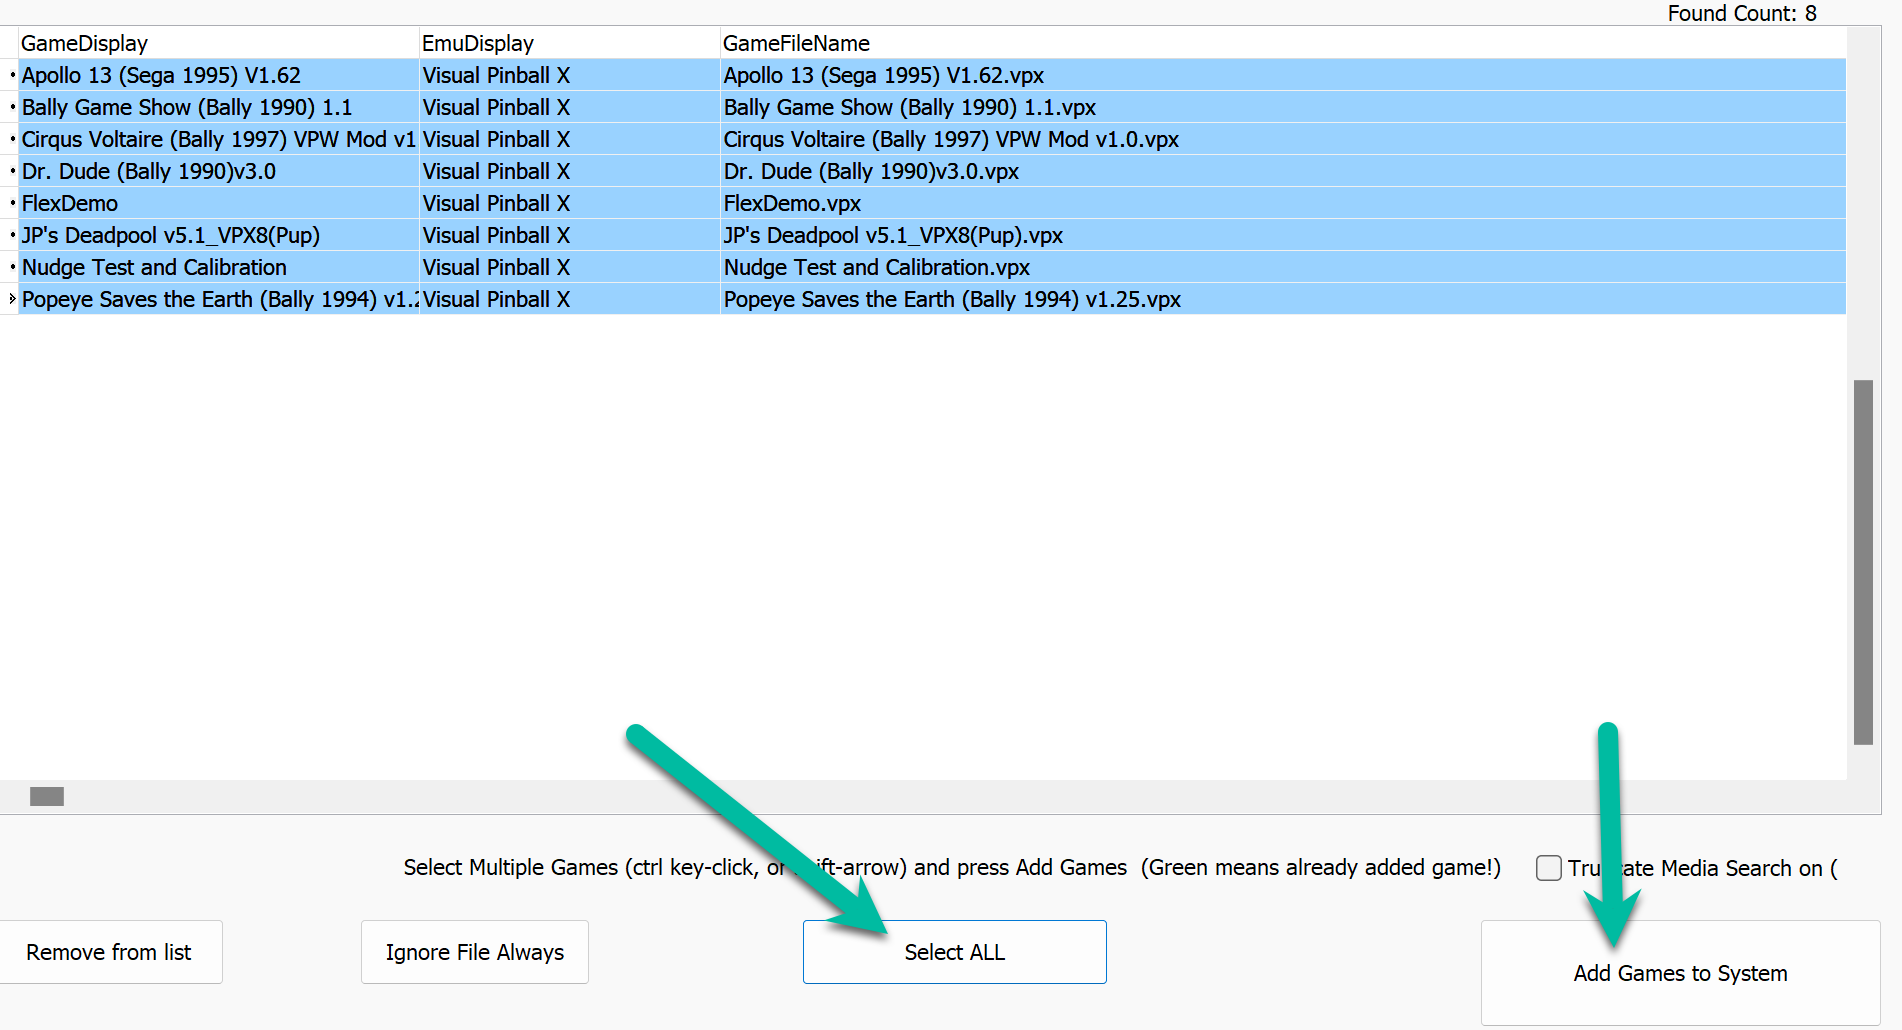
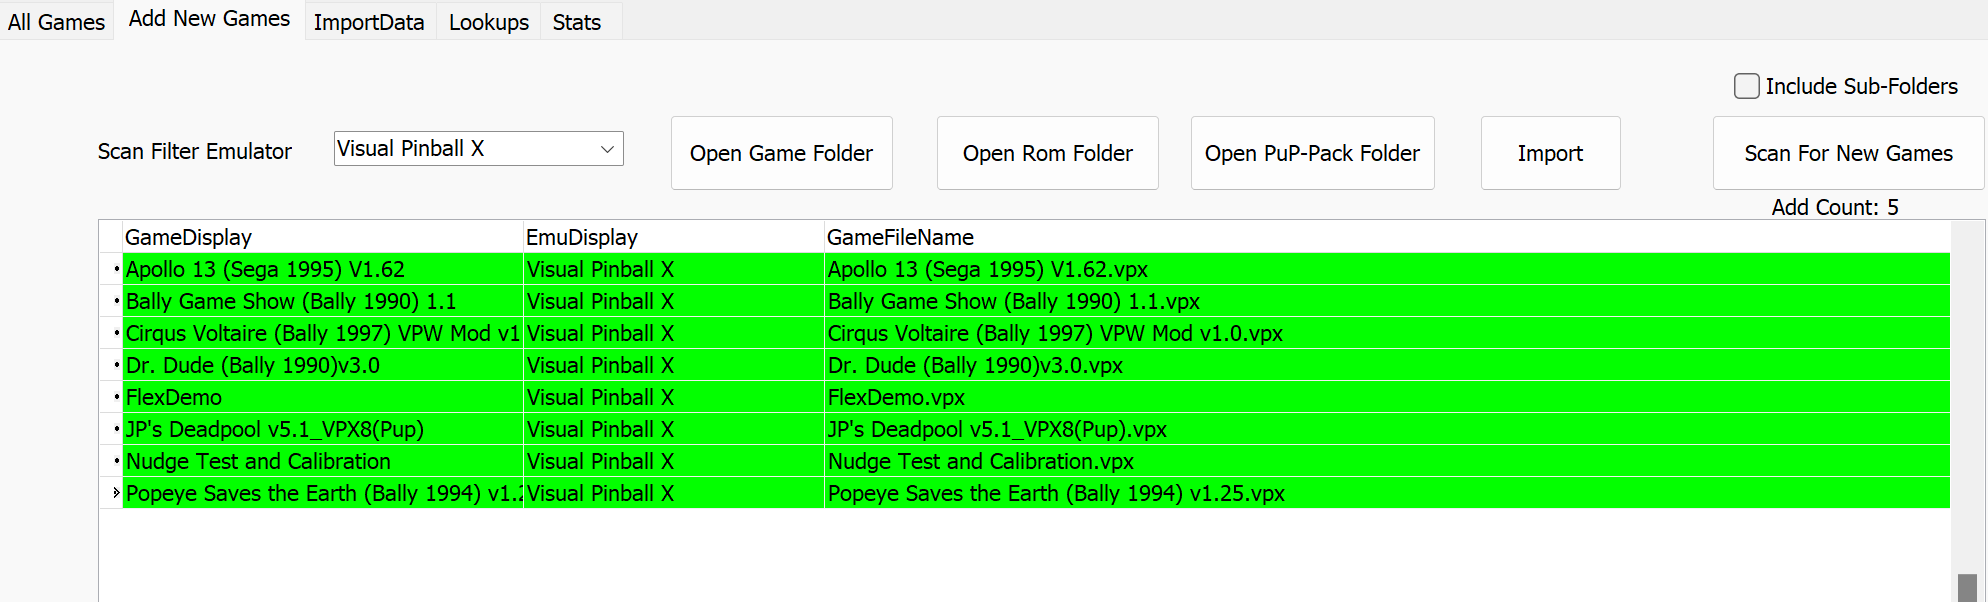
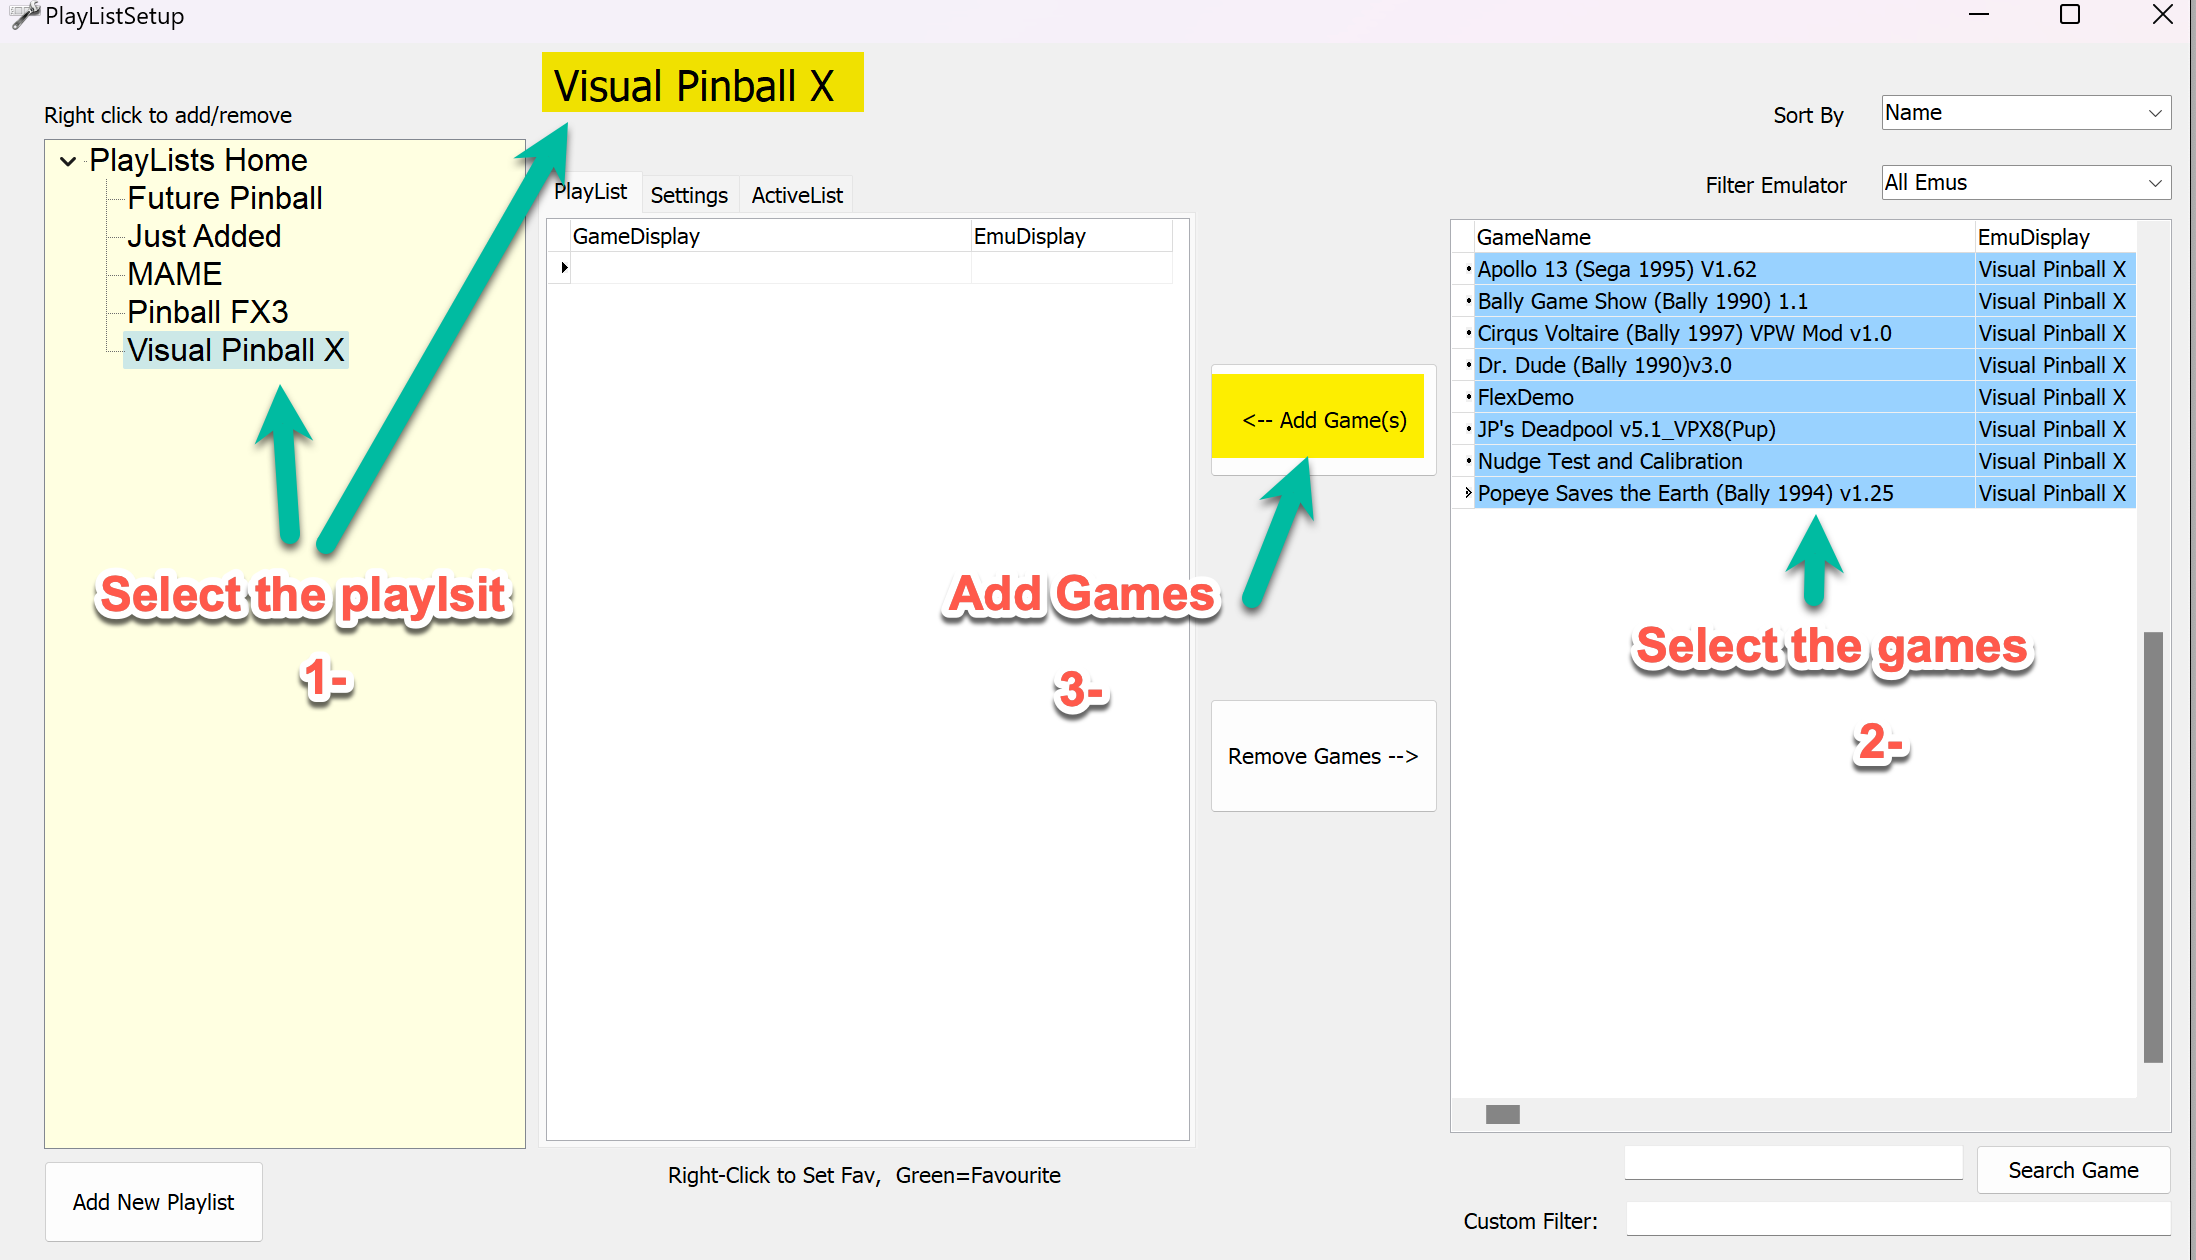
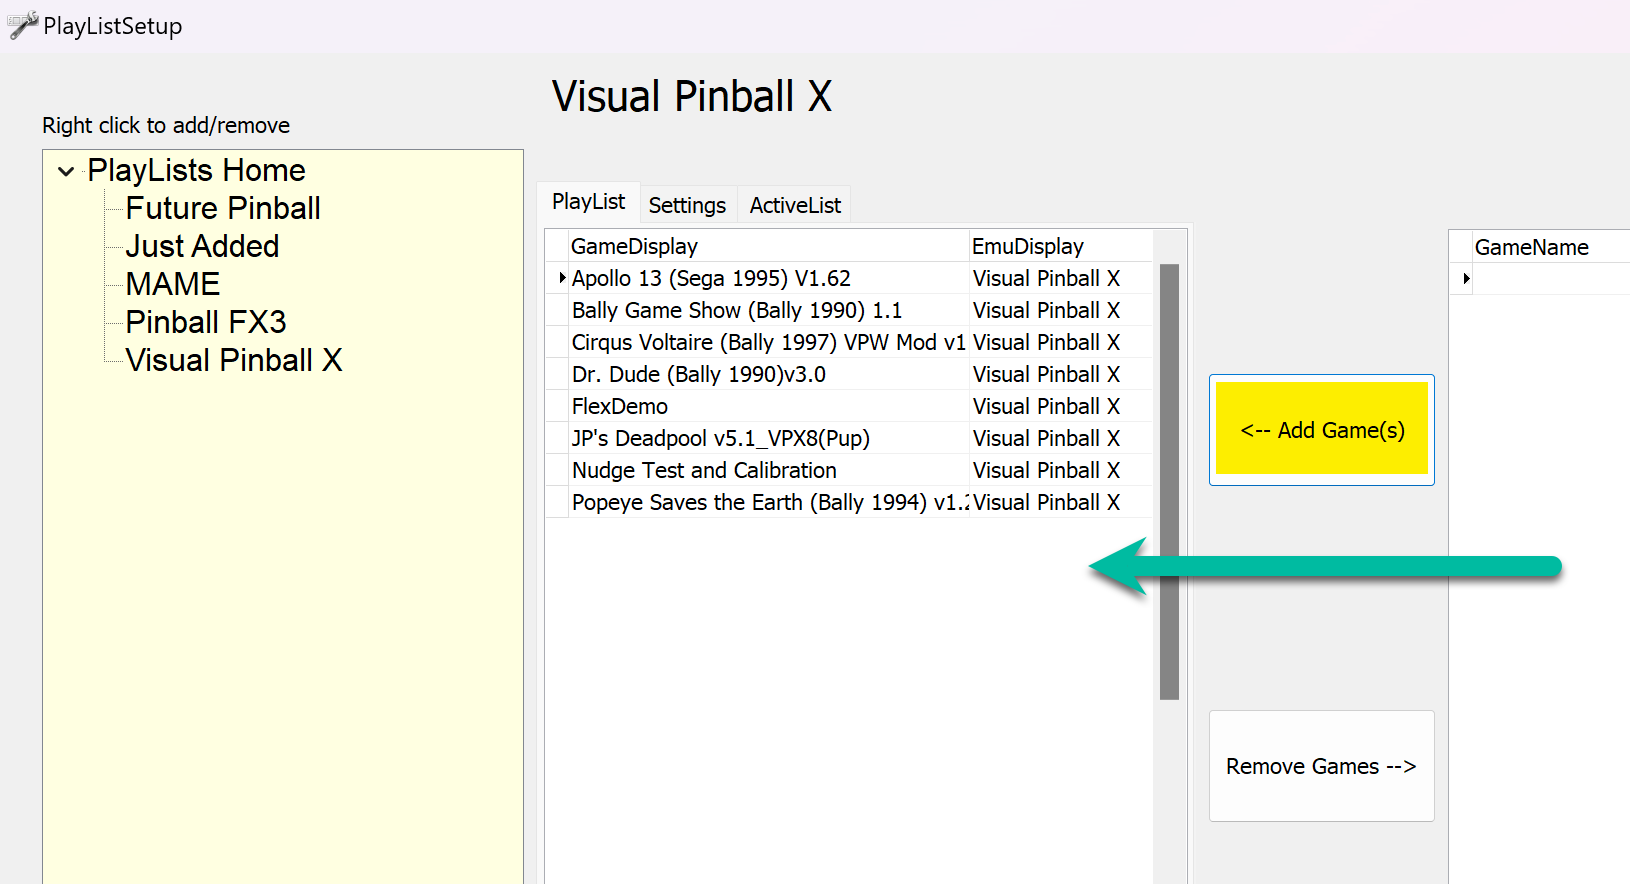
Select all and click Add to System. Added games turn green. Now add them to a playlist.
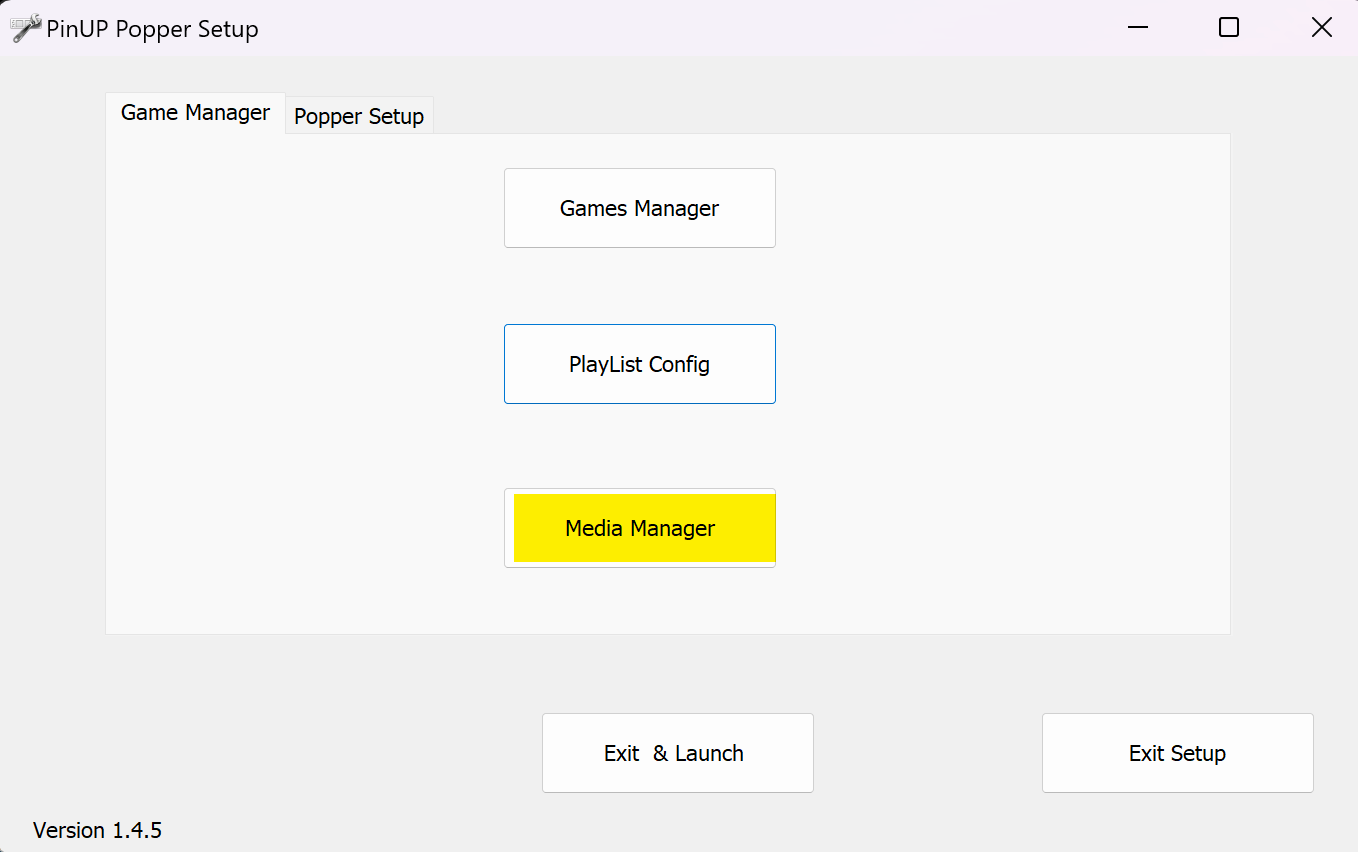
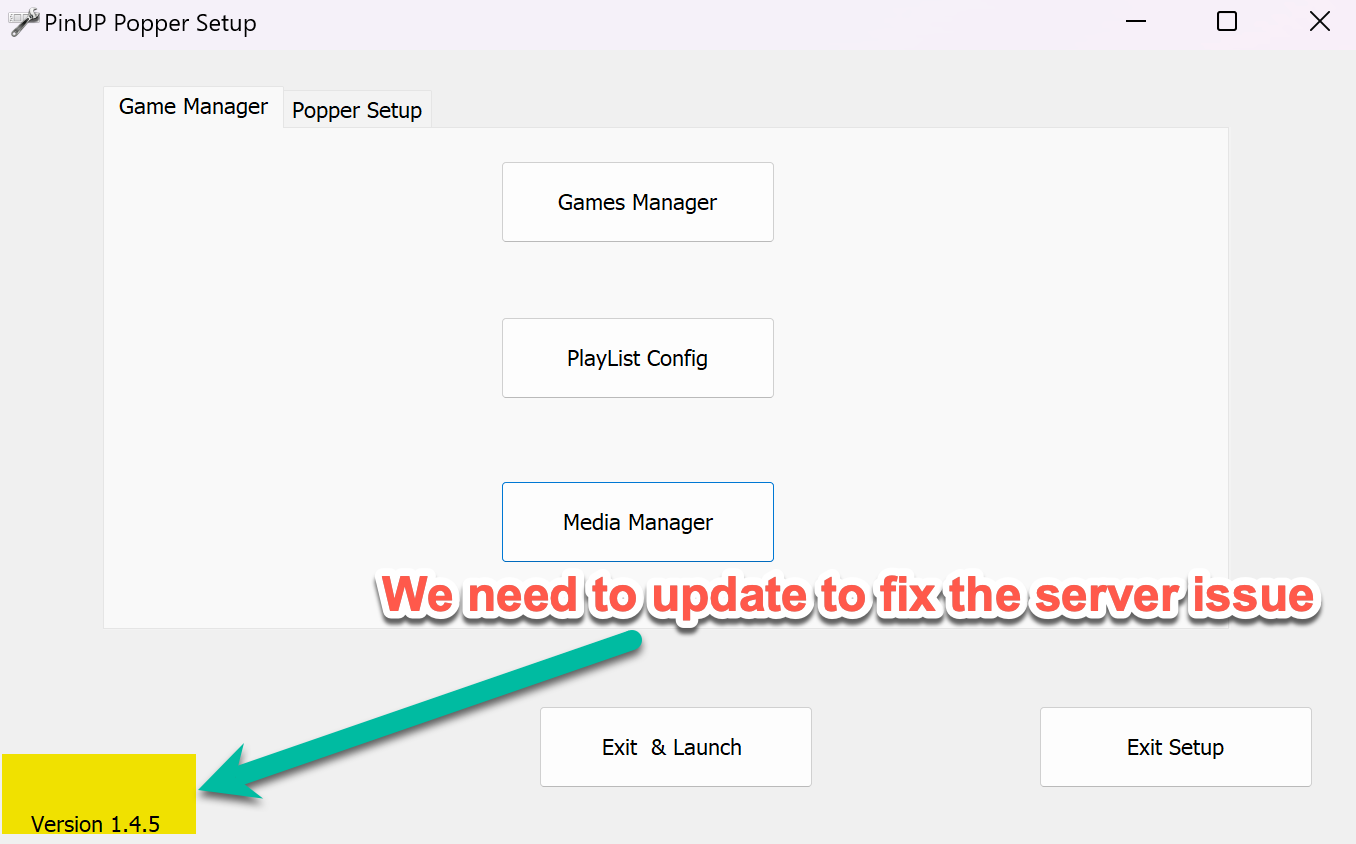
Media Manager
The built-in multimedia server lets you preview and download media for each table (backglass art, wheel images, playfield videos, audio, etc.).
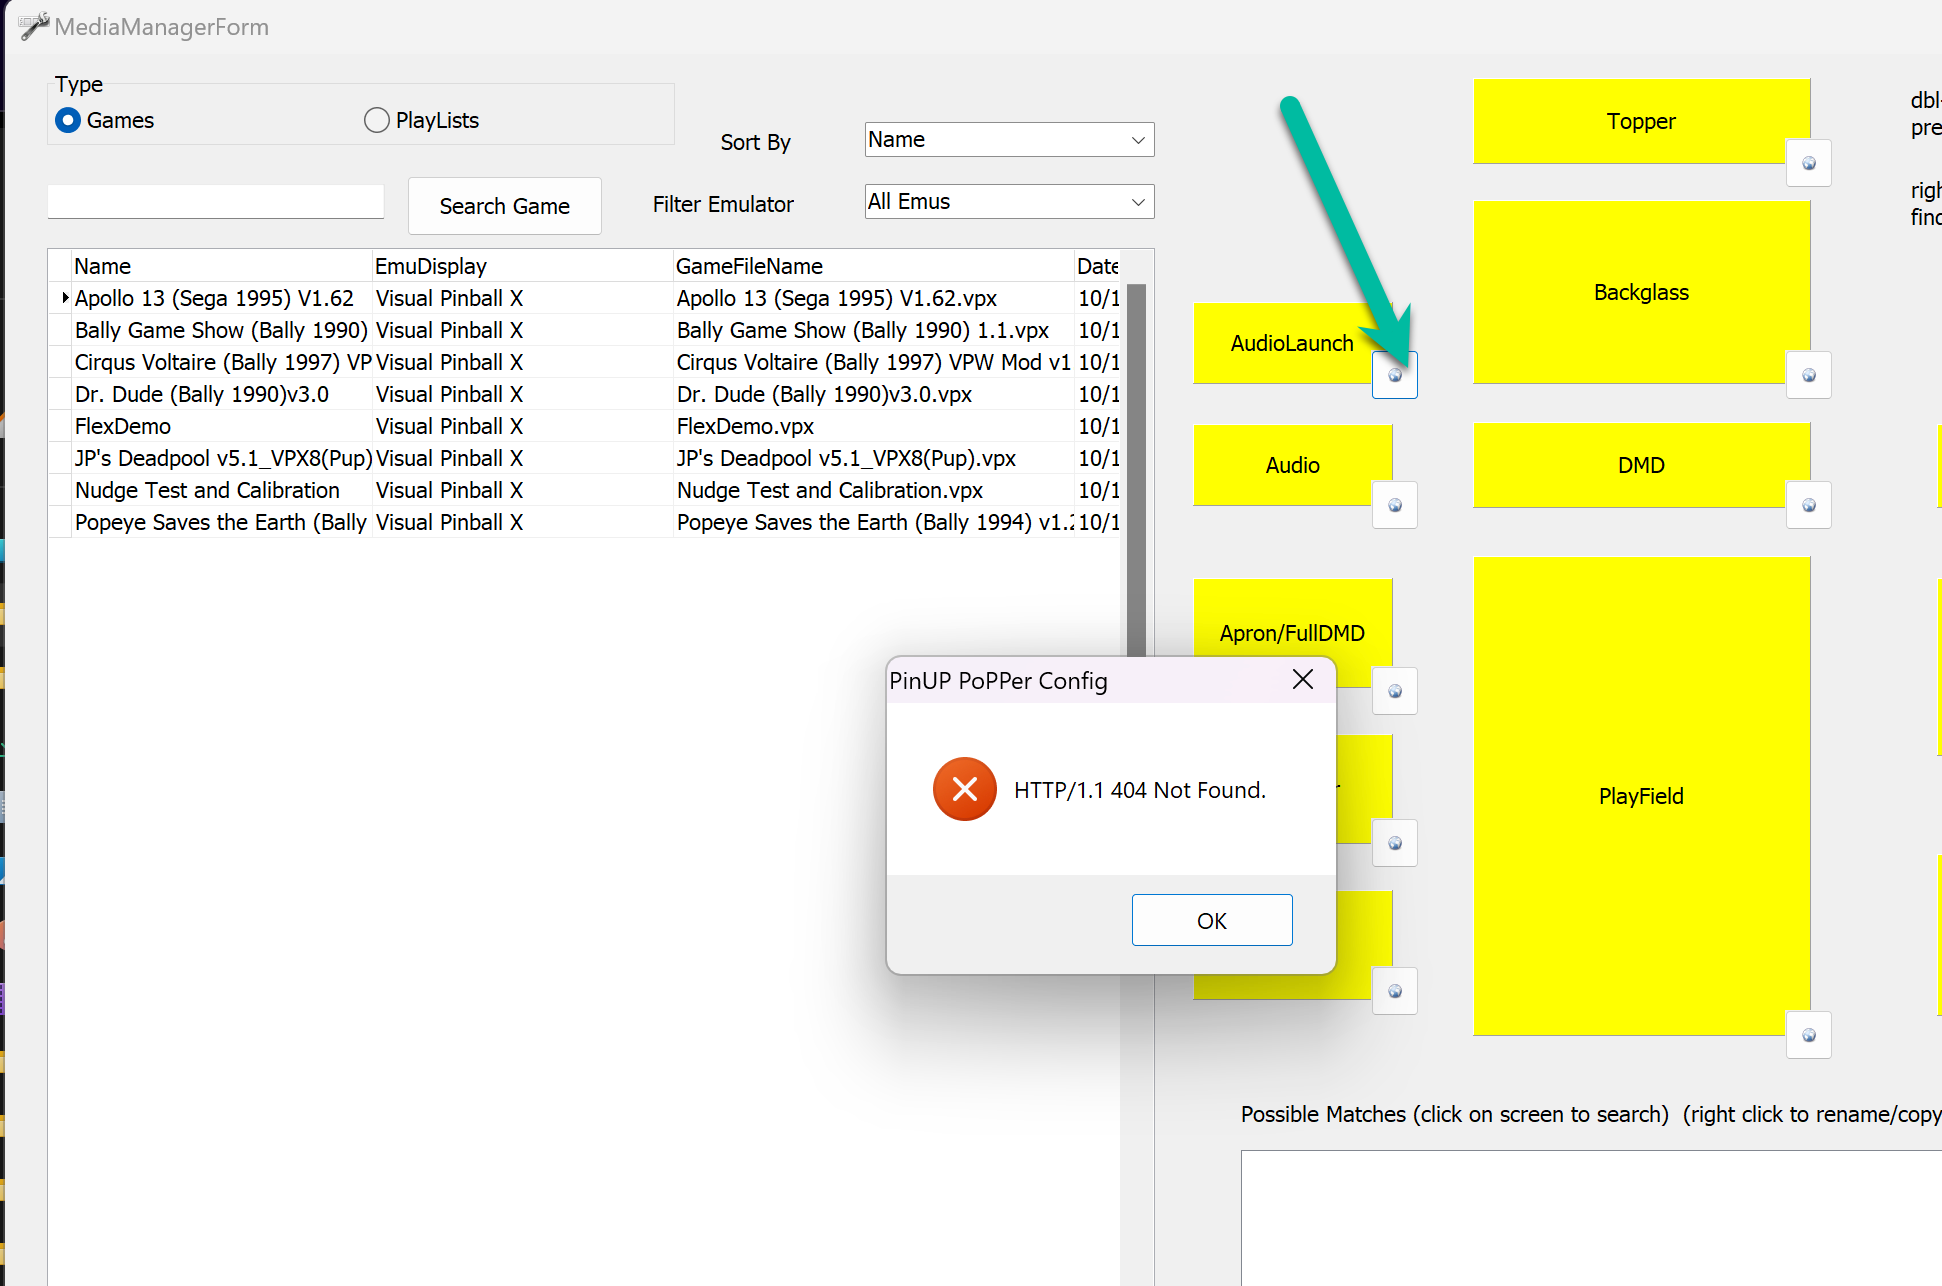
Click the Globe icon next to AudioLaunch. If you see an error, PinUP Popper needs updating — see below.
Backing up the Database

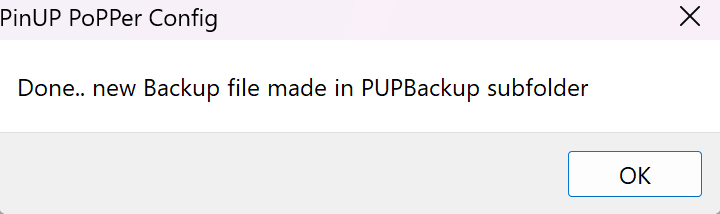
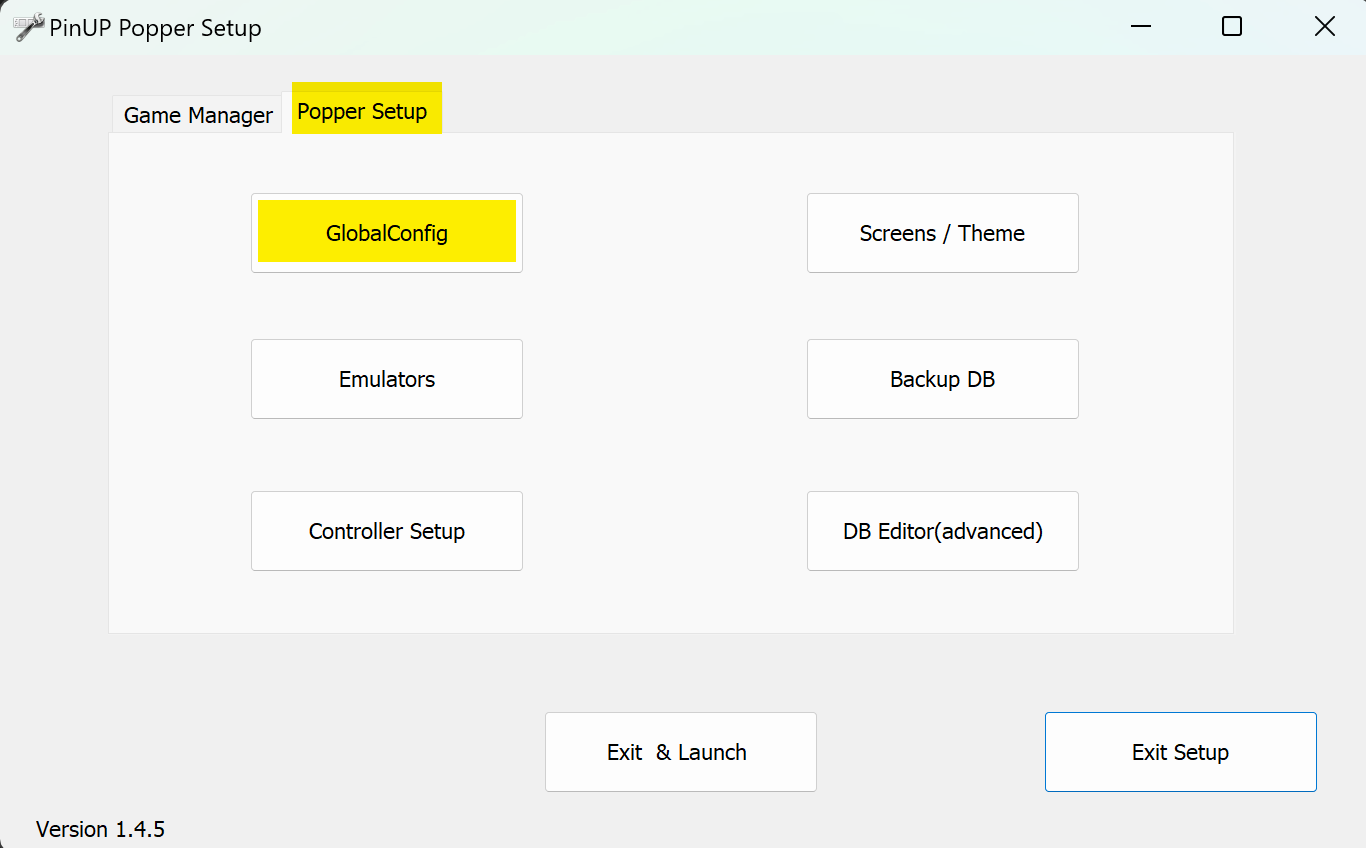
Go to Popper Setup → Backup DB → click Yes. It saves a single SQL file.
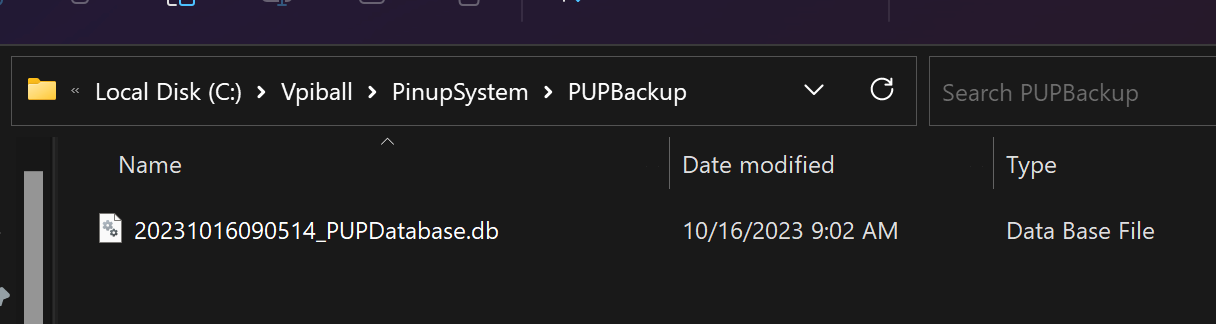
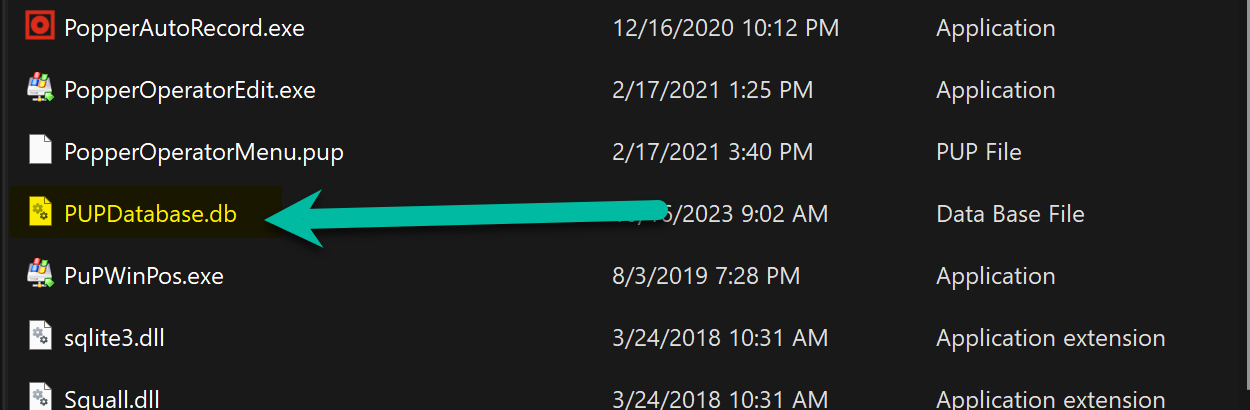
Save somewhere safe. To restore: rename to PUPDatabase.db and drop into PinupSystem.
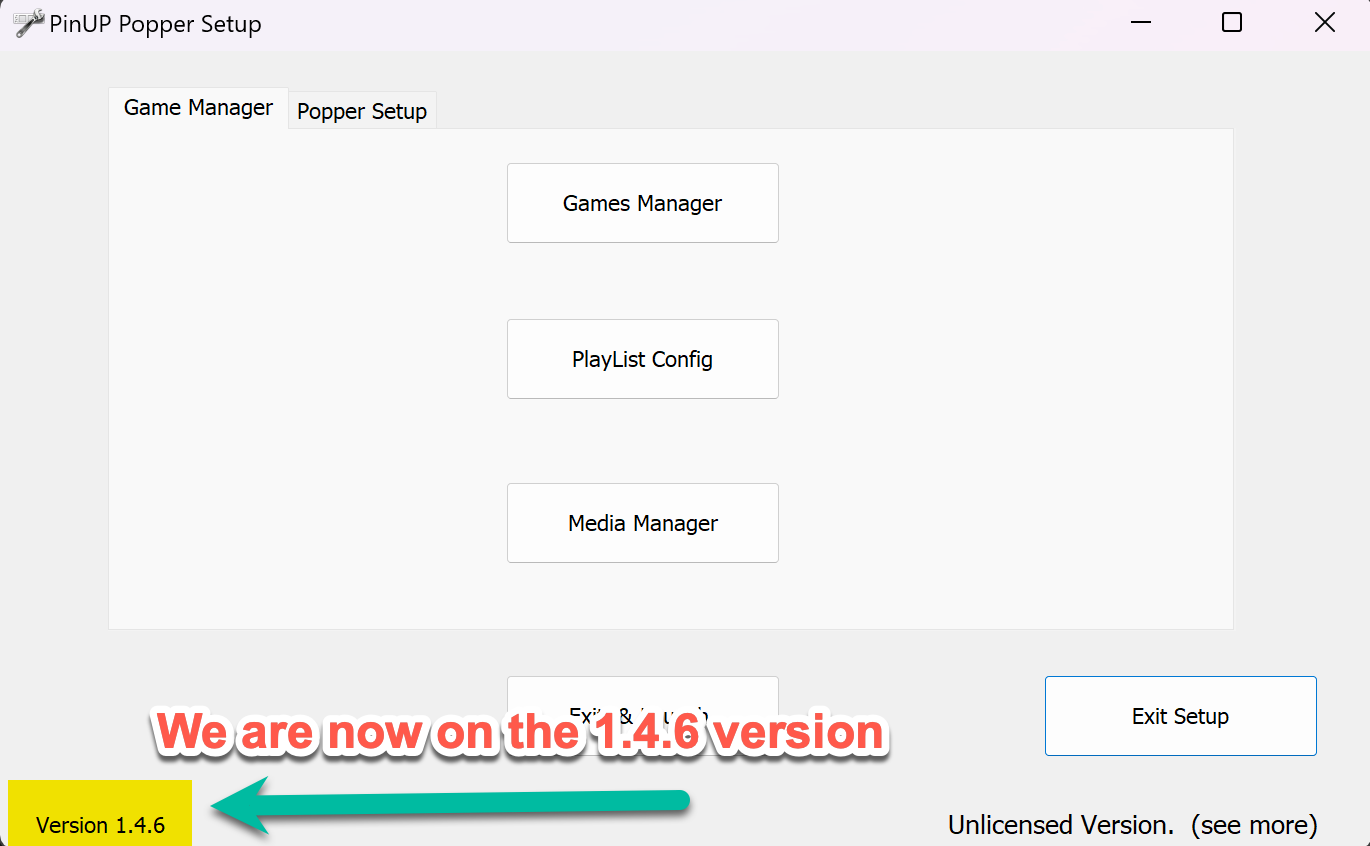
Updating PinUP Popper
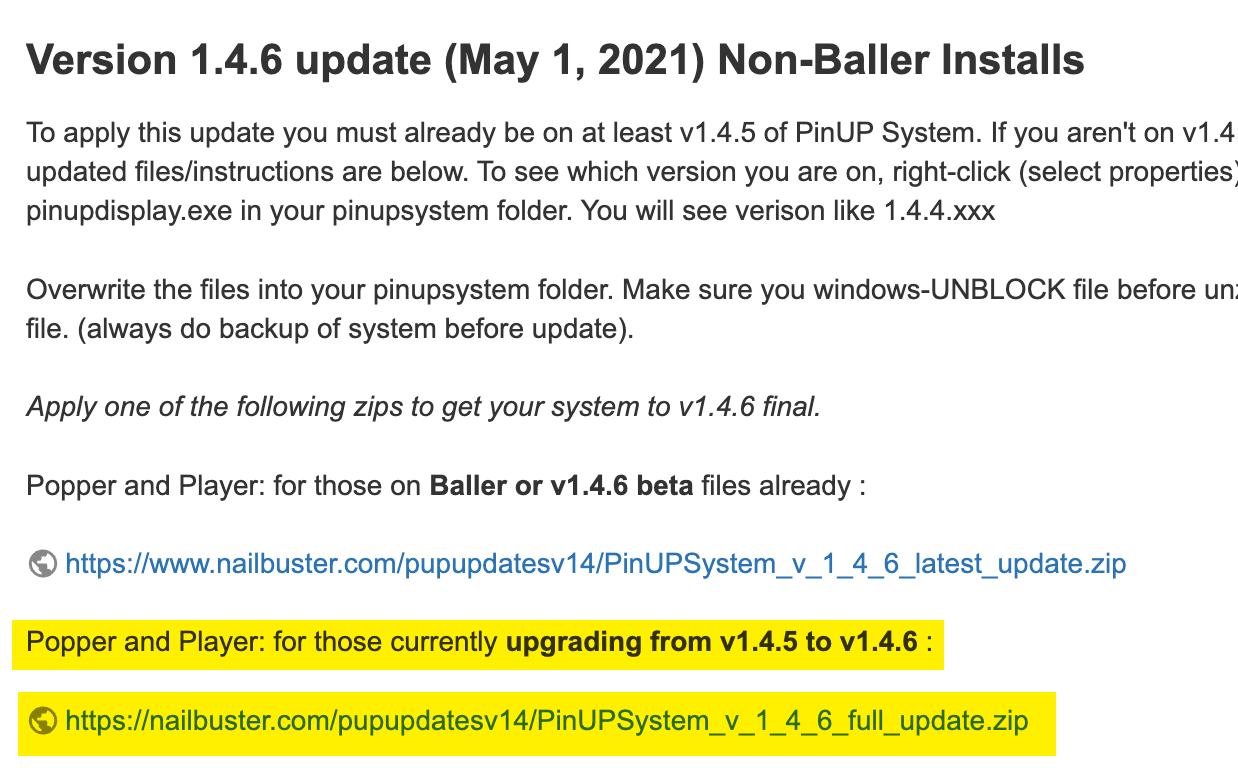
Go to PinUP Popper Wiki release notes. Read the file titles carefully and download the correct upgrade package for your version (e.g. 1.4.5 → 1.4.6). This update covers both PinUP Player and the Front End.

Download, unblock, extract. Drag and drop new files into PinupSystem, overwriting old ones. Make sure PinUP Popper is fully closed. Re-launch when done.
Back in Media Manager, click the Globe icon — the multimedia server should now be working.
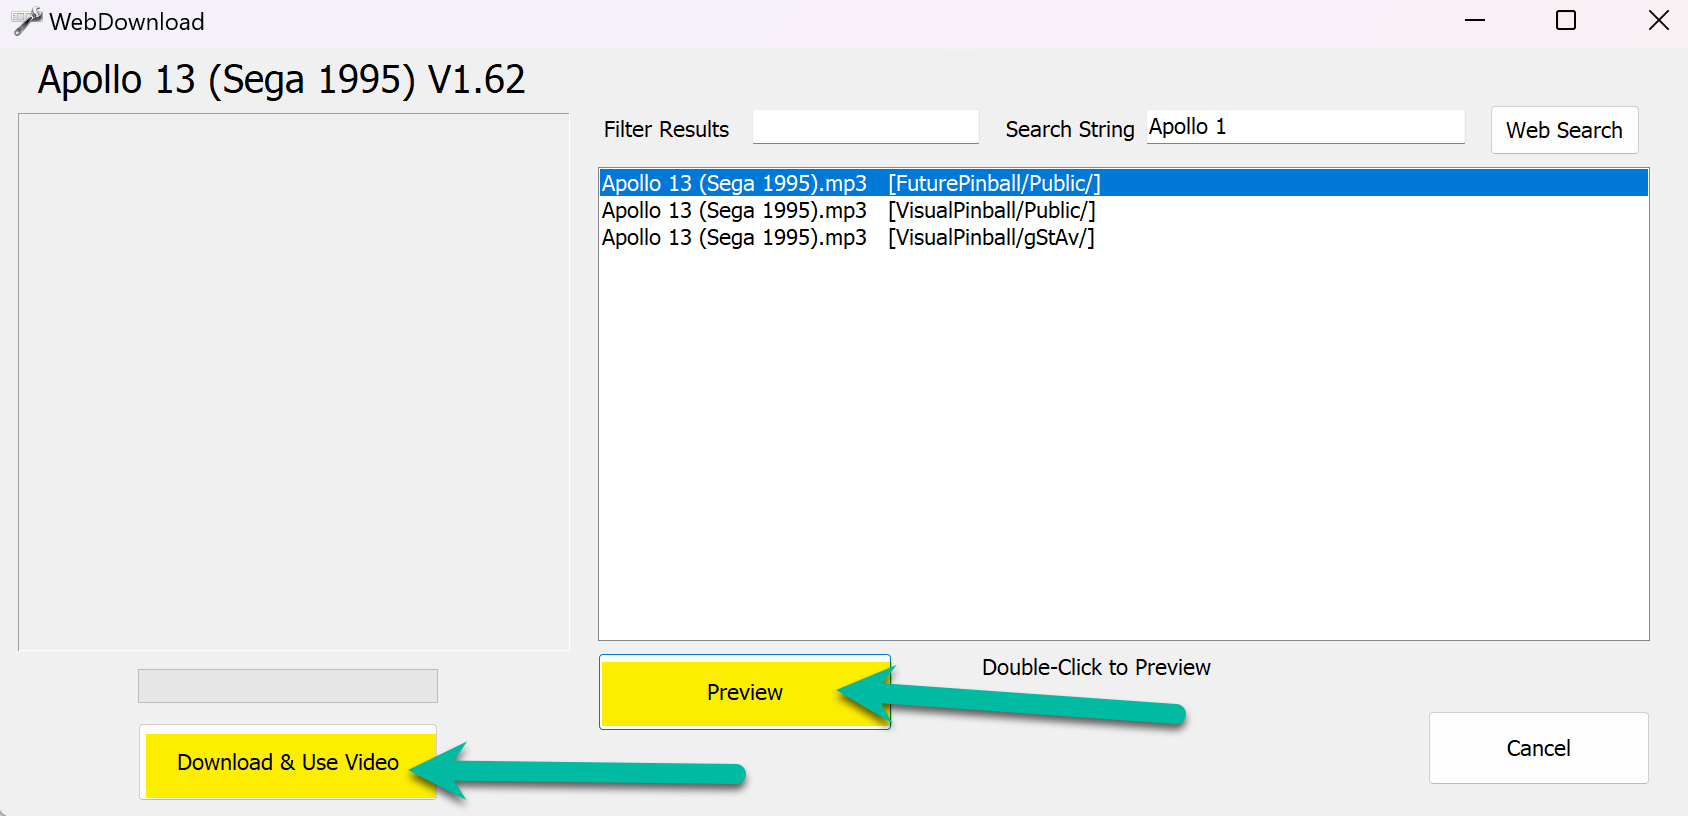
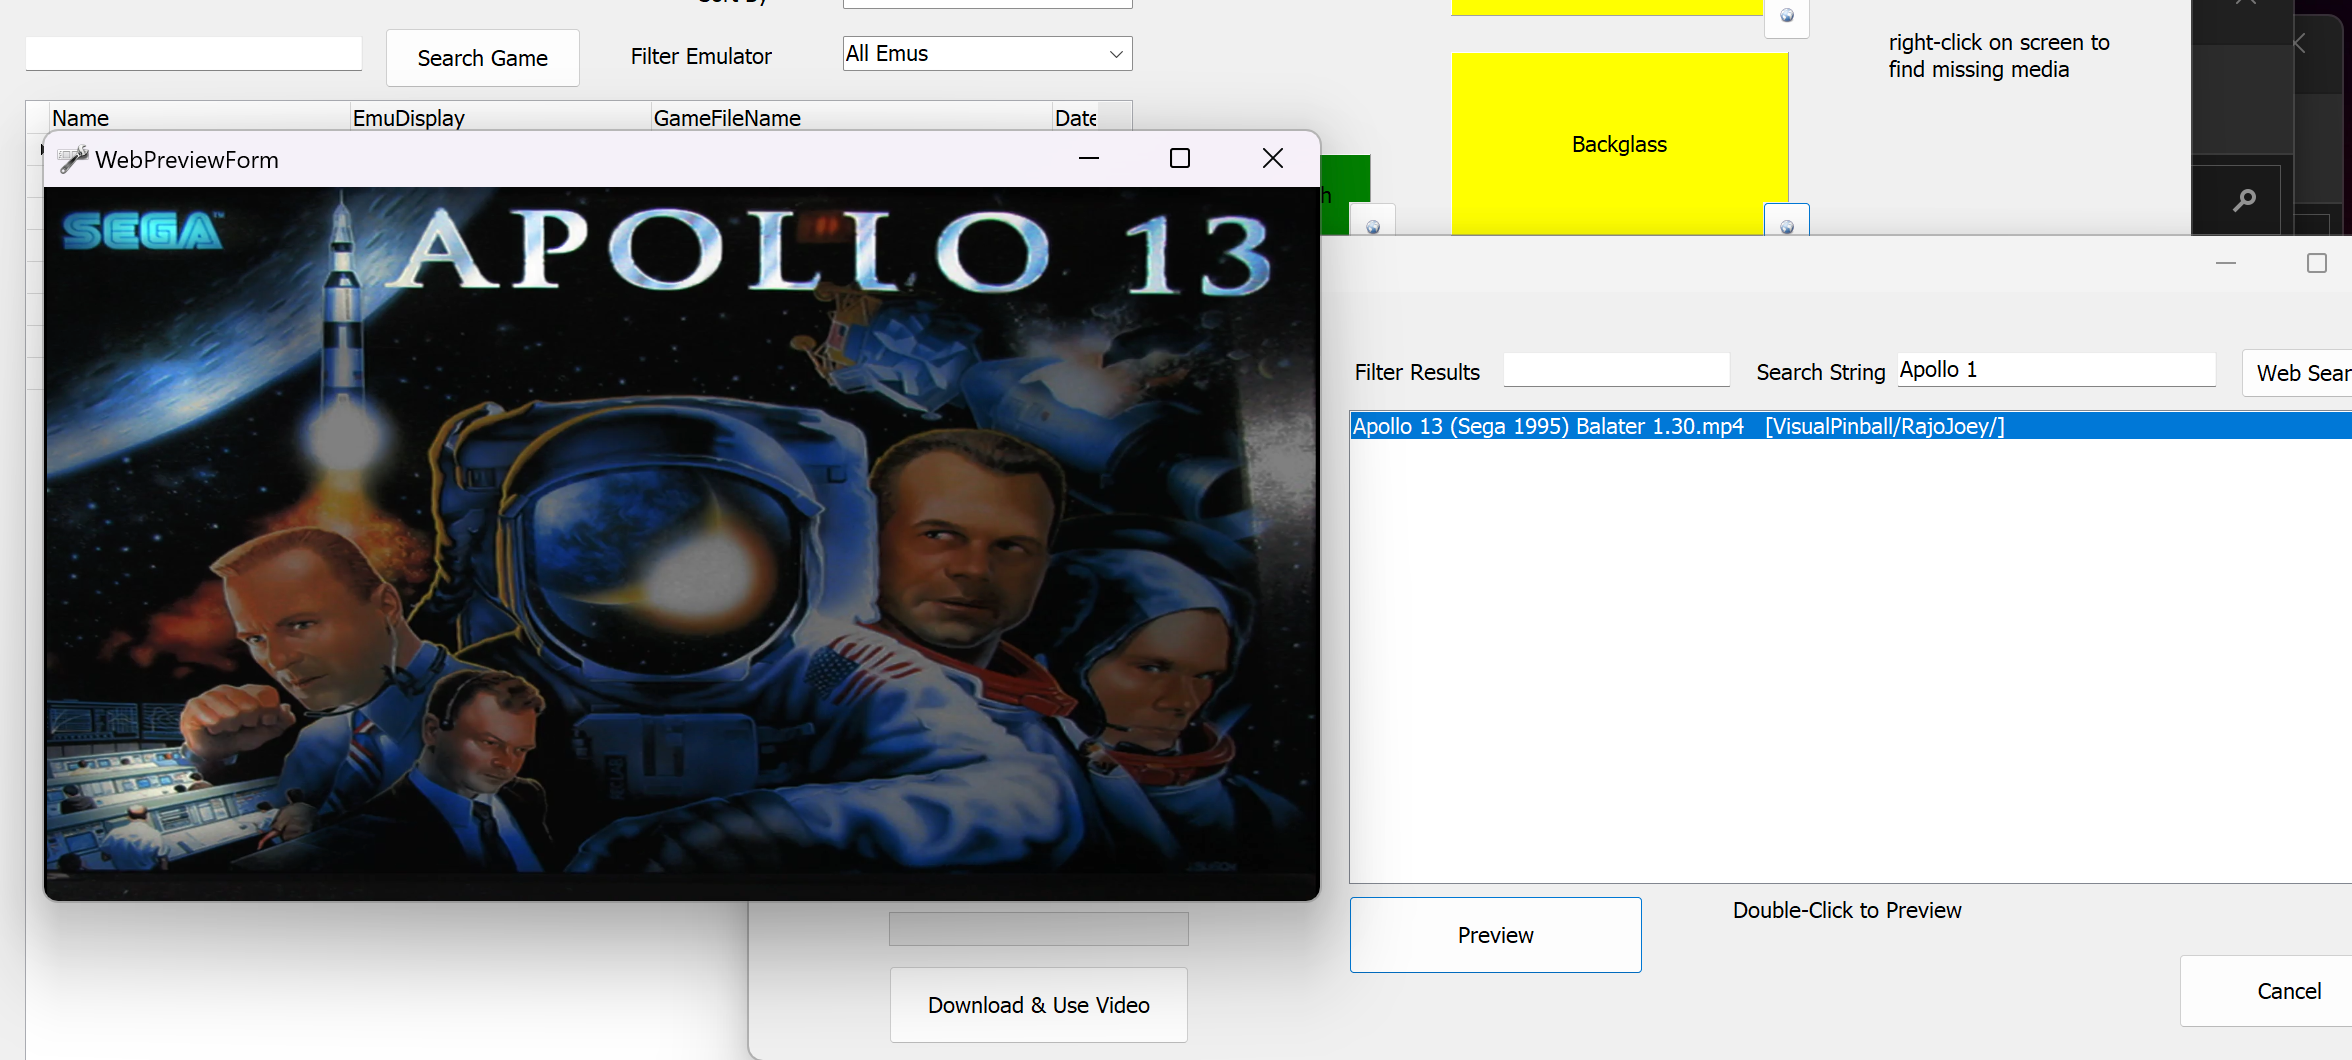
Repeat for backglass, DMD, Playfield, Audio, Wheel, and anything else you want.
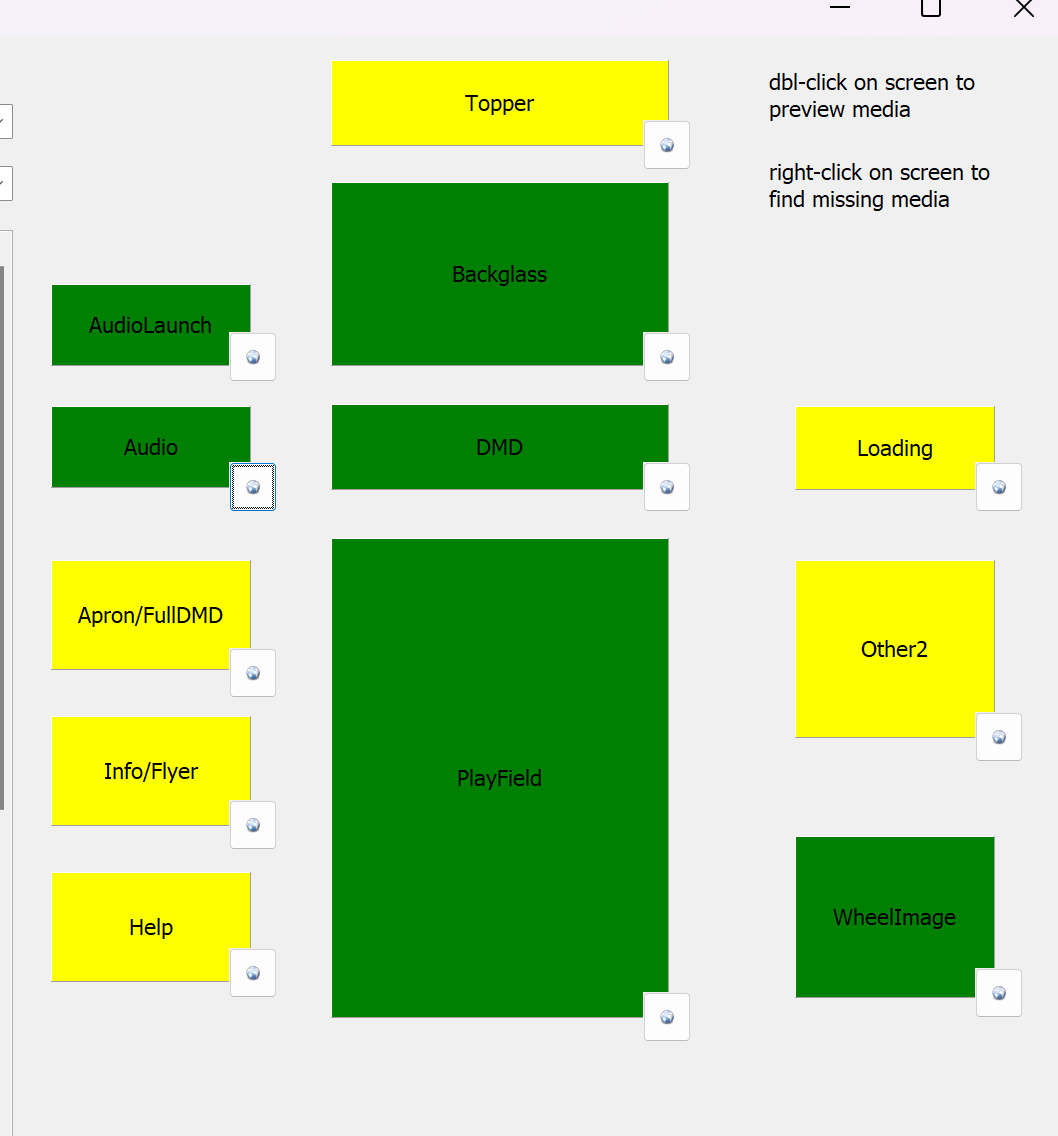
When media is applied, the field turns green.
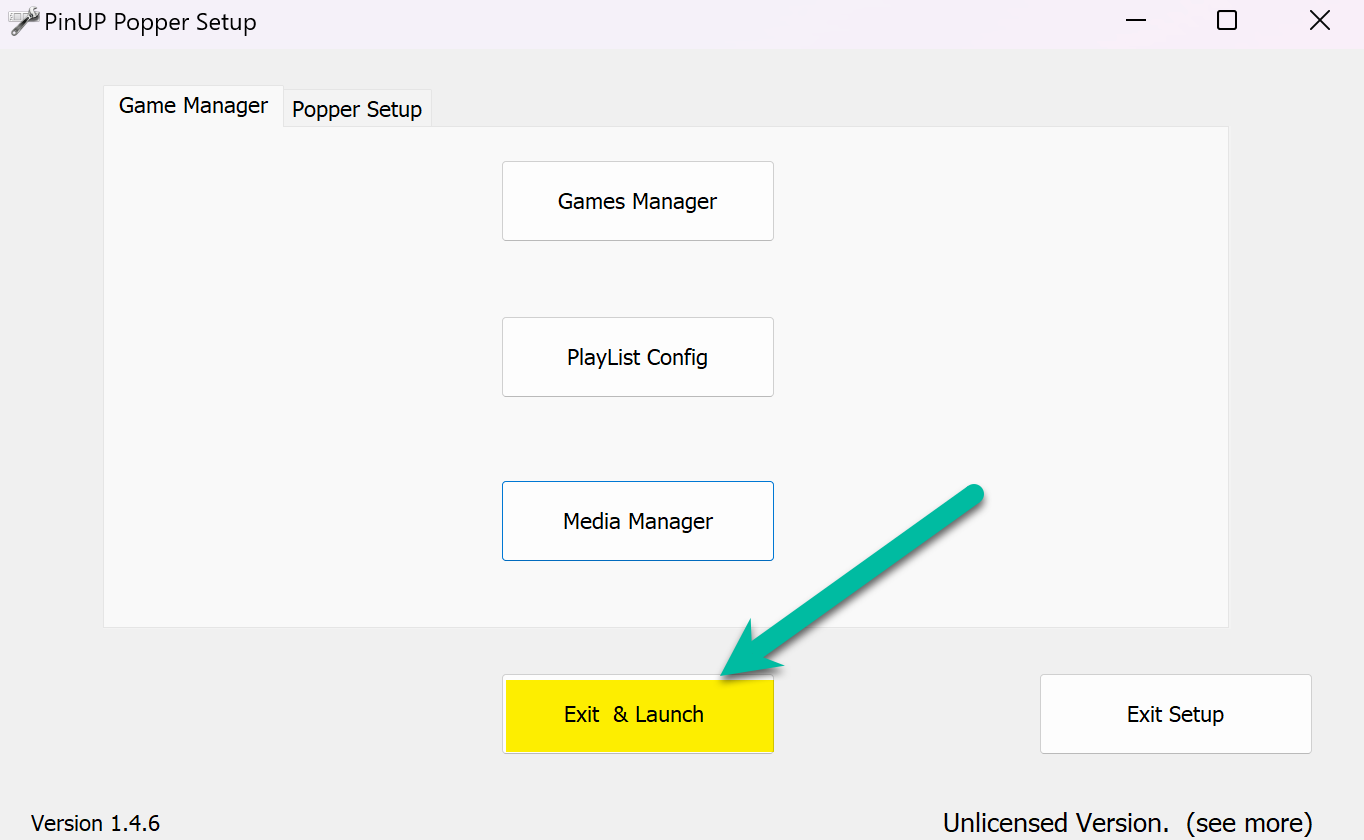
Click Exit and Launch to open the front end. Here's Apollo13 with all media set. Now do the same for all your games — and don't forget to back up your database! 🎉
---Related: Visual Pinball X · Freezy / DMD Ext · DOF Setup · Software